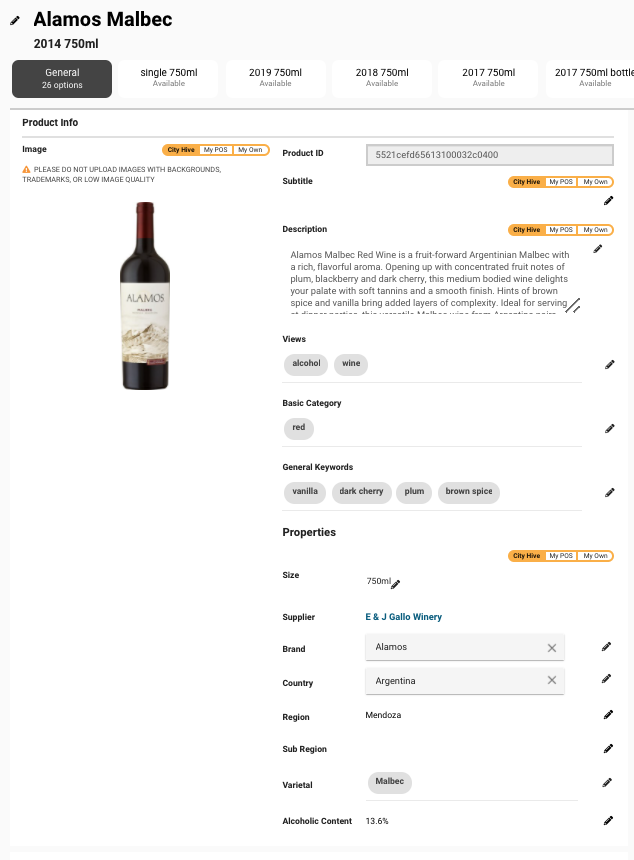
City Hive provides free product information management (PIM) tools for brands to update product and brand content and syndicate the information across its network of thousands of independent retail websites and mobile apps. Once edits are submitted through the dashboard, they go through an approval process by City Hive, which can be monitored in the "Modification Offers" section of your supplier dashboard.
1) Getting Started: Create an Account and Upload Products
To manage content through your Supplier or Distributor City Hive Dashboard, you first need an account. If you do not have an account, learn how to set one up
here
.
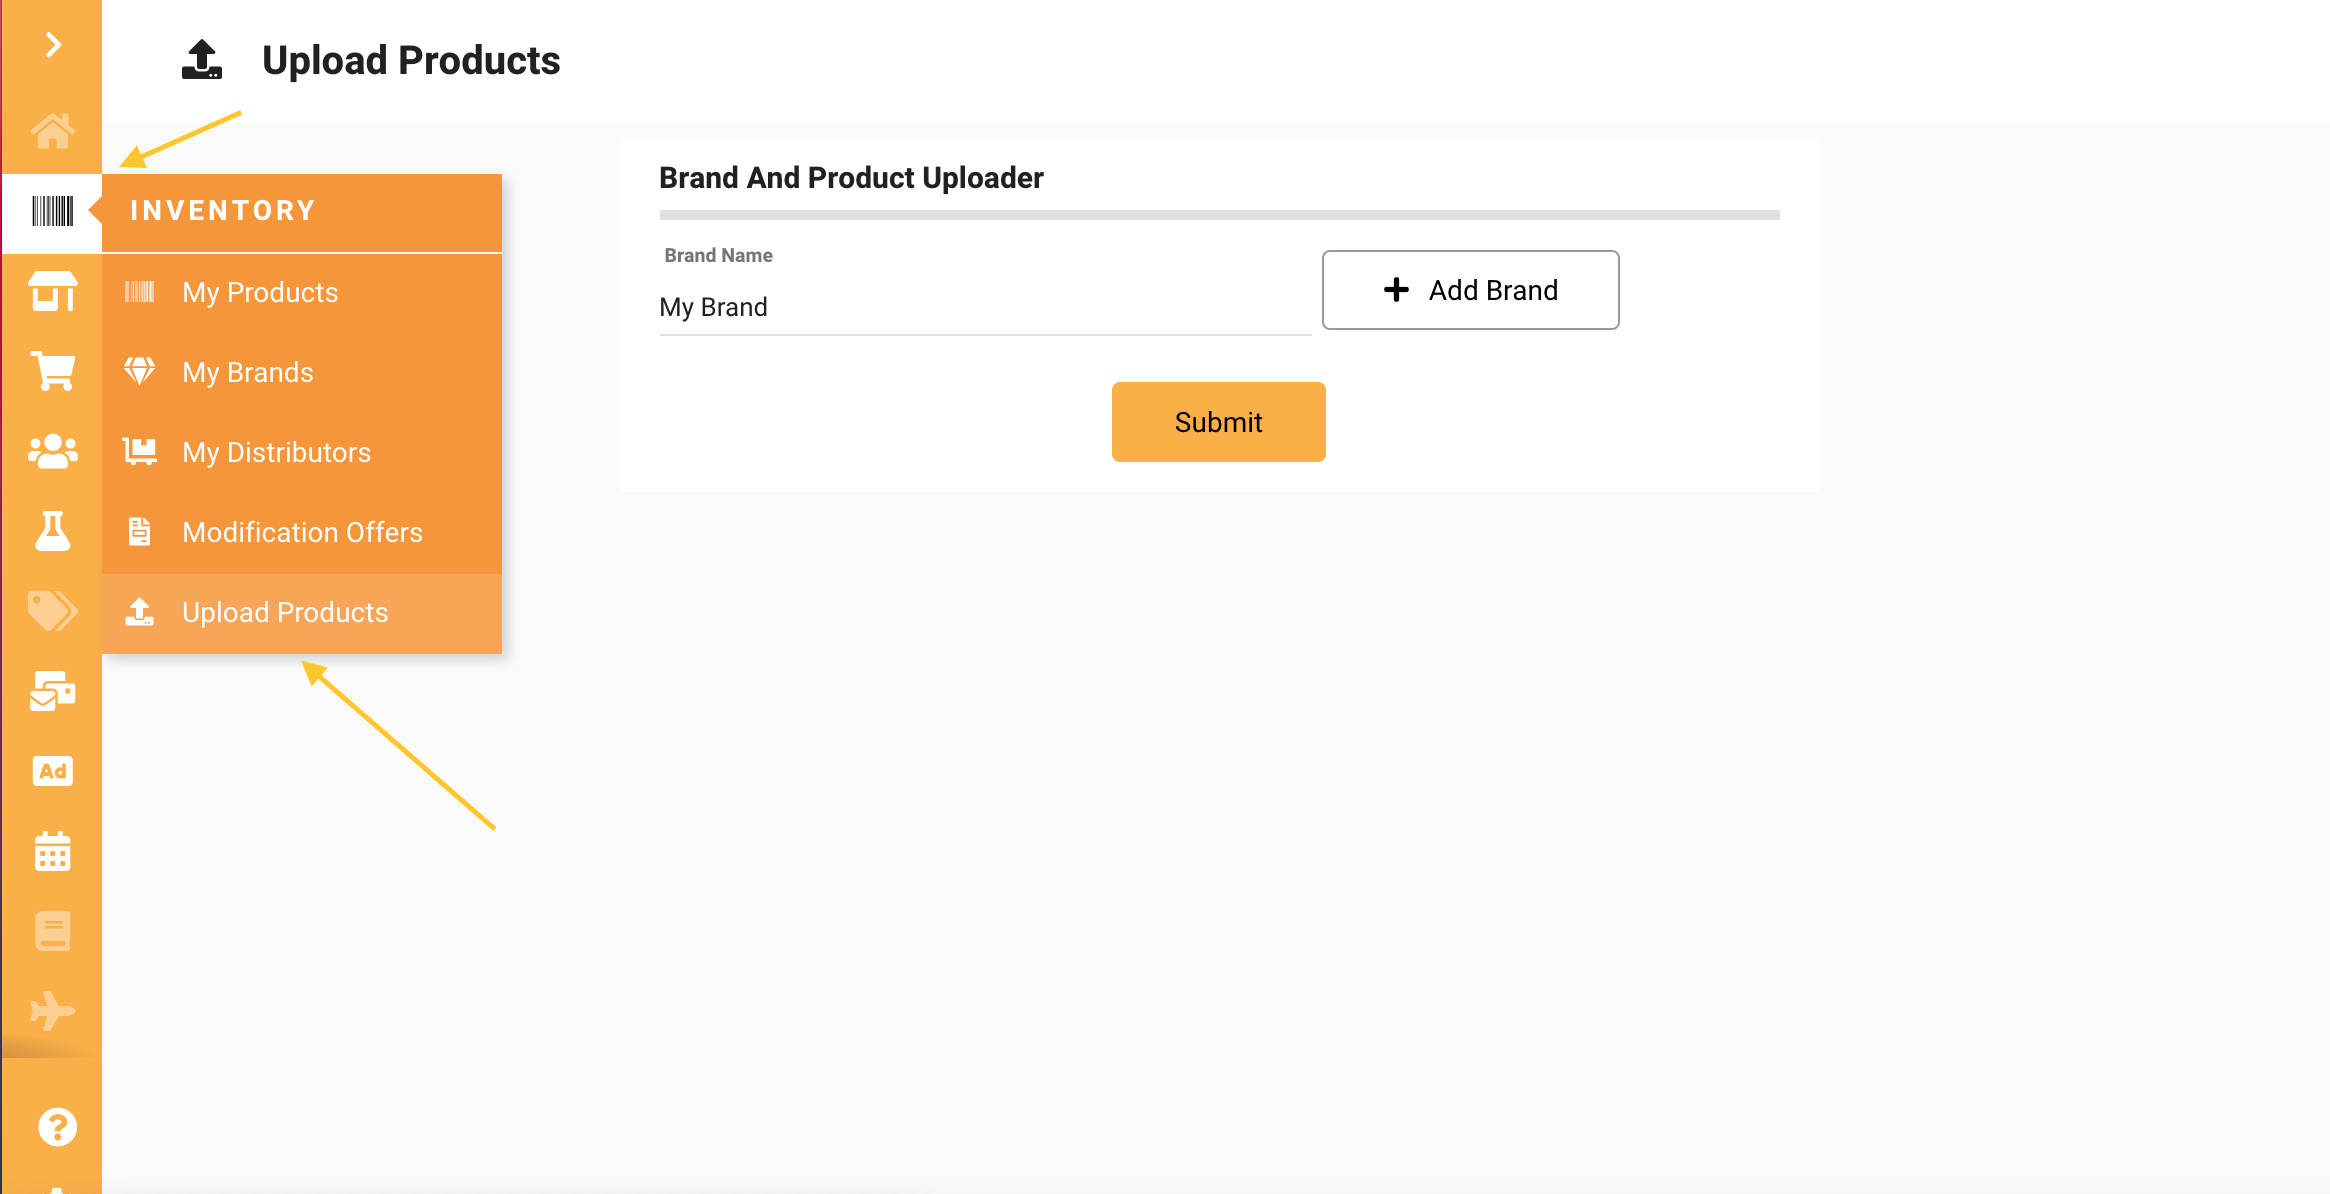
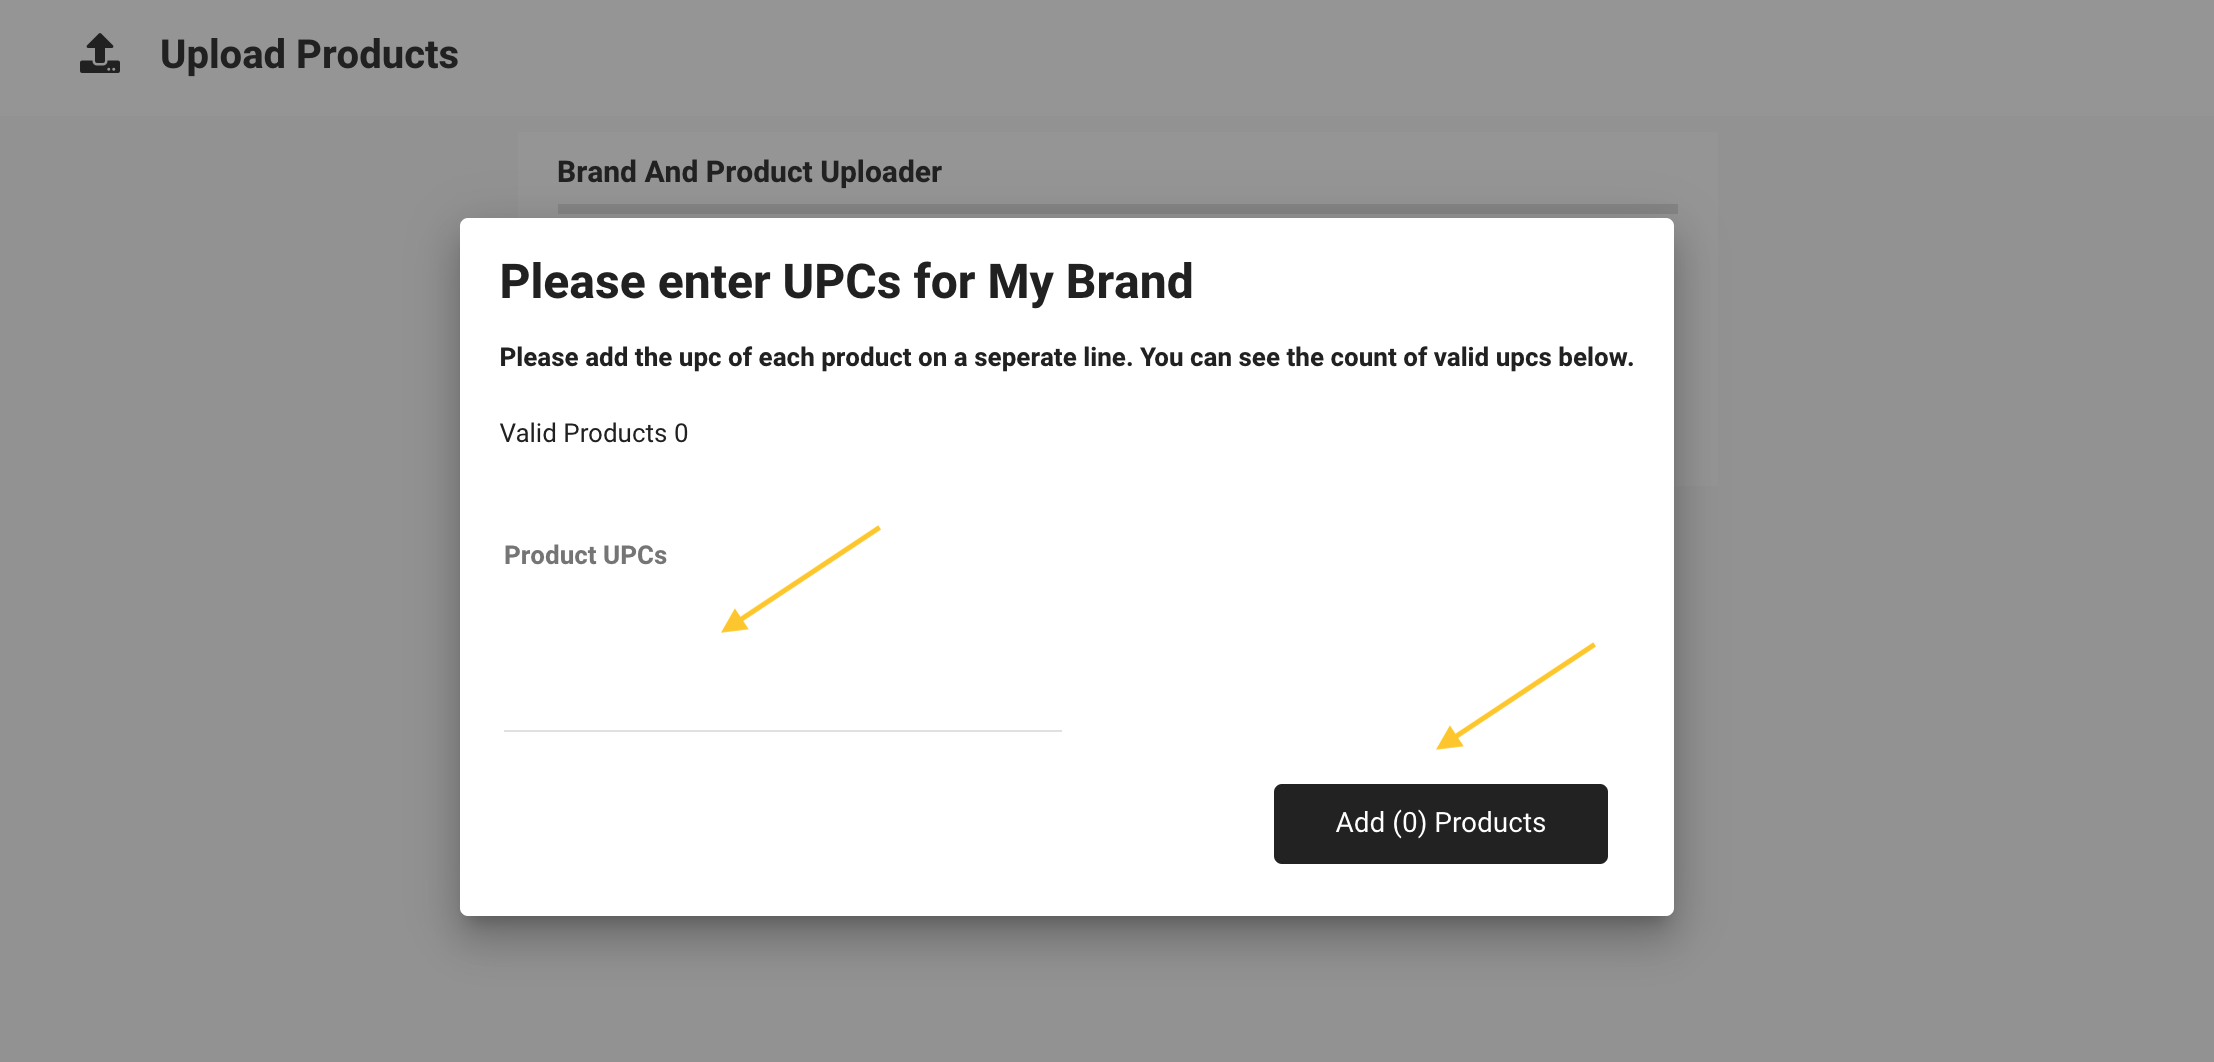
In order to manage product information, you must upload product brand names and UPCs. This can be done during when you create your account, or in the Inventory section (barcode icon) of the dashboard.
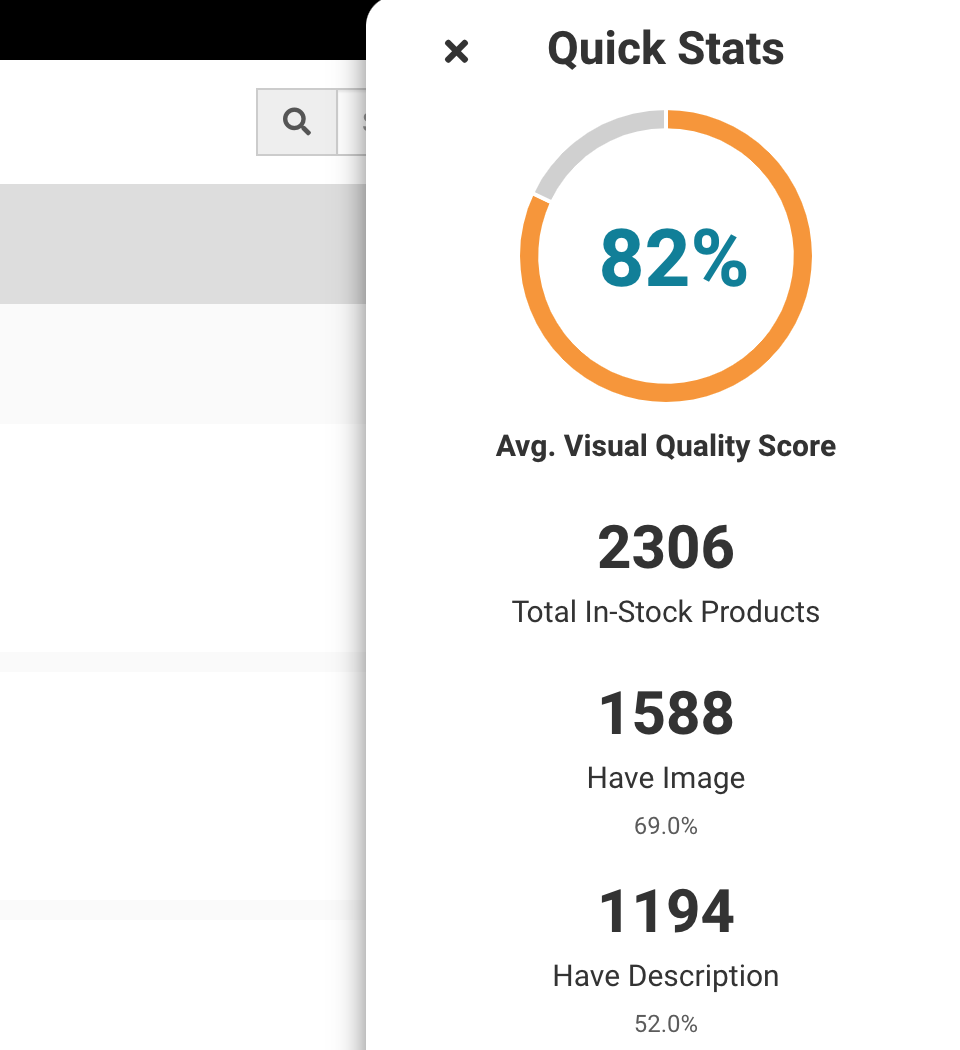
Take a pulse on how your products look online with our quick stats tool located in the upper right hand corner of the Product Inventory section.

Quick stats give you an average visual quality score and let you know how many of your items have images, descriptions and product details. Something to note -this rating indicates that the information exists, but not necessarily that it is up to date.
3) Quick Edit and Bulk Edit Products
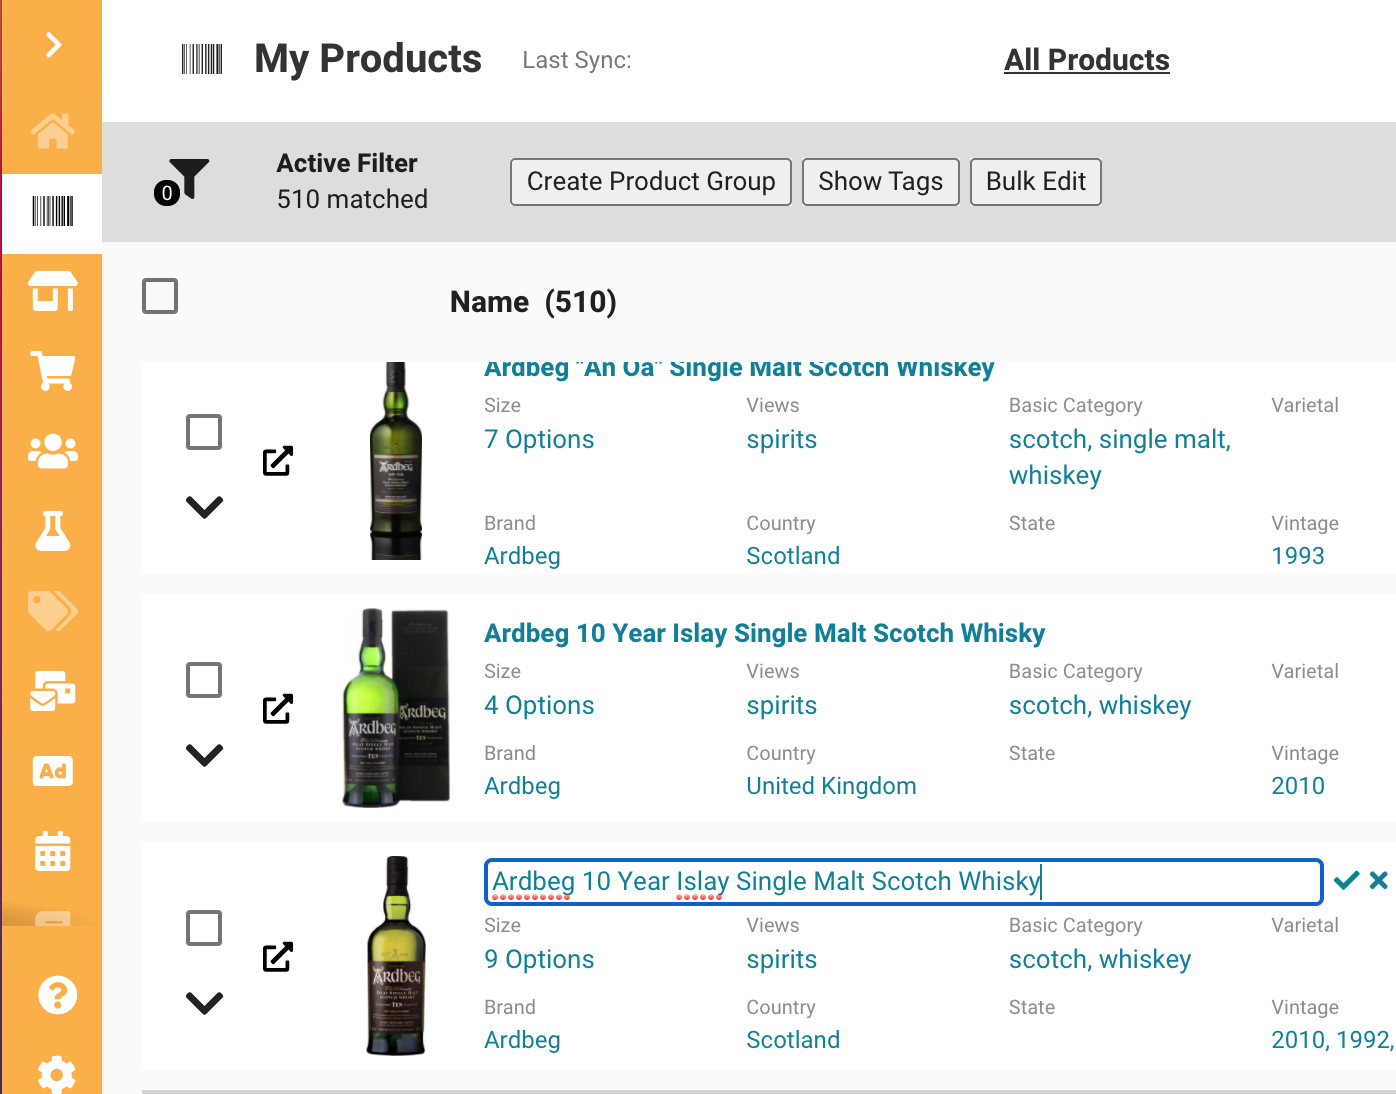 Off the bat, you may notice many several versions of the same product. Best practices first step is to go through your product naming is consistent and there aren't two different names for the same product.
To do this, hover over the product name and click the pencil. Change the name and click the check mark. You can also quick edit the product image, and country in the same manner.
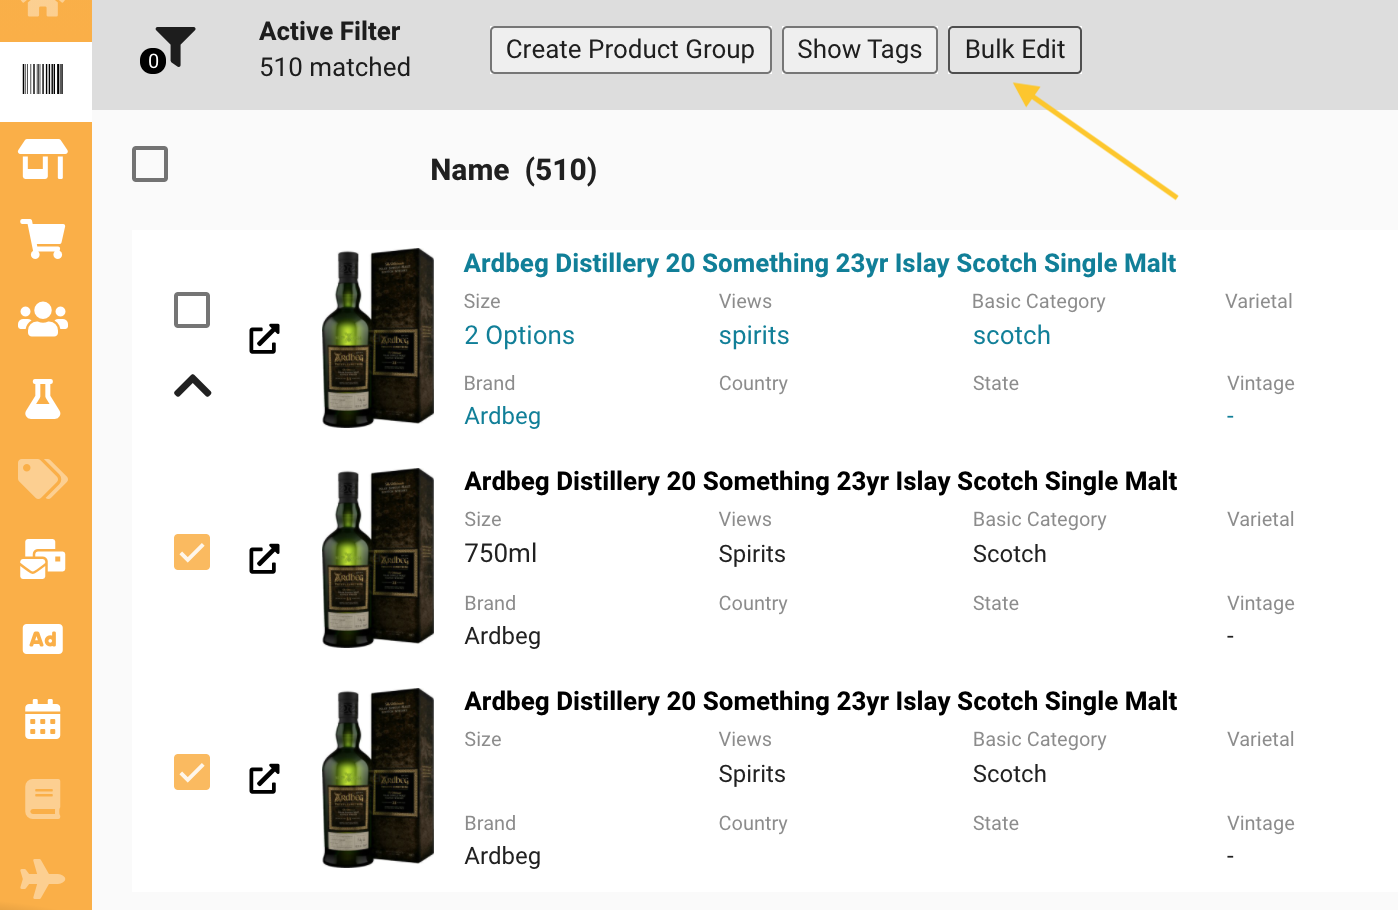
To bulk edit products, click the down arrow underneath the check boxes for all items you wish to edit. Click Bulk edit at the top of the page, edit the field and click the check box to save.