![City Hive Logo-2.png]](https://support.cityhive.net/hs-fs/hubfs/City%20Hive%20Logo-2.png?width=62&height=60&name=City%20Hive%20Logo-2.png)
This feature is available with the following subscription plans. Merchants not on one of these plans will be automatically upgraded:
- Pro
- Expert
Once you have enabled Subscription Plans in your dashboard (tutorial here), it's time to configure your subscription service.
Setting up a delivery subscription service
- Begin on the "Plans" tab and use (+) to create a new subscription

- Fill in the setup details on the new subscription page
- Position - If you have more than one club, choosing a position number will decide which club you would want to show first.
- Is Active - If you want it to be live and ready to sell on your website, check this box
- Cycle - This determines when the subscription renews: monthly, quarterly, annually, etc.
- Limited Cycle Enabled - Leave this un-checked for delivery subscription services.

- Scroll down to fill in the subscription info
- Friendly Name is the title of your wine club, which your customers will see.
- Description is where you tell the customer what they're getting (i.e. all deliveries included for a month)
- Cover Image can be a generic image, in keeping with your brand

- Scroll down to fill in Billing and Pricing info
- Charge Invoices Automatically - Leave this checked. If un-checked, you will need to open the plan in your dashboard each month, and click "charge" on each of your customers' invoices
- Use Subscription Day - check this box, so that your customers' subscription service will begin on the day they subscribe
- Billing Day of Month - leave this as it is; when you check "Use Subscription Day" then the billing day field becomes irrelevant
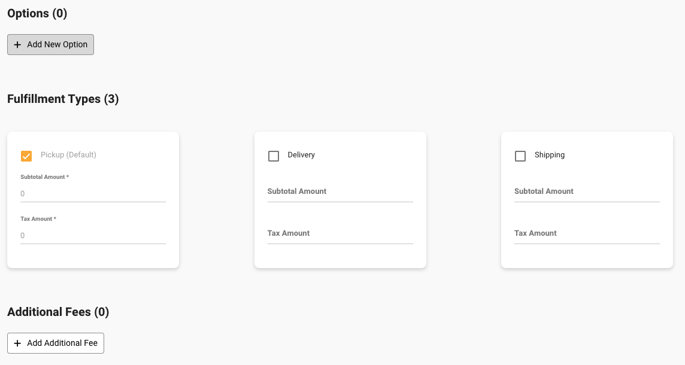
- Set the Display Amount and Subtotal Amount - these are typically identical and reflect the basic price of your subscription service
- Set the tax amount (if applicable) by calculating your sales tax rate multiplied by the subtotal amount

- Leave the last three sections blank/default
- Scroll to the top and click the "Submit" button to create the plan

- Set up an automatic discount for all customers who enroll in this plan. Without a corresponding discount, customers who enroll wouldn't actually get their delivery/shipping fees waived at checkout! Please refer to this detailed walkthrough for more information
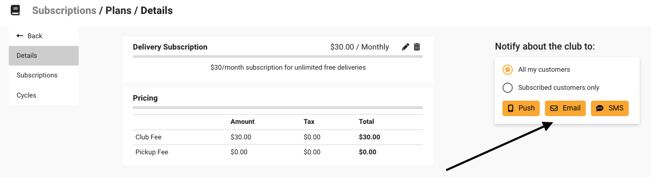
- Promote your new subscription service within the plan page. You can send a marketing email to your entire email list, or send specific updates to your existing subscribers. Learn more about sending marketing emails here.