Submit promo banner creative to the City Hive network through your Supplier Dashboard in a few easy steps. Once uploaded, retailers on the City Hive network have the ability to enable the creative on their website and/or app.
Once activated, City Hive will begin tracking consumer impressions of the promo banner and you will be invoiced $0.01/impression on a monthly basis.
Your brand promo banner creative is shared with City Hive's retail network and retailers are given the option to "opt-in" to displaying the banner on their site. Each retailer has full control over which banners are displayed and where banners are displayed on their sites and apps. Some retailers may have settings such that brand banners are automatically enabled if they carry the product. Other retailers may prefer to manually activate all banners. Either way, the choice is in the retailers' hands and they can enable or disable banners at will. Retailers do not receive any incentive or benefit (
monetary or otherwise) for enabling banners on their websites or mobile apps.
Here are steps and best practices for creating a promo banner on the City Hive platform.
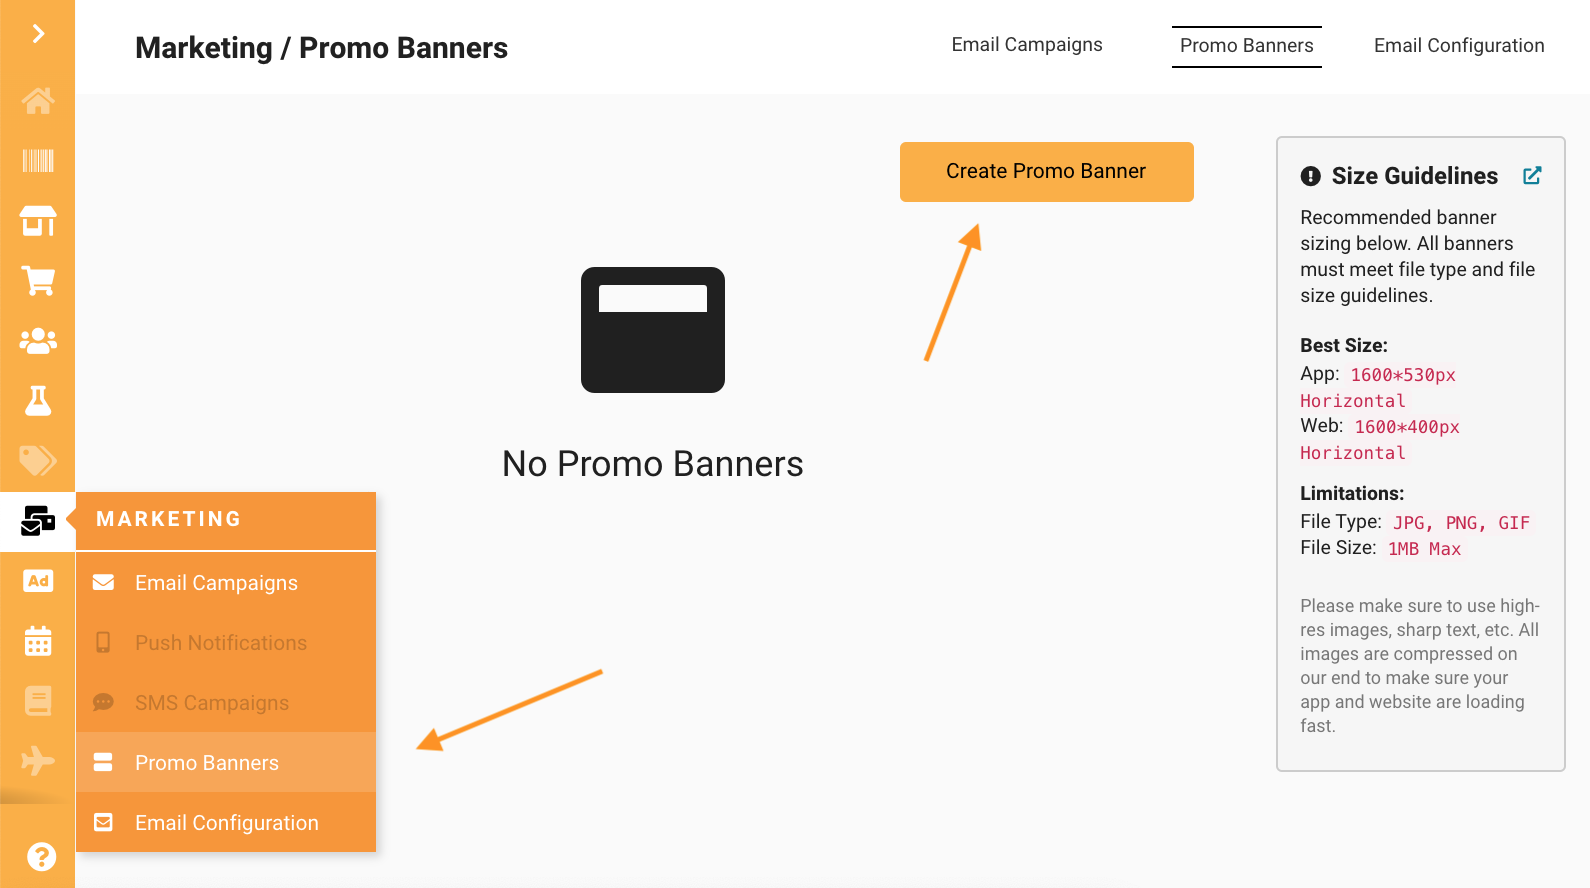
Step 1: Go to Promo Banner Section of the Supplier Dashboard
The "Promo Banner section" is found under the "Marketing" tab. Click the orange button that reads "Create Promo Banner" to get started. Be sure to have your banner creative already prepared. You will need a banner sized for the web and another sized for mobile apps. Size guidelines are available on the home screen of the Promo Banner section.
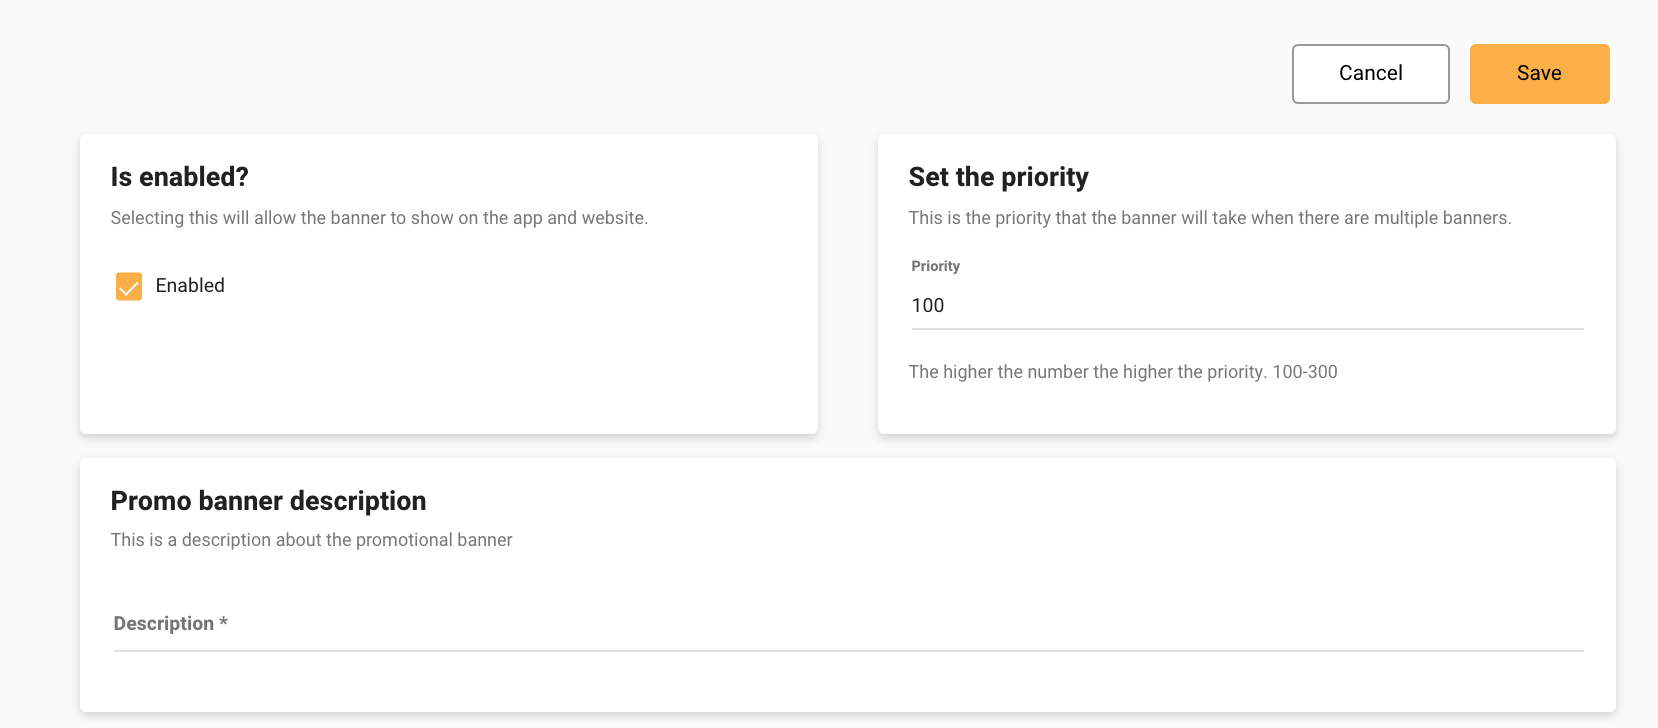
Step 2: Set up Basic Banner Properties
Is Enabled? - Banners default to being enabled, but you can un-check this if you are not ready for your banner to be shared. (Note - Alternatively, you also have the option to set a timeframe, which could be set for the future, a little further down on the page.)
Priority
- Priority of the banner placement ranges from 100 to 300. Banners with a higher number show up first in a scrolling banner rotation. Banner priority defaults to 100 and may be edited to any number in the 100-300 range. Unless you have a series of banners with a preferred priority rotation, there is no need to change the default banner priority.
Promo Banner Description - This is the title name of the banner as it will appear in your supplier dashboard and the merchant dashboards. This is not consumer facing
Step 2: Upload Promo Banner Images
You will need two images: one for the web and one for mobile apps. Each image has a specific size which is indicated in the promo banner section.
Lear more about optimum image sizes.
Creative should be crisp and professional with a simply call to action, such as "buy now" or "learn more" as consumers can click on your banner to view and purchase products associated with it.
Keep in mind that banner creative on mobile is much smaller, so text should be minimal. In general, keep copy at a minimum and make anything you would like the consumer to read large enough to catch their eye.
Creative promoting digital rebates in circulation may also be used.

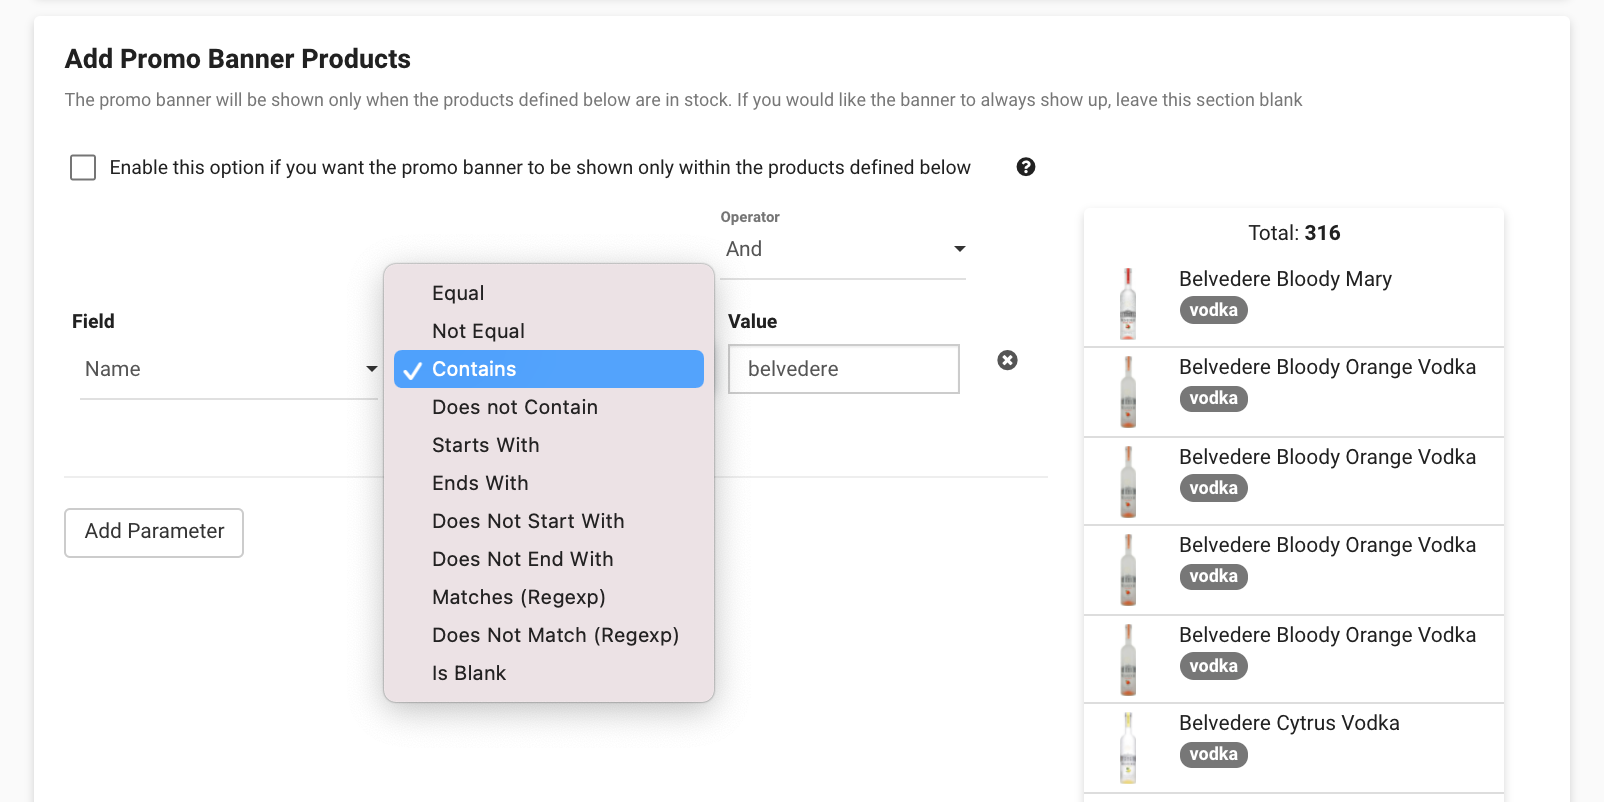
Step 3: Add Promo Banner Products
This step identifies the products you would like associated with the promo banner. Many field options are available to choose from, but the most applicable for supplier promo banners are "Name" and "Brand."
"Name" will search for the terms defined in the product name and is ideal for choosing specific products within a brand. "Brand" will pull in all products associated with that brand.
There are also several operations to choose from. The most common are "Contains," "Equals" and "Starts with" and "Matches (Regexp). "Equals" is a very specific command and will only bring items that match exactly. "Contains" is used to pull in many items with a common term. "Starts with" is often used to hone in on a specific line within the portfolio. "Matches (Regexp)" allows you to add multiple terms for a promotion that may include products from different brand lines.
There is also the option to have the promo banners shown only when the product is in the search results. This limits the promo banner exposure audiences with an intent to buy something in their product category (eg. Vodka). Most suppliers opt for maximum exposure, but this option does reach a more targeted audience and is often used when suppliers have multiple banners running simultaneously.
The products defined by the criteria will appear in the right hand column. You may notice a higher number than the individual products you actually represent. This is because the list not only reflects the individual products, but also the different "options" available.
Learn more about product options and why there are so many.
Only retailers who carry at least on of the products in this criteria will be able to activate the banner for their website and/or app.
Step 4: Add Action
This step defines what happens when a user clicks on the banner. Choose "Open Banner Page" to open the products defined in the previous step. You may name the Banner Page whatever you wish, but you may want to past the Promo Banner name here for consistency.

Step 5: Add Time Range (Optional)
This feature allows you to limit the time period for which a banner will be displayed. You may also use this to pre-plan creative months ahead. Our recommendation is to set timeframes for all creative, to keep your brand imagery and the merchant websites fresh. Seasonal, relevant creative is seen as a great value, but no one wants to see a Halloween banner still running on Valentine's Day.
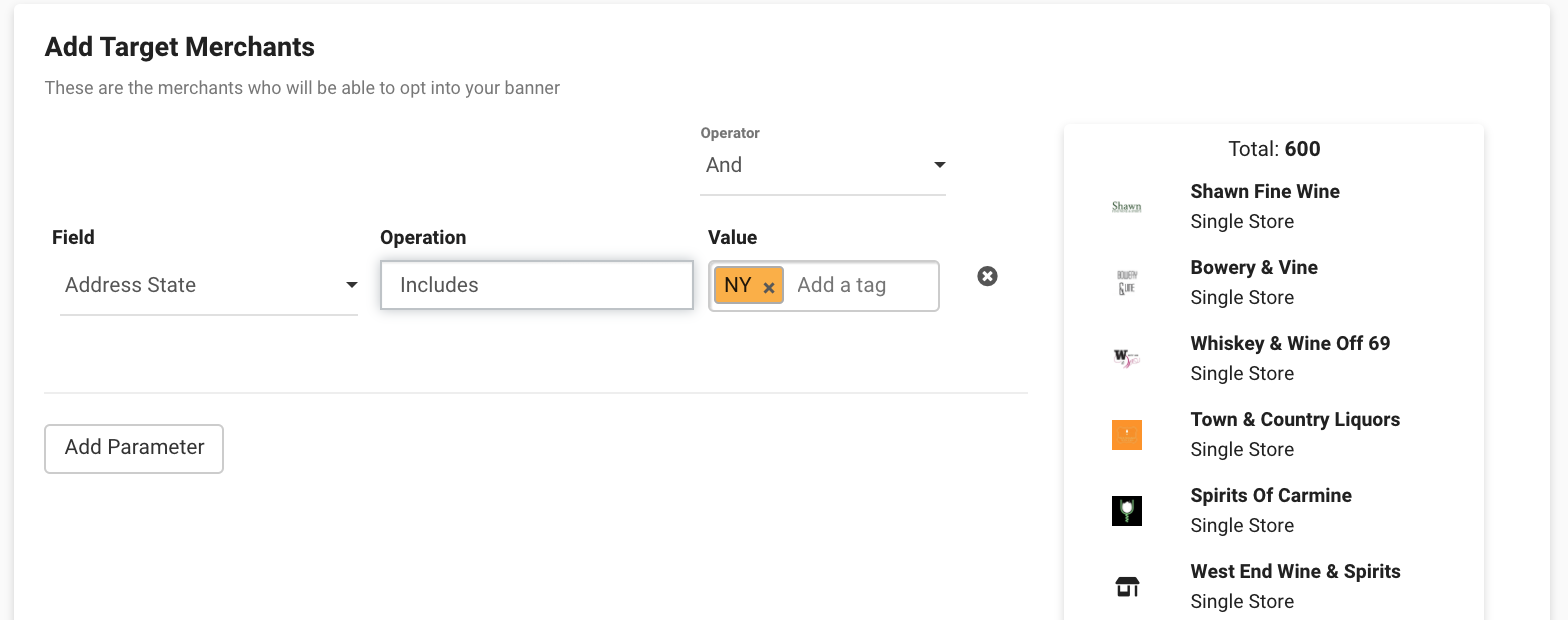
Step 6: Add Targeted Merchants (Optional)
To target all City Hive merchants, you may leave this section blank. You can also limit banners to a specific group of retailers.
This function is most commonly used for creative specific to a given state or group of states. To do this, select "Address State" as your Field with the Operation "Includes" and then list the states in the value field. The retailers that qualify will appear in the side bar.
You may also share creative with a specific retailer by selecting "Name" for the field, the Operation "Contains" and then adding the merchants name in the value field. This is most often used when a store requests custom creative for a specific promotion they might have in place.

Step 7: Save Your Banner
Scroll up to the top of the page and hit "Save." When you do, your banner will be saved to your dashboard and added to a gallery of brand creative on the merchants' dashboards, which retailers can browse and organically enable.
Your creative will also be automatically added to websites and/or apps of retailers that carry your product and have chosen auto opt-in for promo banner creative.
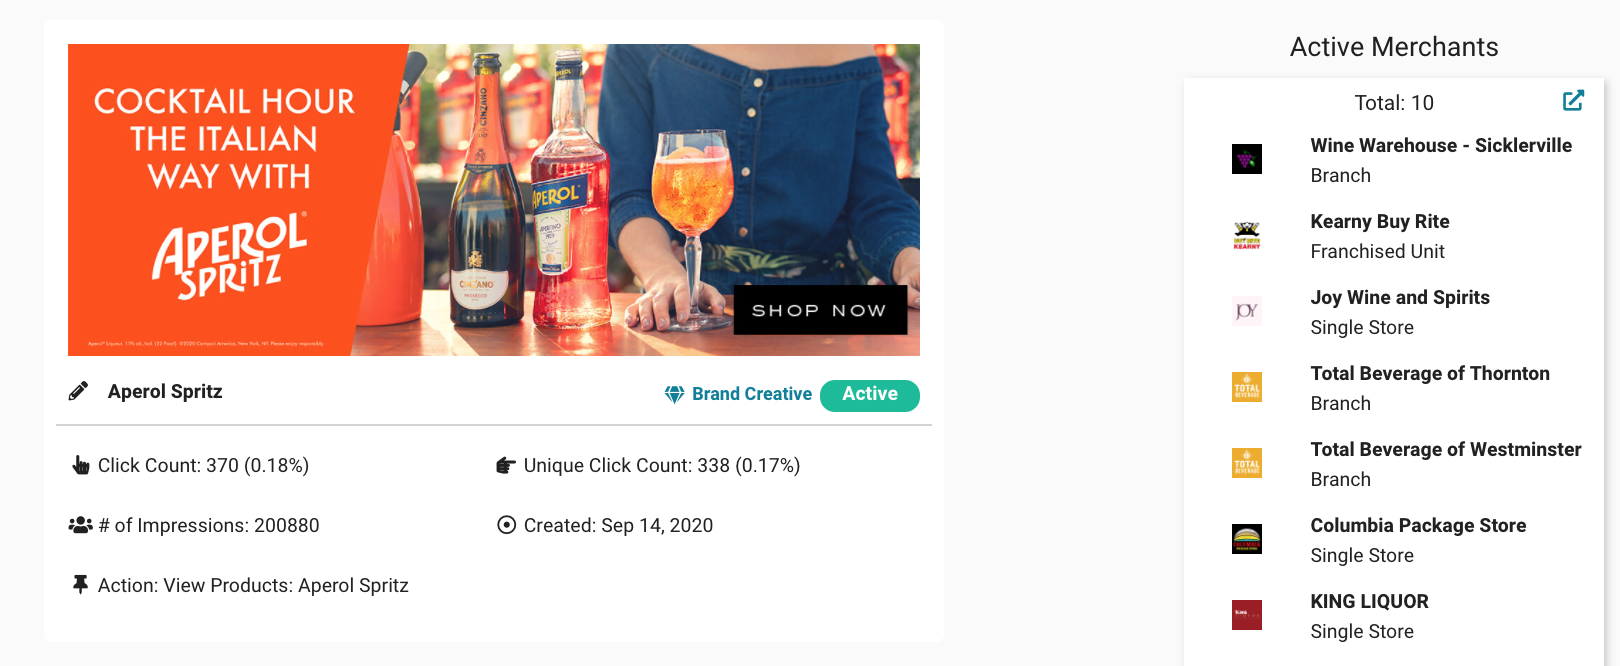
Once saved, you will be able to see the status of your banners along with real-time impressions and clicks in the promo banner section of your supplier dashboard.
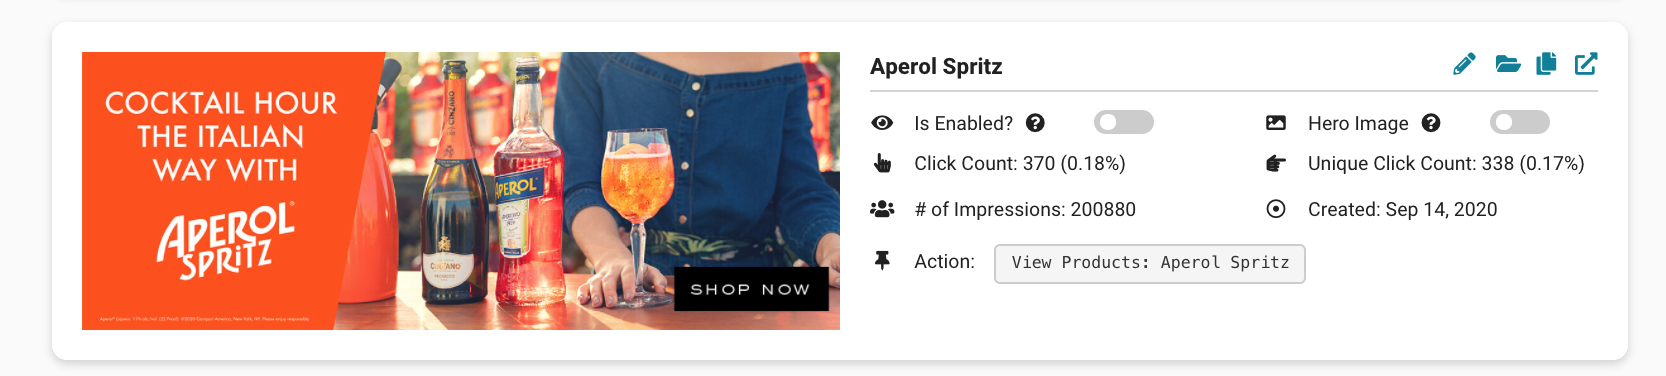
In the top right corner of each banner there are four buttons:
Edit (pencil) - this allows you to make changes to your banner, even after it goes live
Archive (folders) - this disables your banner and makes it unavailable for merchants to activate
Copy Banner Link (papers) - this is a unique link that you can share with City Hive merchants, when a merchant clicks on this link, they can "enable" your banner in one click
View (box with arrow) - this takes you to promo banner details, including a partial list of merchants that have activated the banner. If you click on the blue box with arrow icon at the top of the list, you will be taken to a filter in your Merchants tab that shows the full list of merchants that have activated the banner.