Looking to incorporate your branding into your new City Hive site? Changing up the color scheme is a great place to start. In this article, we’ll go over how to change your site colors right through your dashboard.
HEAD TO YOUR CITY HIVE DASHBOARD ➡️
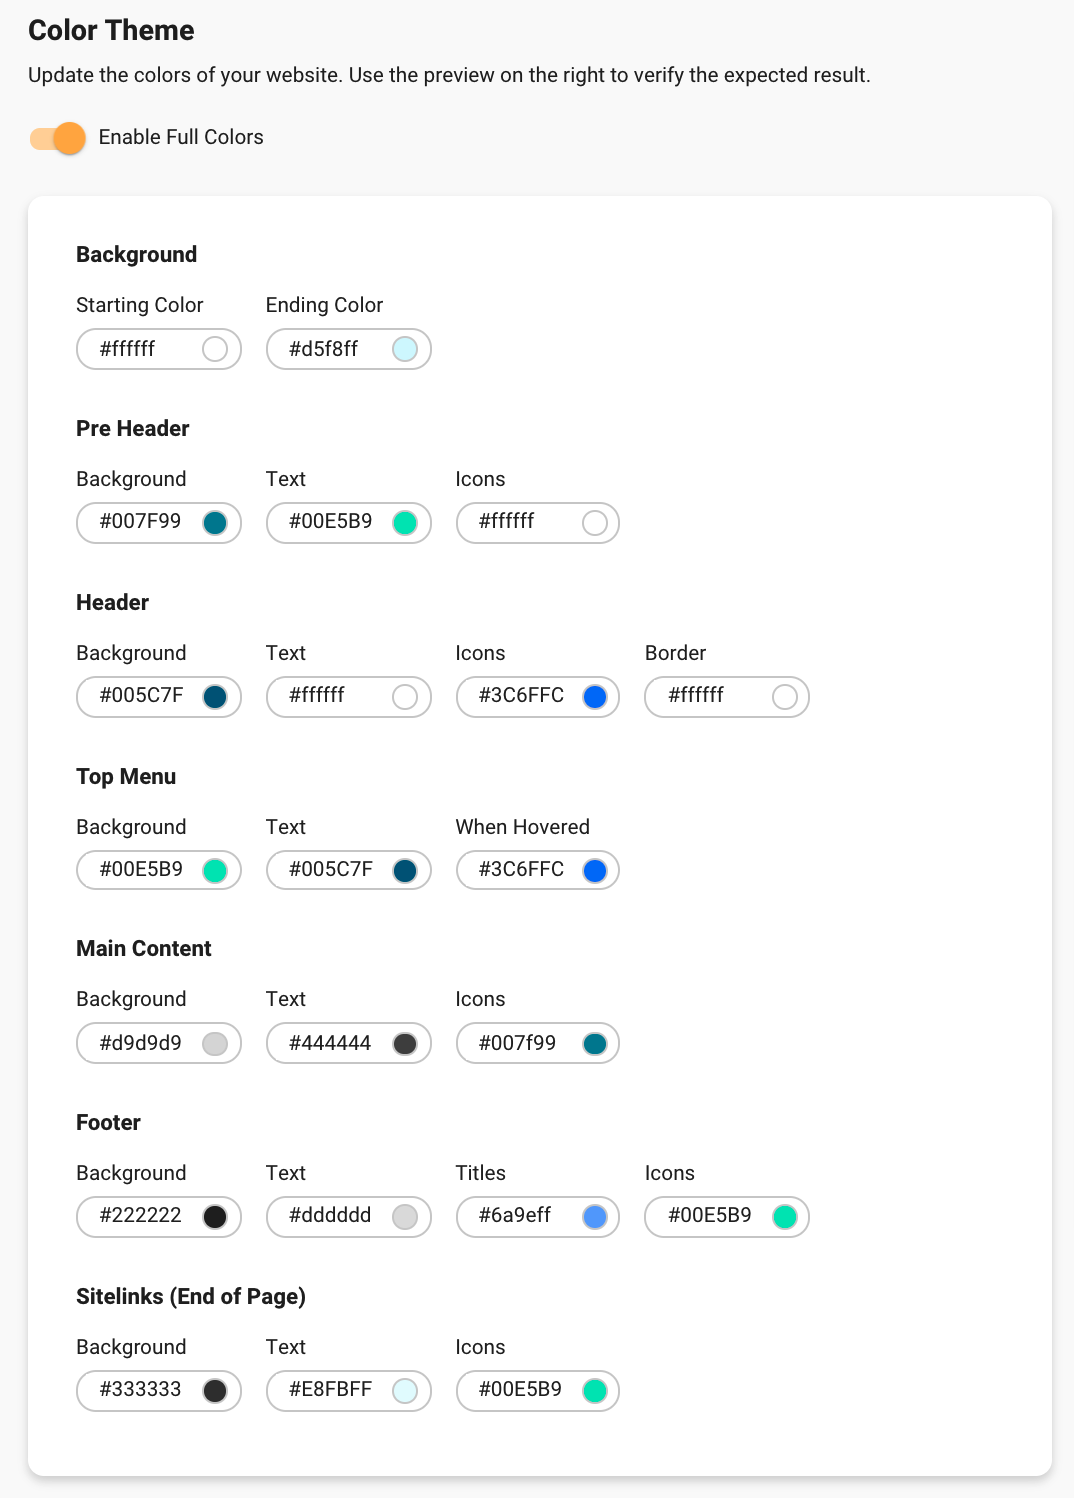
From the City Hive dashboard, head to your studio section > website > colors. Click “Enable Full Colors”.
To edit each item, paste the hex or choose the color from the selector.
 Pro Tip: Choose contrasting colors for the text/icon color and the background!
Background Color
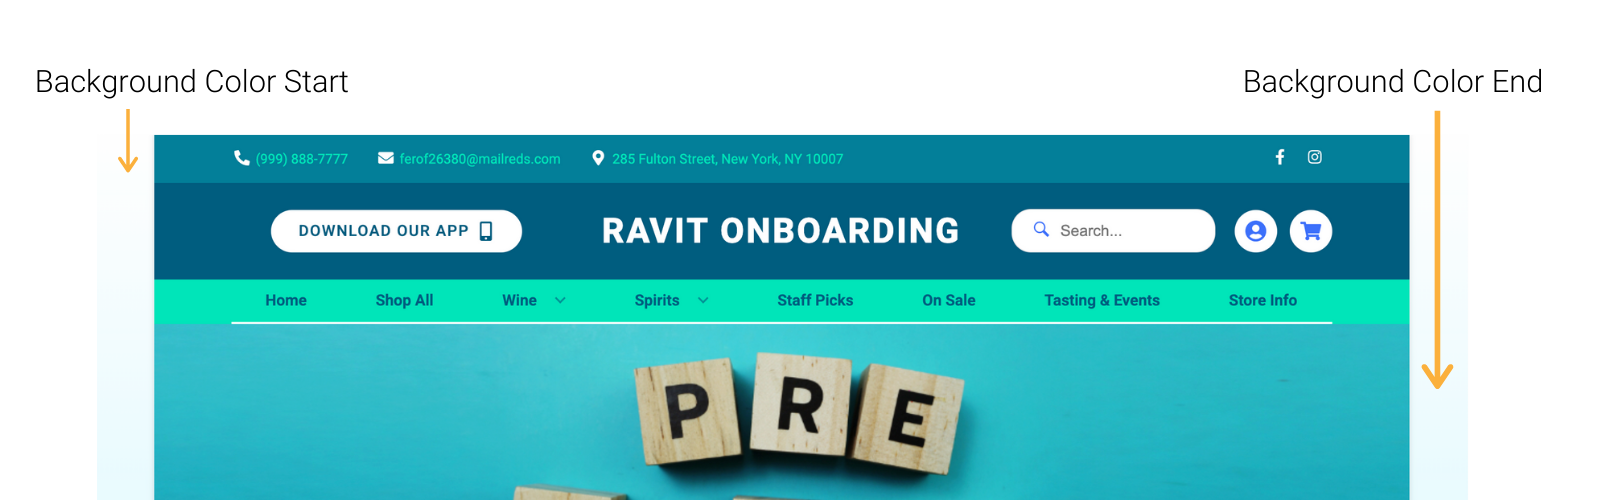
If your site is not full width, this will be the color on the left and right-hand sides of the site content. If there are two separate colors, it will form a top-to-bottom gradient. If it’s the same color, it will be solid.
These colors will affect the contact info and social media icons in the header bar. Make sure you can see the icon and text colors on the background color you choose.

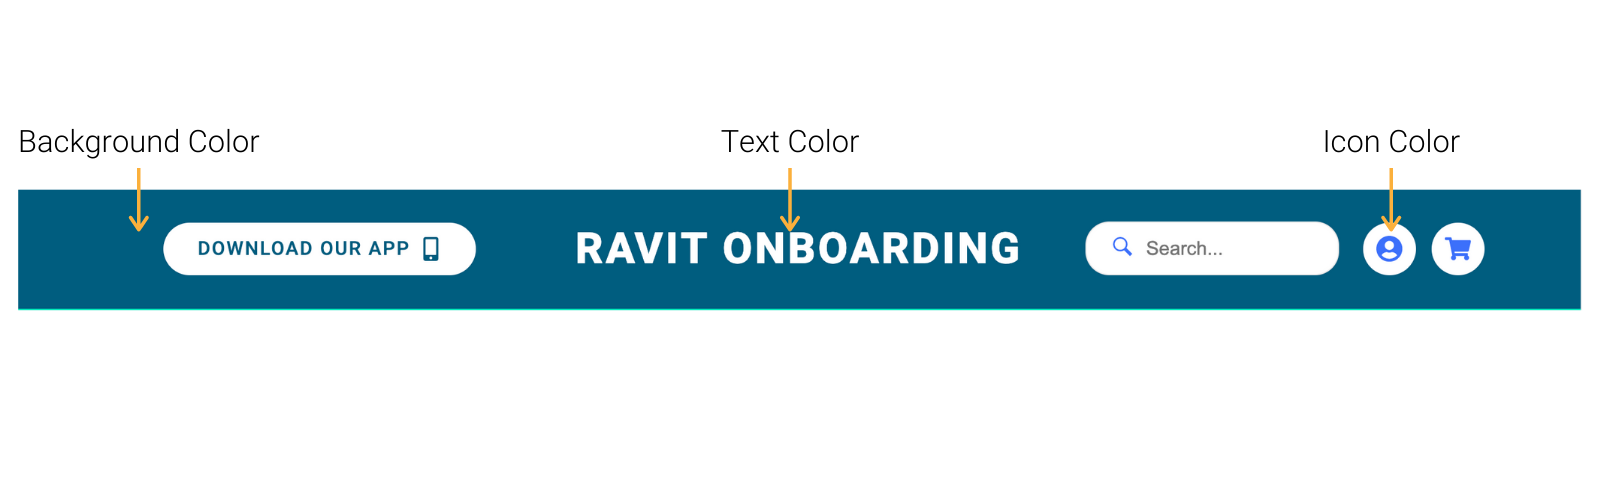
These colors will affect the area surrounding the logo. If your site does not have a logo, the text color will be the color for the placeholder in the meantime. The border color will be the small strip below the menu that separates the site content and header content (see Top Menu Colors for an example). Make sure that you can see the icon color on a white background.
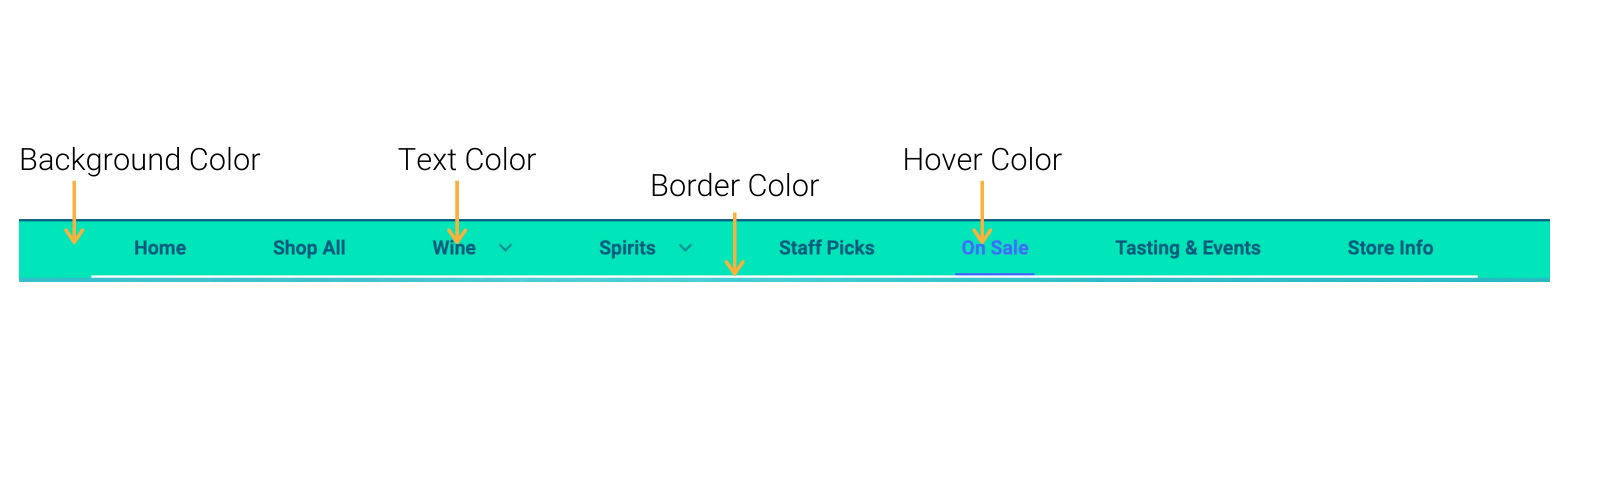
Top Menu
These colors will affect the top menu background and titles. Make sure you can see both the text and hover color on the background.
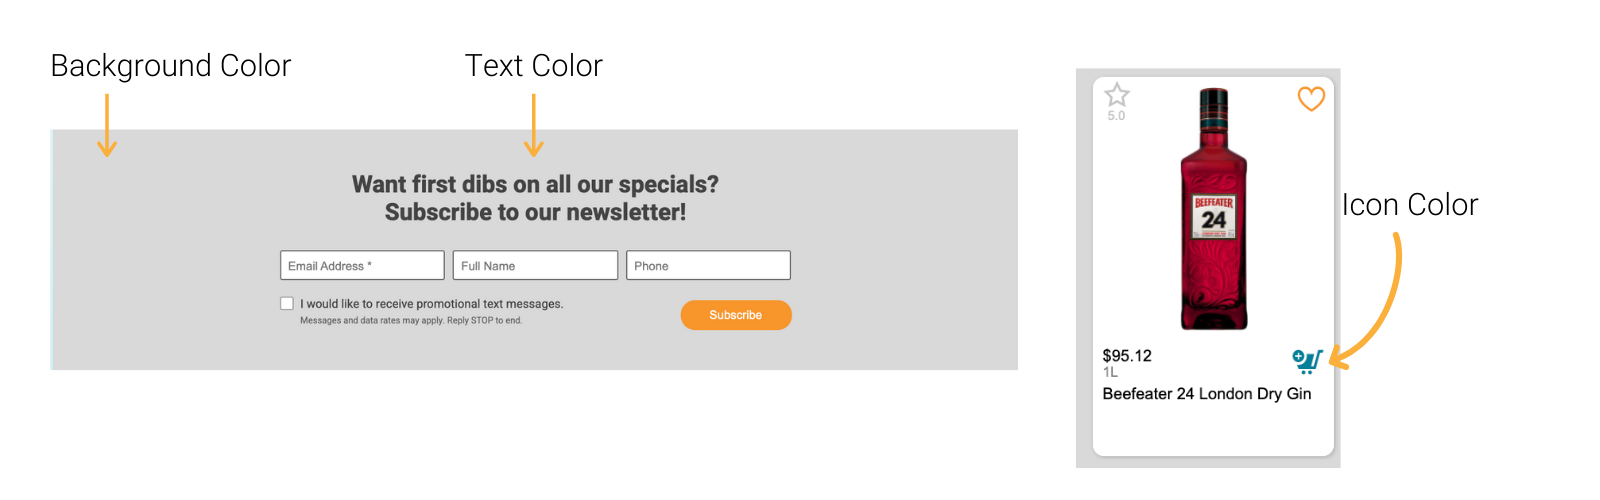
These colors will affect the content section of the site. The text color will be the section title, and the icon color will be the shopping cart icon on a product.
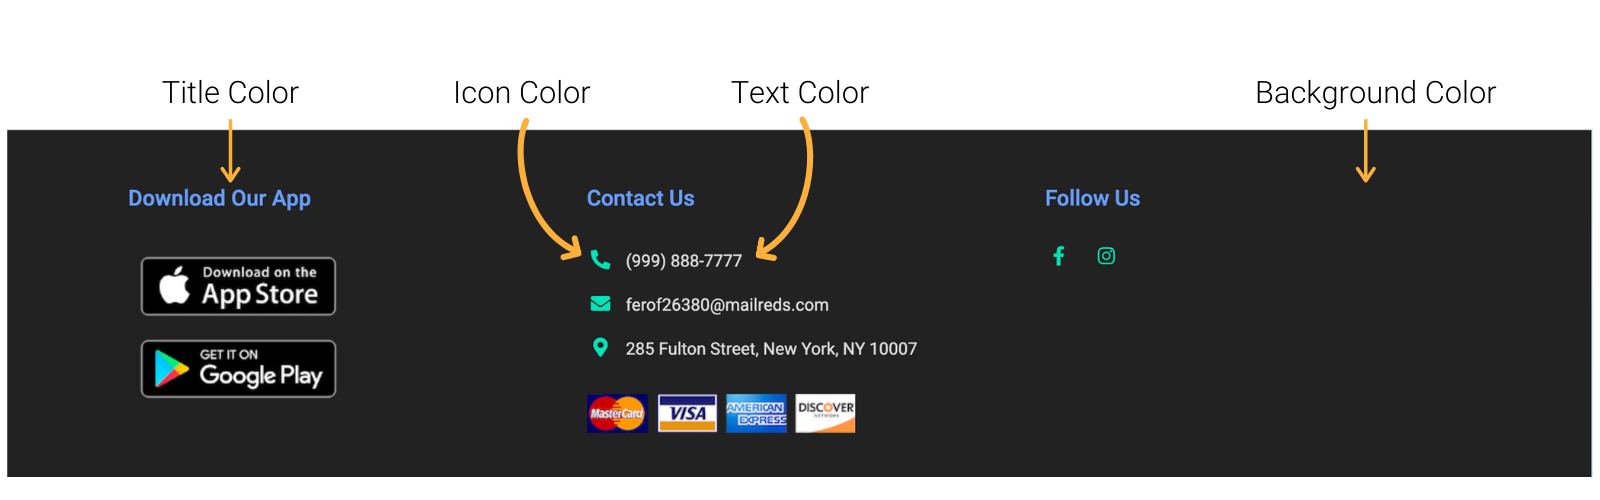
Footer
These will affect the footer titles, text, icons, and background color. Make sure you can see the titles, icon and text on the background color you choose.
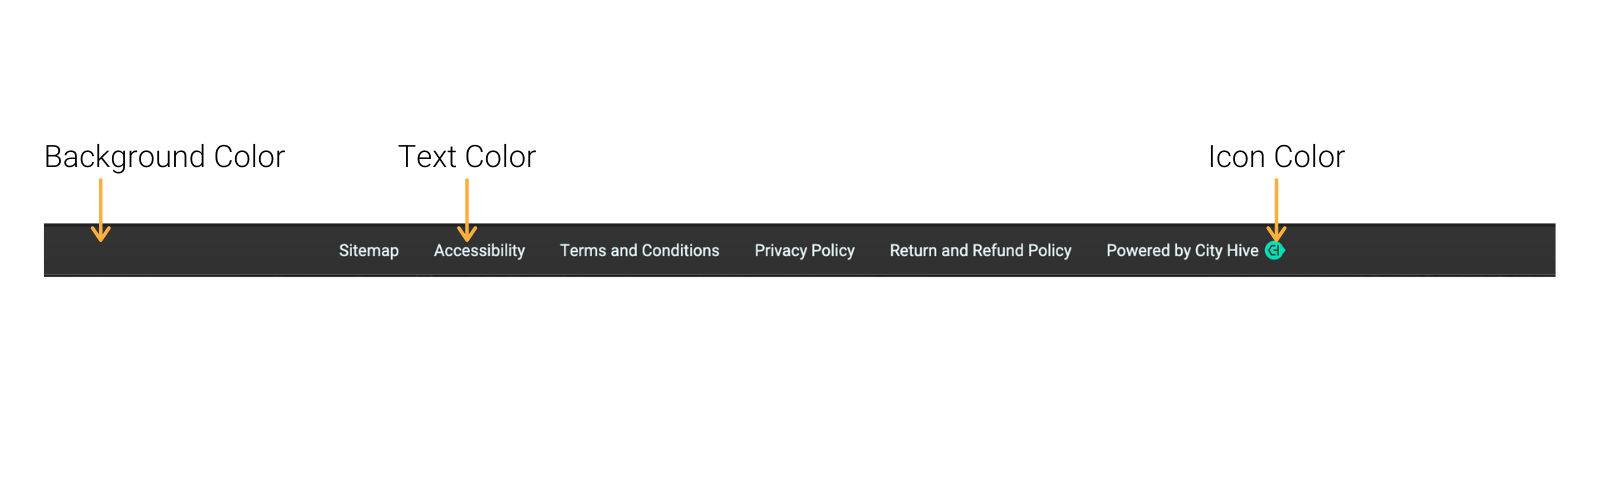
Sitelinks
Last but not least, these colors will affect the links in the footer of the website. Make sure you can see the text and icons on the background color you choose.