![City Hive Logo-2.png]](https://support.cityhive.net/hs-fs/hubfs/City%20Hive%20Logo-2.png?width=62&height=60&name=City%20Hive%20Logo-2.png)
Split Payments
This training provides essential guidance on managing split payments within the CityHive register. You will learn how to efficiently process orders using multiple payment methods and tender types.
1. Overview of Split Payments
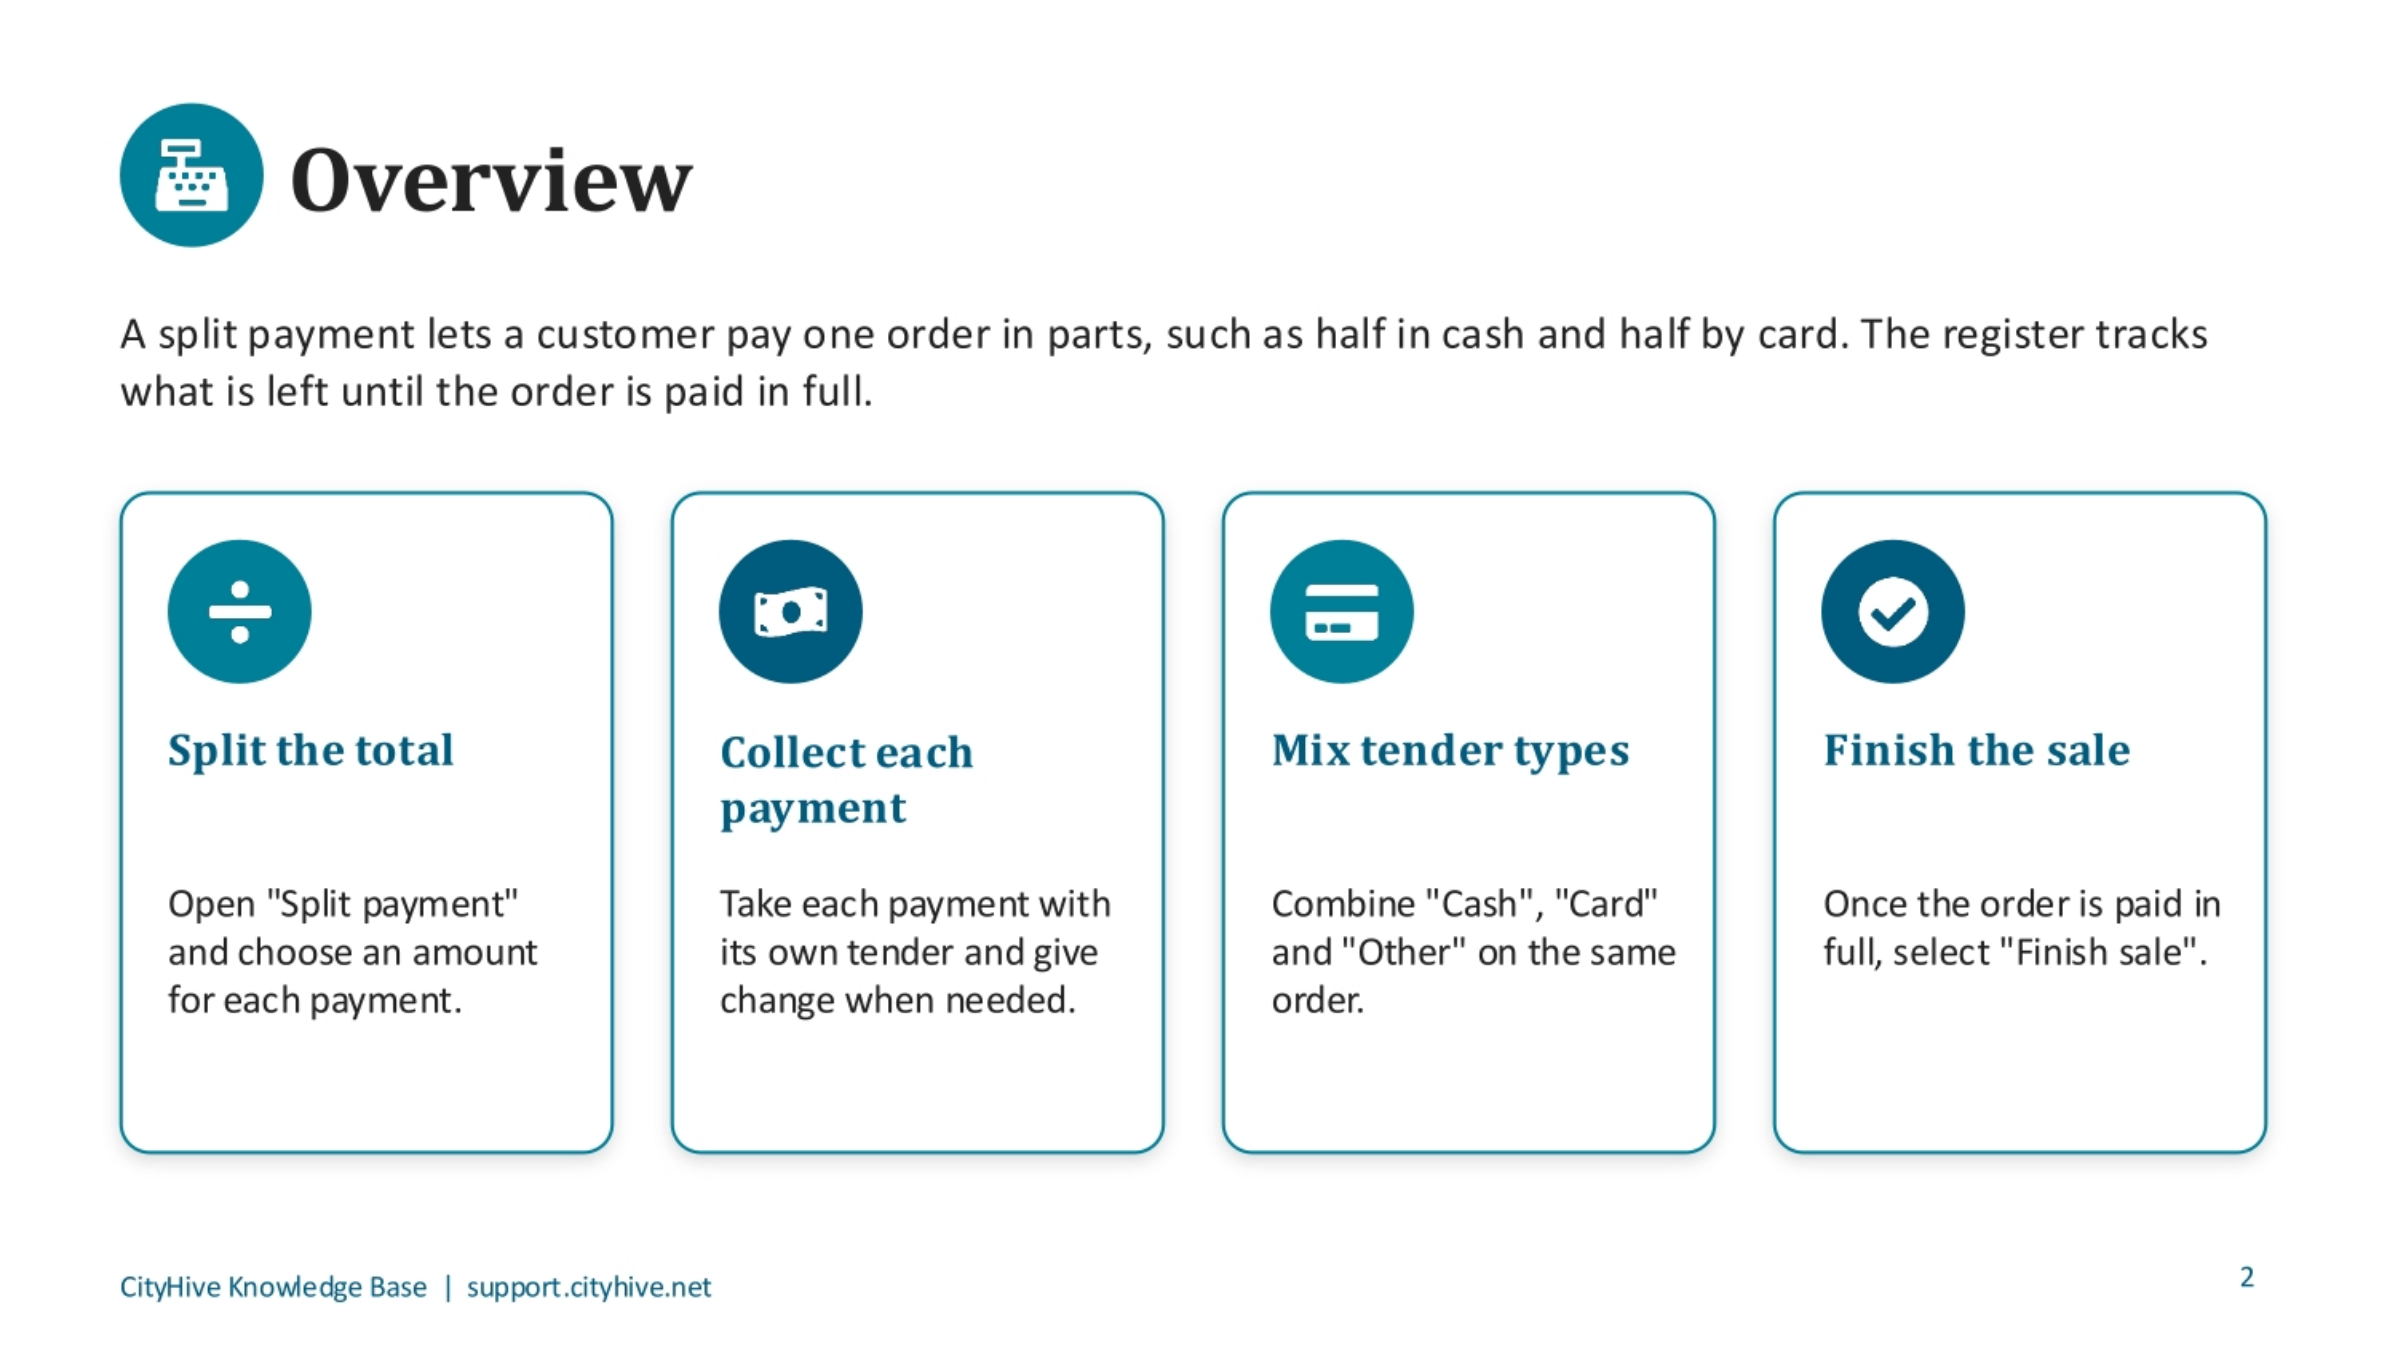
Split payments allow customers to pay for one order in multiple parts, such as using both cash and a card. The CityHive register efficiently tracks the remaining balance until the order is fully paid. The process involves splitting the total, collecting each payment, mixing various tender types, and finally, finishing the sale.
2. Opening Split Payment
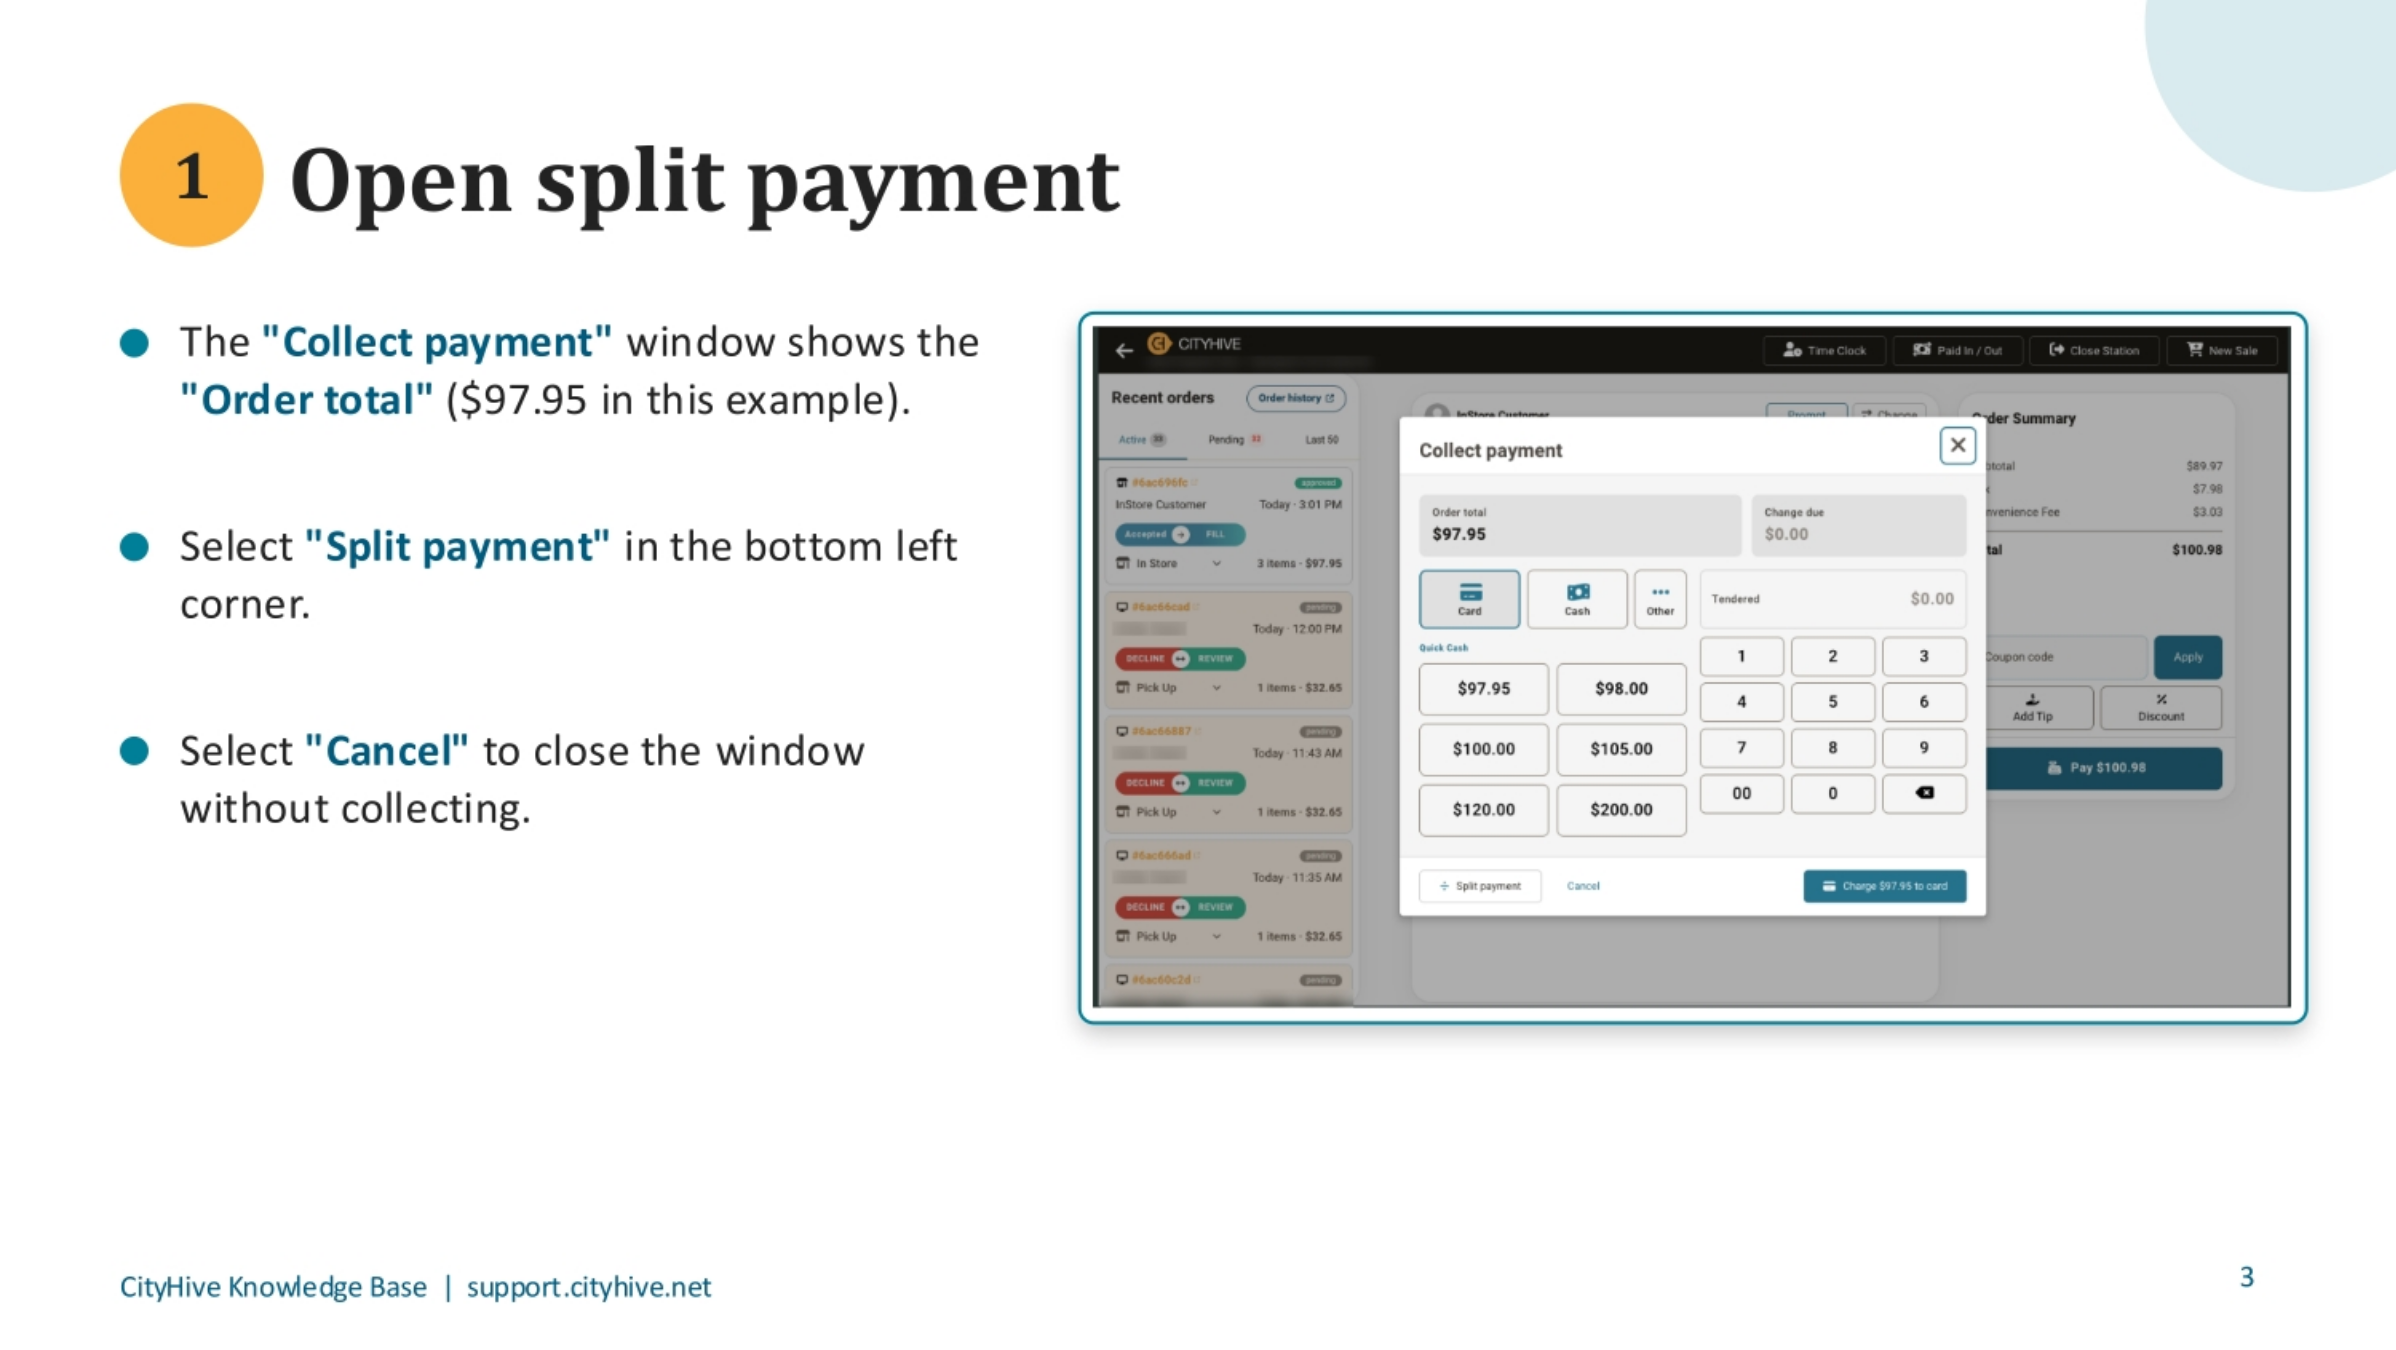
To begin, navigate to the 'Collect payment' window. Here, you'll see the 'Order total,' which is $97.95 in this example. To initiate the split payment process, select 'Split payment' located in the bottom left corner. If you need to exit without collecting payment, simply choose 'Cancel'.
3. Selecting the First Payment Amount
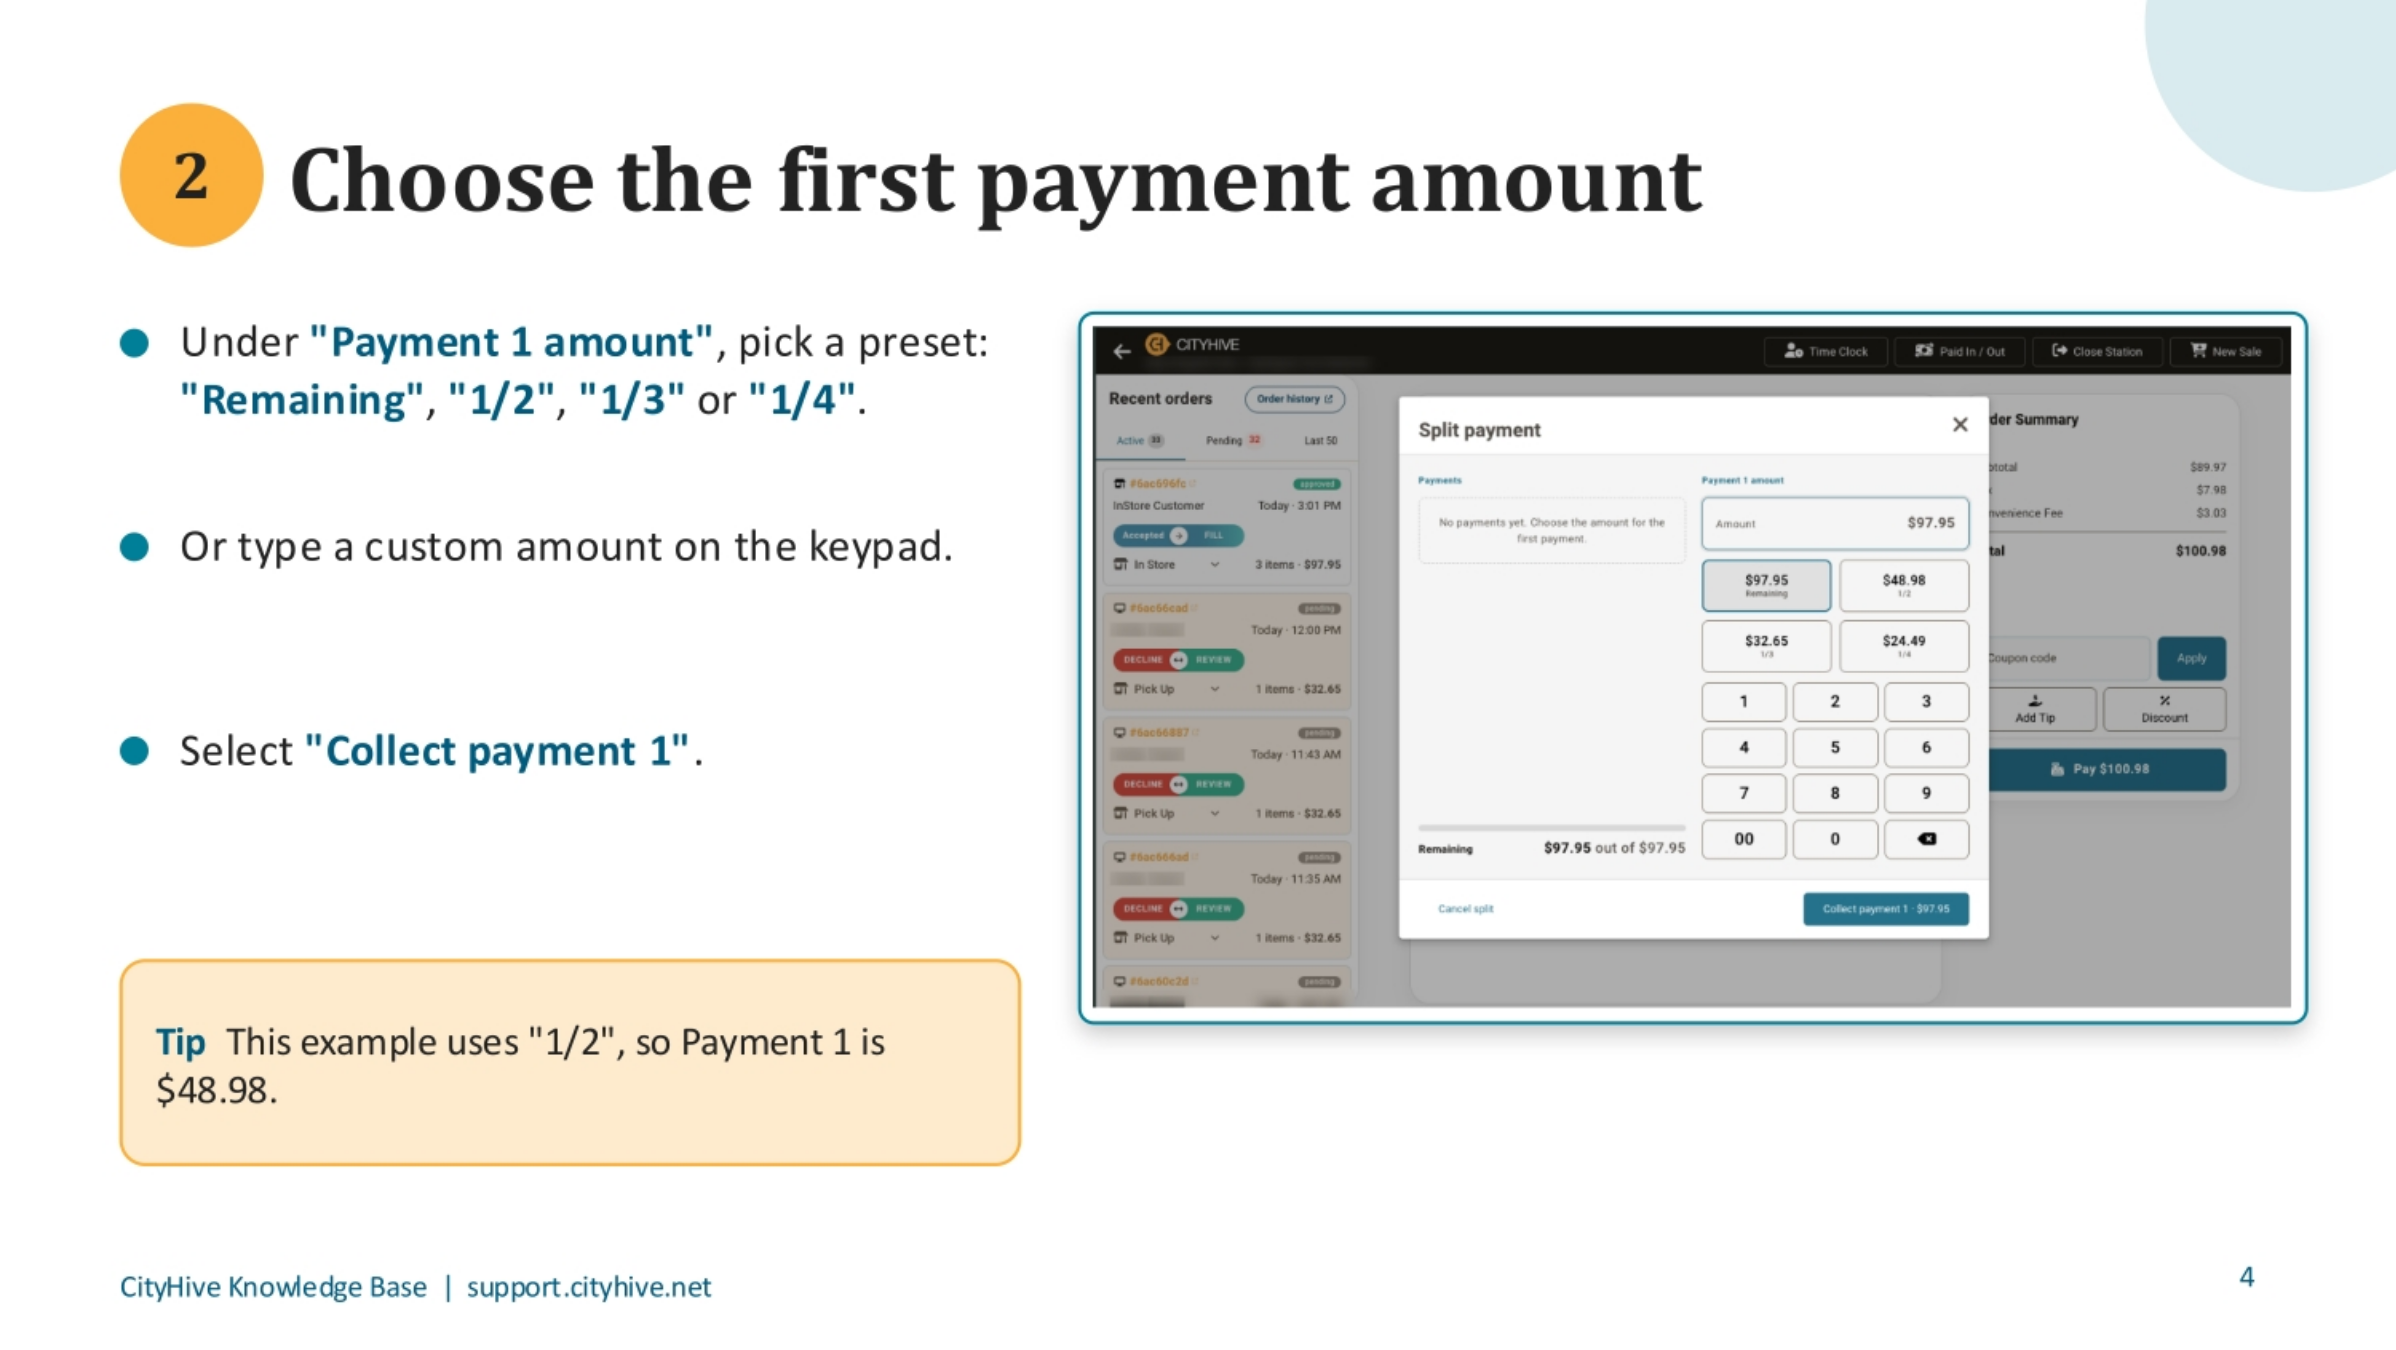
Next, you'll choose the amount for the first payment. Under 'Payment 1 amount,' you can select from convenient presets like 'Remaining,' '1/2,' '1/3,' or '1/4' of the total. Alternatively, you can enter a custom amount using the keypad. Once the amount is set, select 'Collect payment 1' to proceed. For instance, choosing '1/2' would set the first payment to $48.98.
4. Processing the First Payment
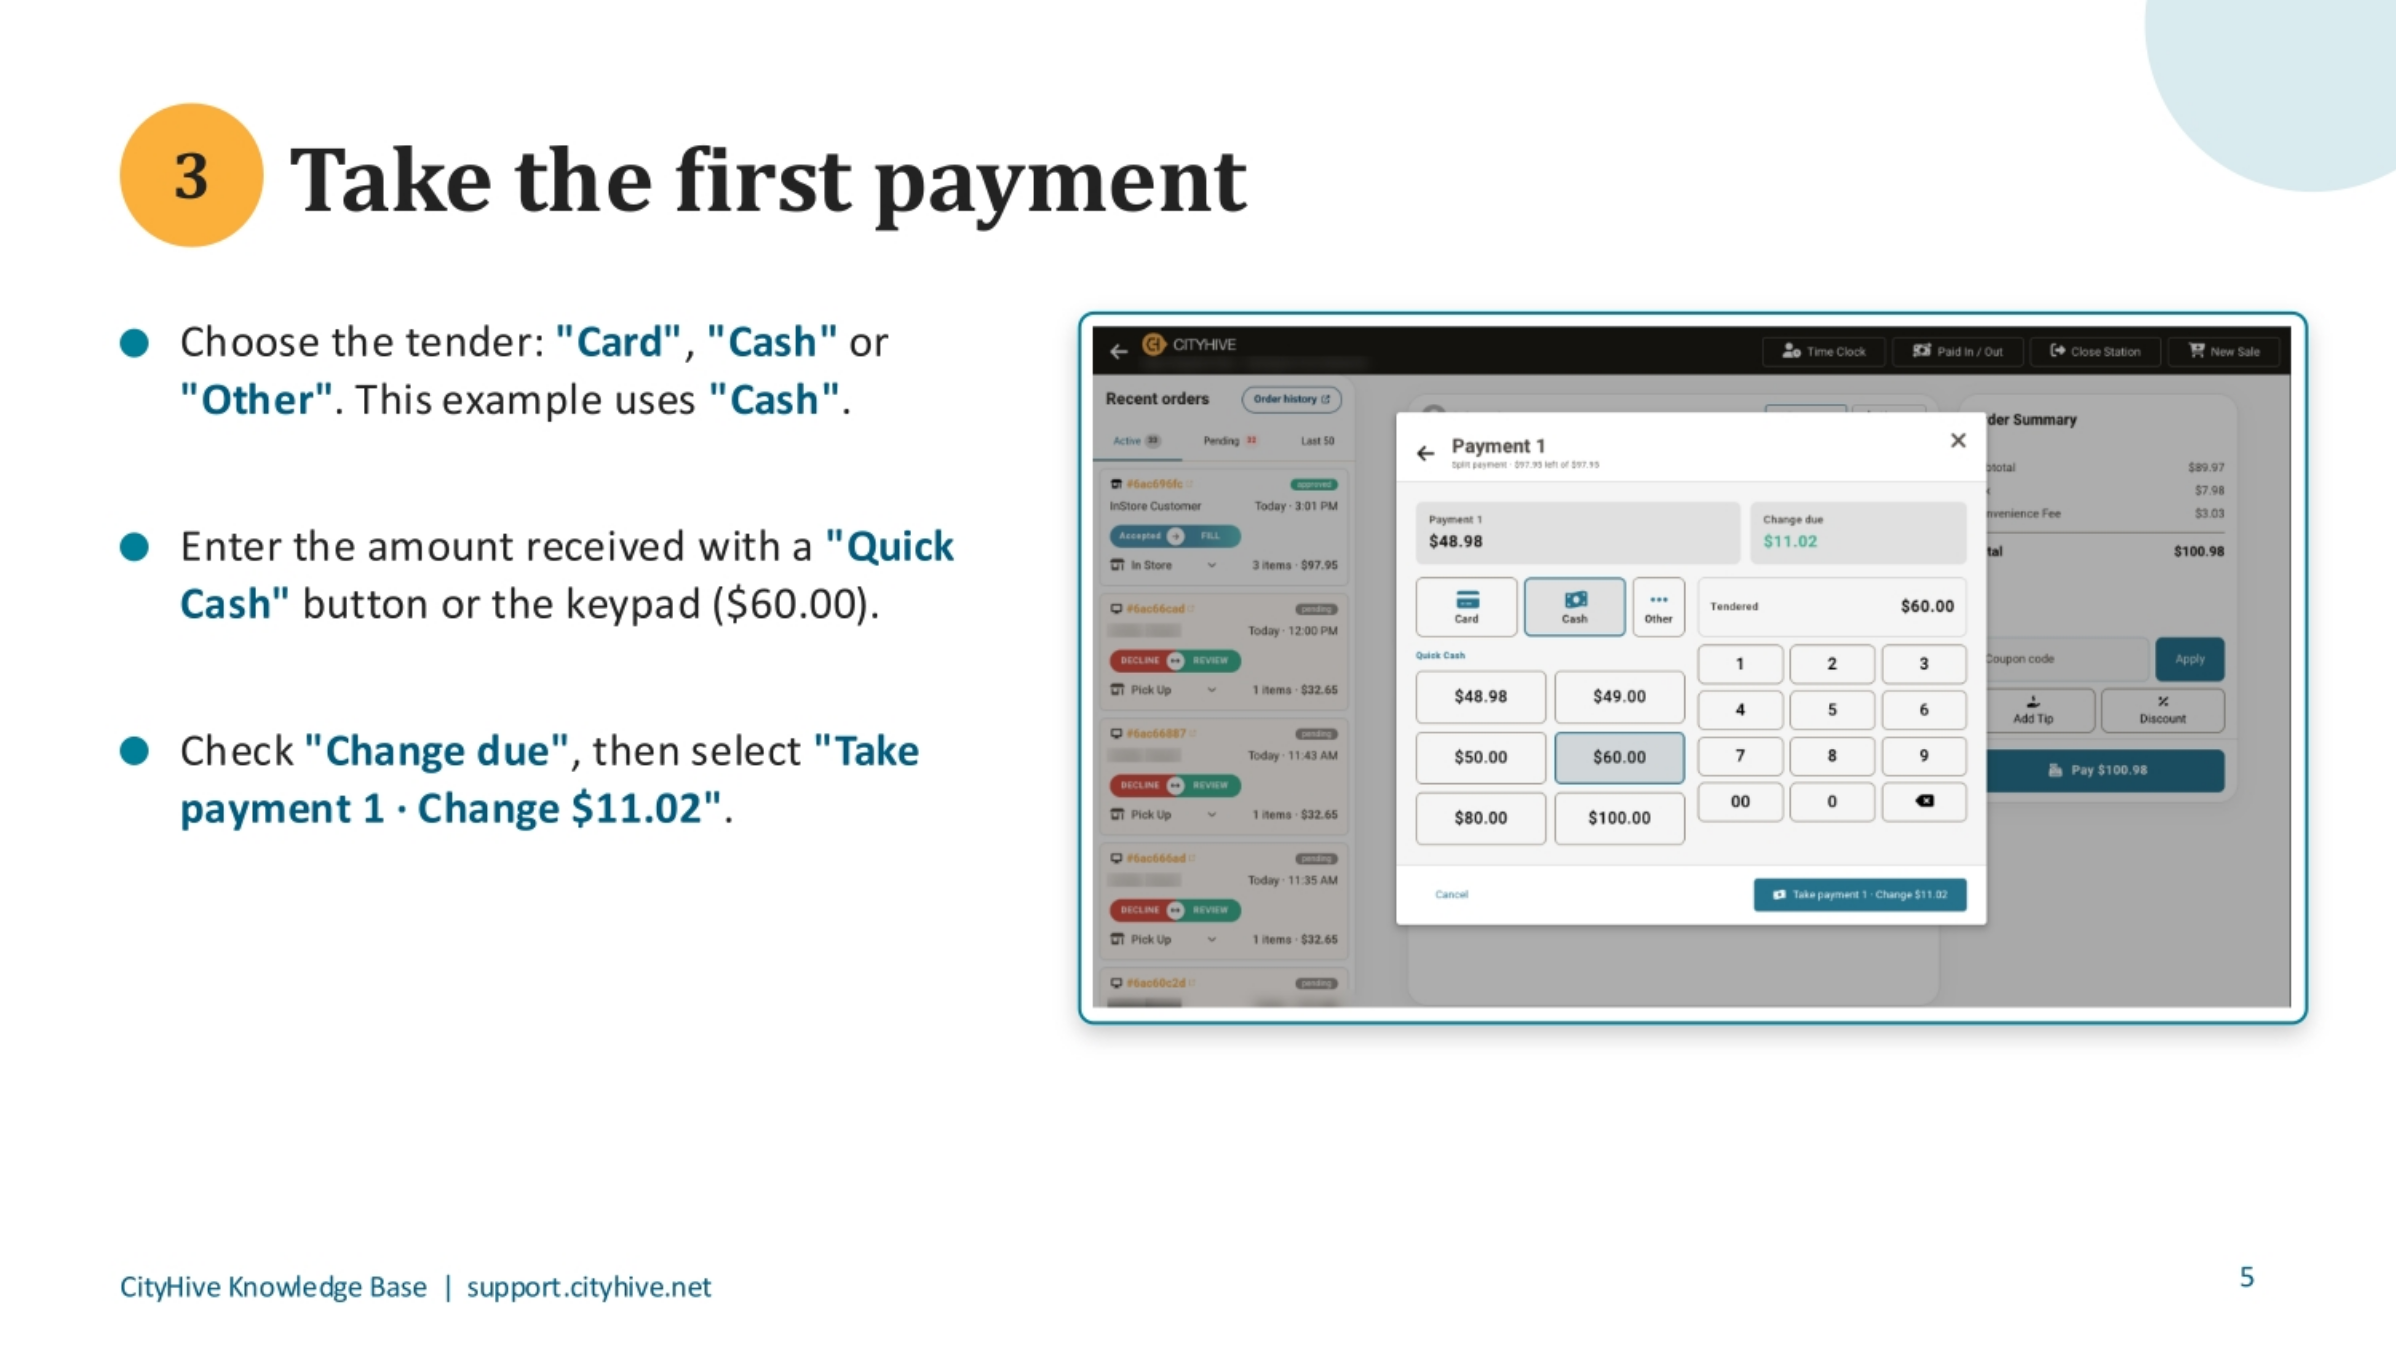
Now, choose the tender type for the first payment, such as 'Card,' 'Cash,' or 'Other.' In this example, we're using 'Cash.' Enter the amount received from the customer, either by using a 'Quick Cash' button or typing it into the keypad, for example, $60.00. After confirming the 'Change due,' select 'Take payment 1 - Change $11.02' to finalize this portion of the transaction.
5. Completing the First Payment
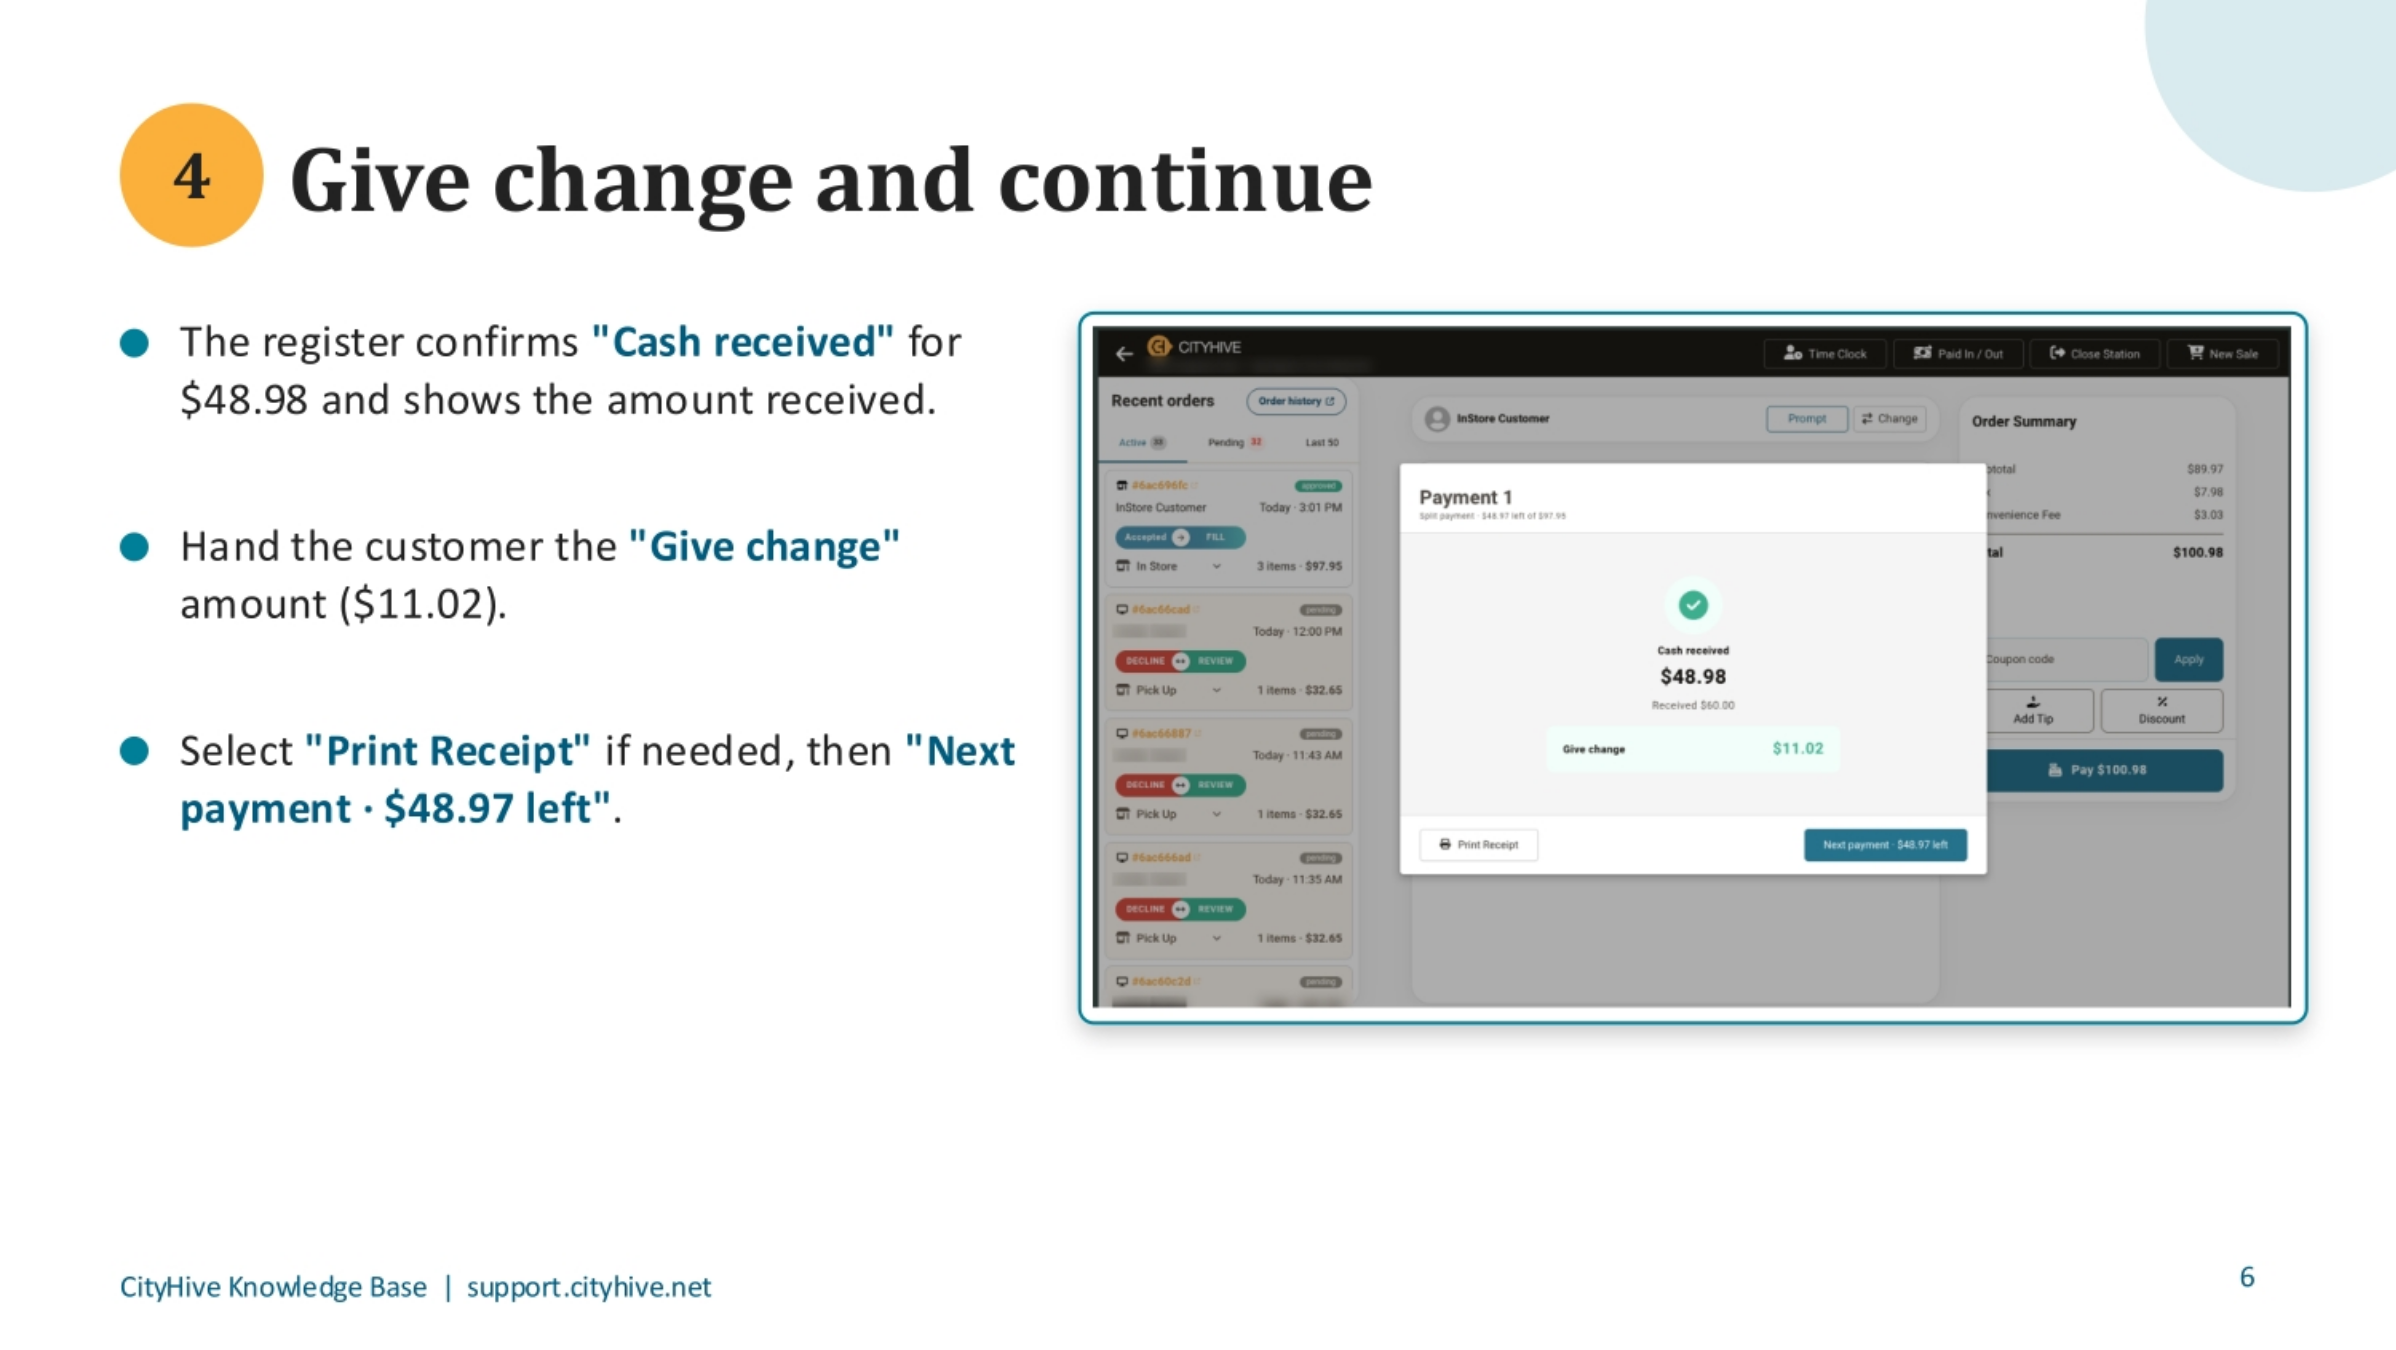
The register will confirm that 'Cash received' for $48.98 has been processed and display the amount received. You can then hand the customer their change, which is $11.02 in this scenario. If a receipt is needed, select 'Print Receipt.' Otherwise, choose 'Next payment - $48.97 left' to continue with the remaining balance.
6. Choosing Subsequent Payment Amounts
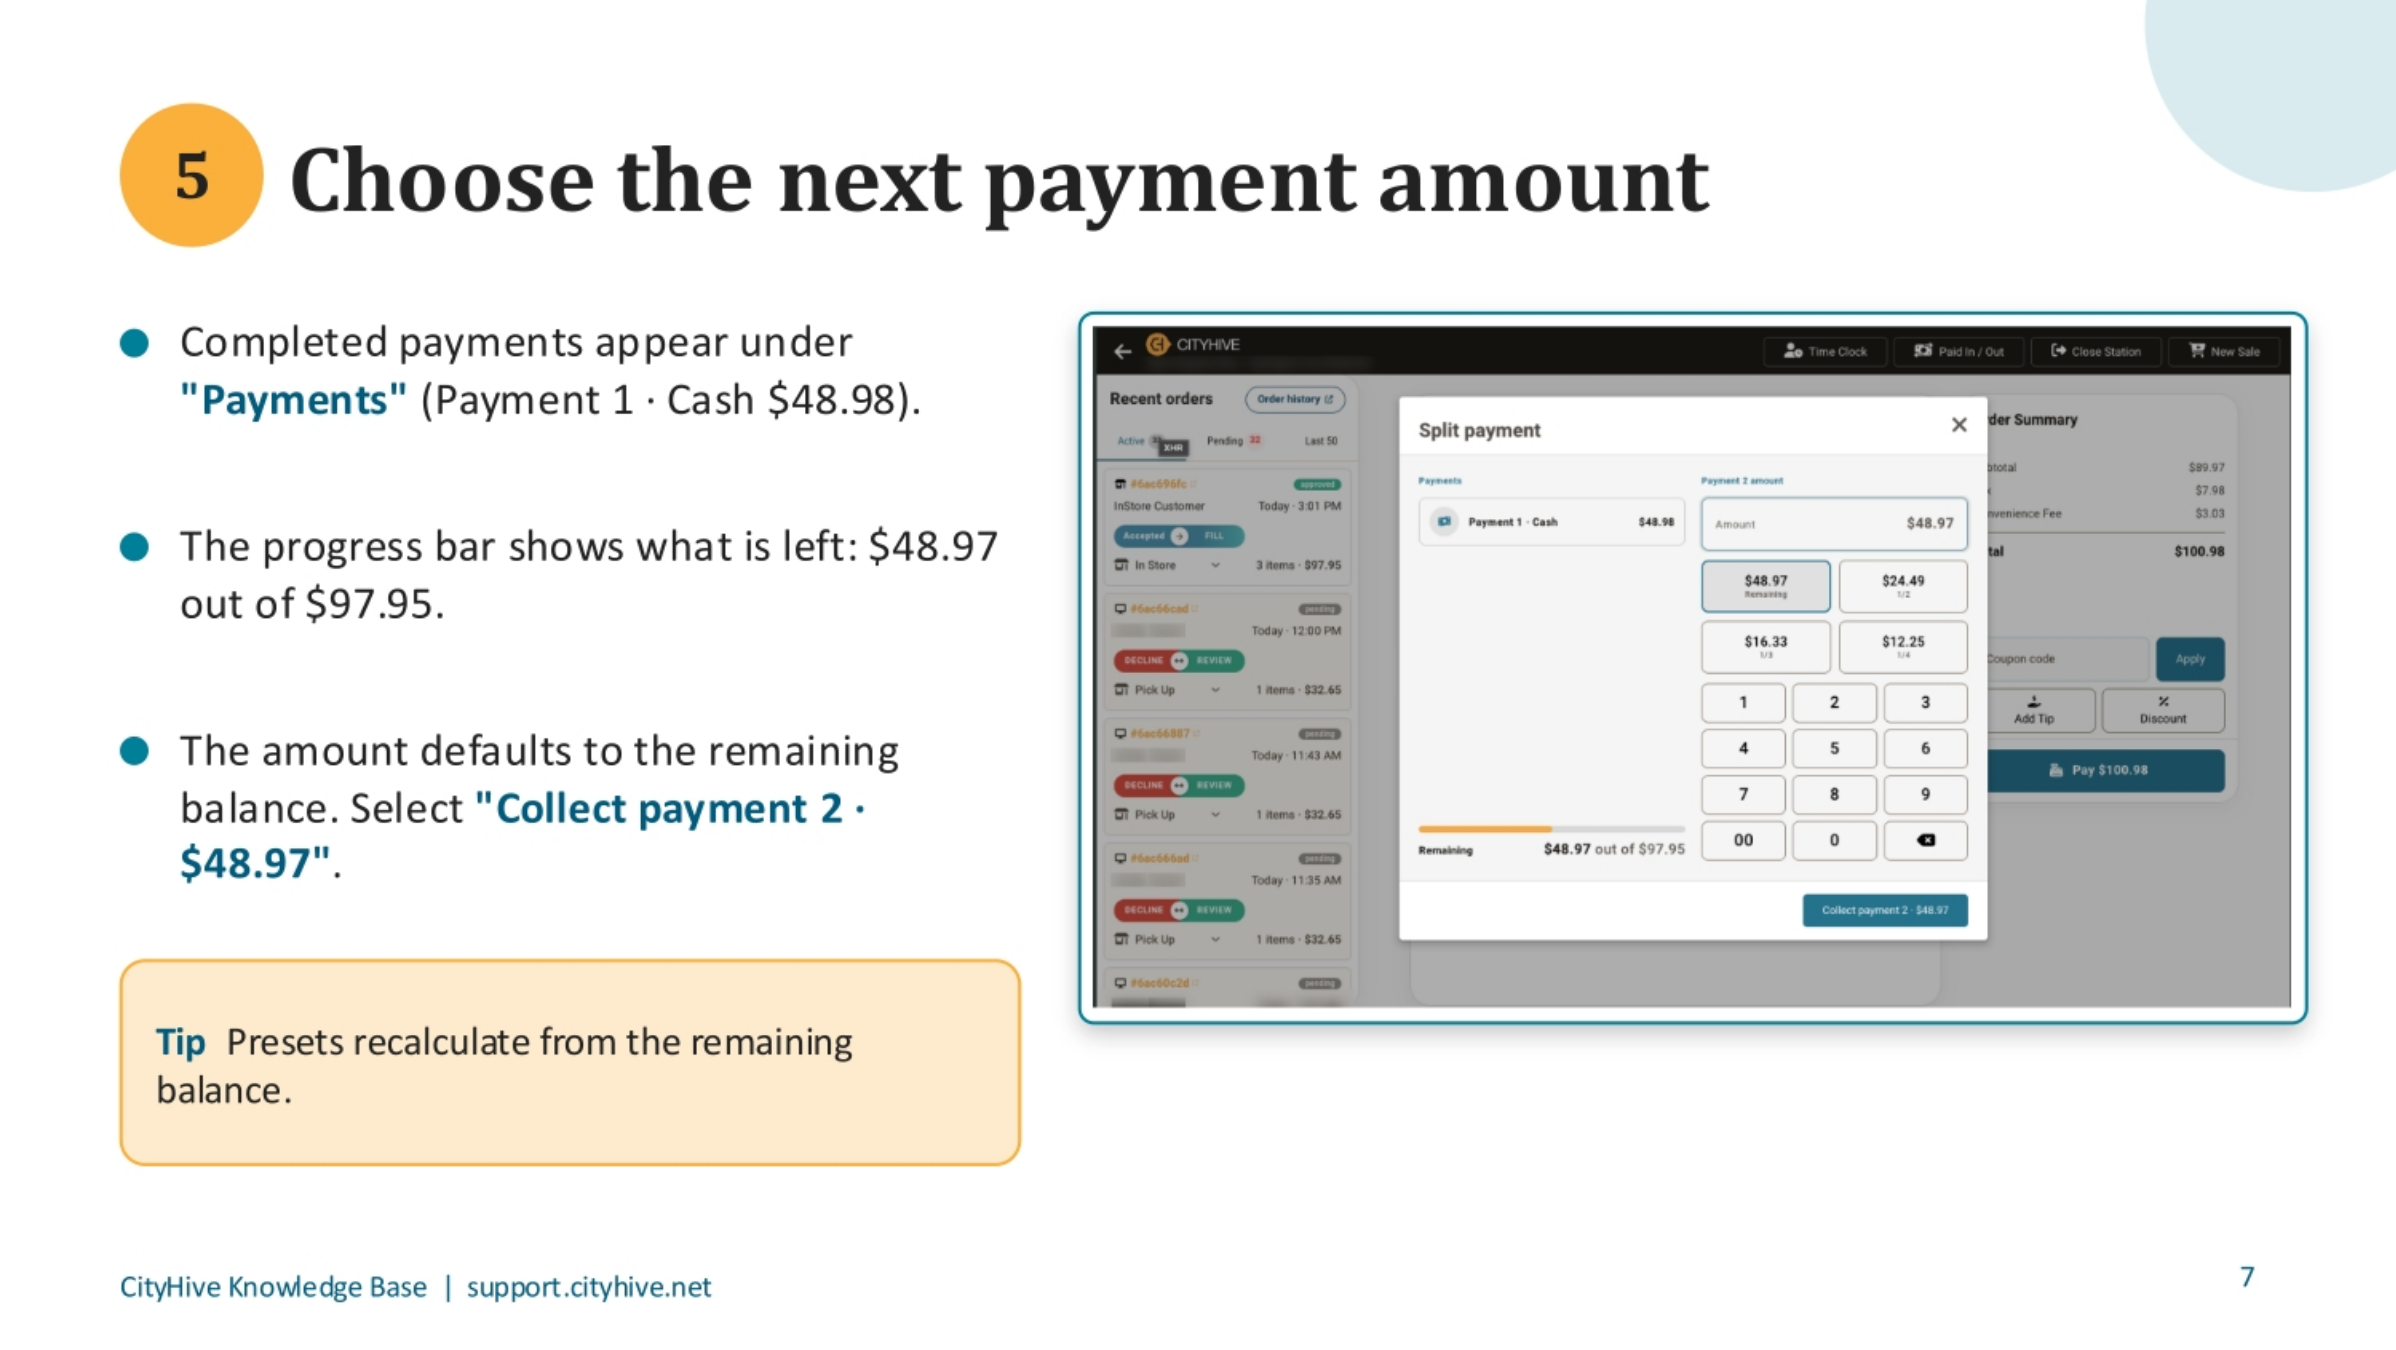
Once the first payment is complete, it will appear under 'Payments,' showing 'Payment 1 - Cash $48.98.' The progress bar clearly indicates the remaining balance, which is $48.97 out of $97.95. The system automatically defaults the next payment amount to the remaining balance. To proceed, select 'Collect payment 2 - $48.97.' Remember, the preset options will recalculate based on the current remaining balance.
7. Confirming Card Payments
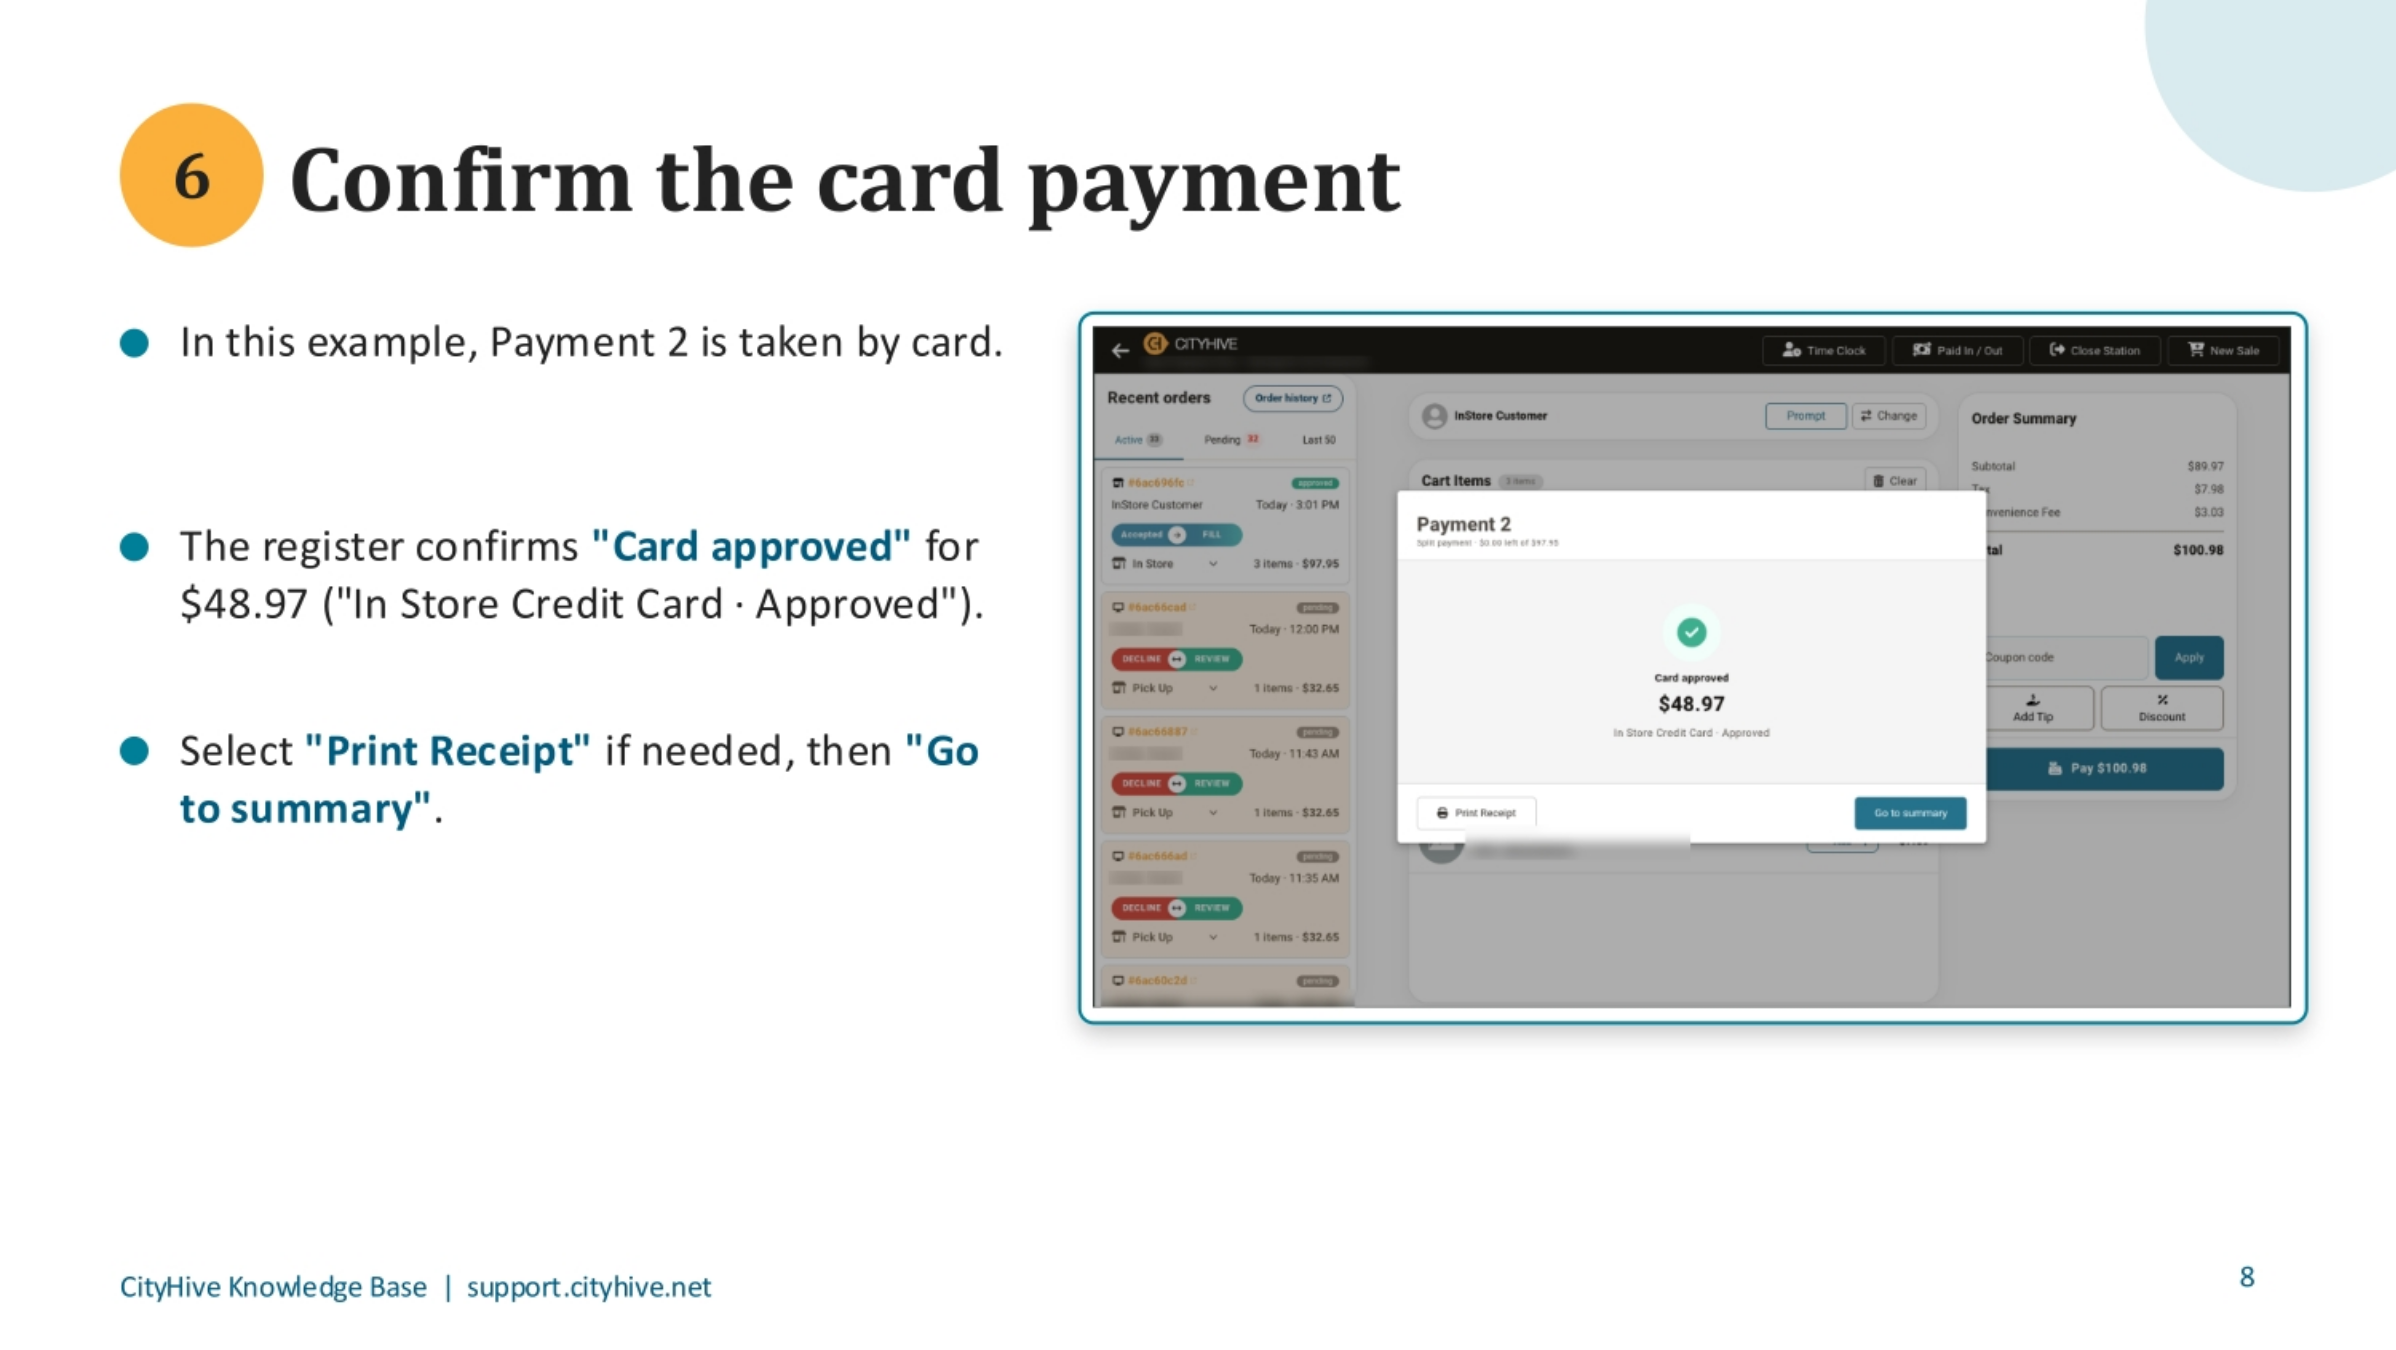
In this example, the second payment is processed by card. The register will confirm 'Card approved' for $48.97, indicating that the 'In Store Credit Card' transaction was successful. If the customer requires a receipt, select 'Print Receipt.' Otherwise, choose 'Go to summary' to review the completed split payment transaction.
8. Finalizing the Sale
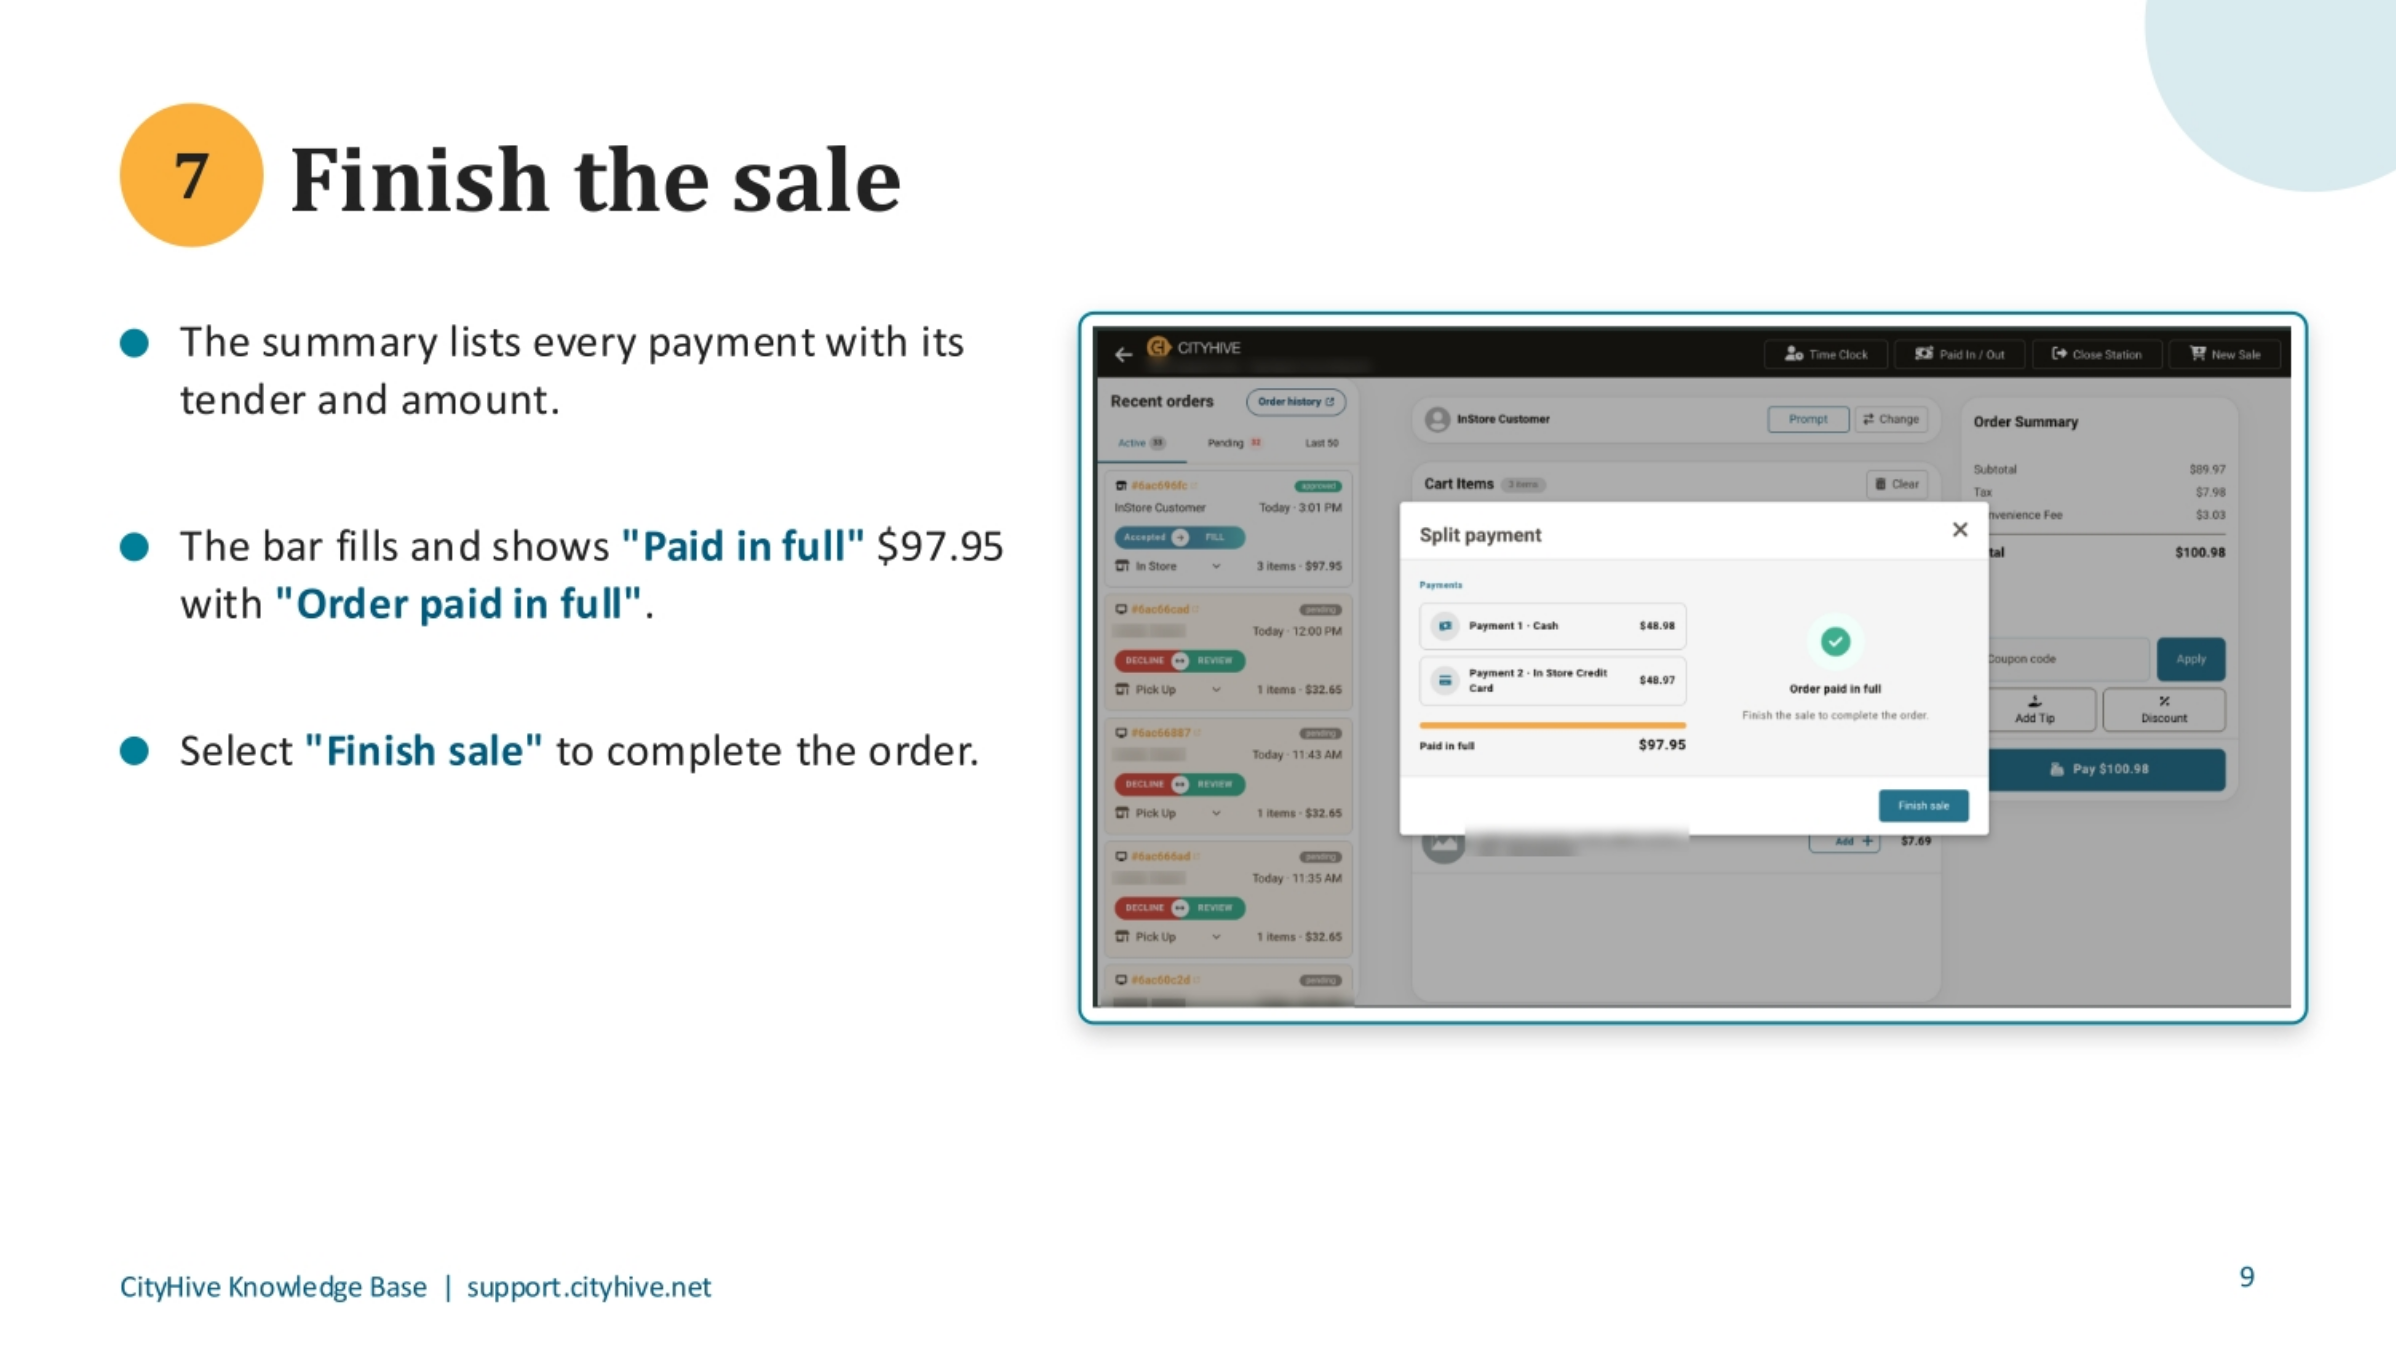
The summary screen provides a clear overview of all payments, including their tender types and amounts. The progress bar will now show 'Paid in full' for $97.95, confirming that the 'Order paid in full.' To complete the entire order and finalize the transaction, simply select 'Finish sale'.
9. Sale Completion
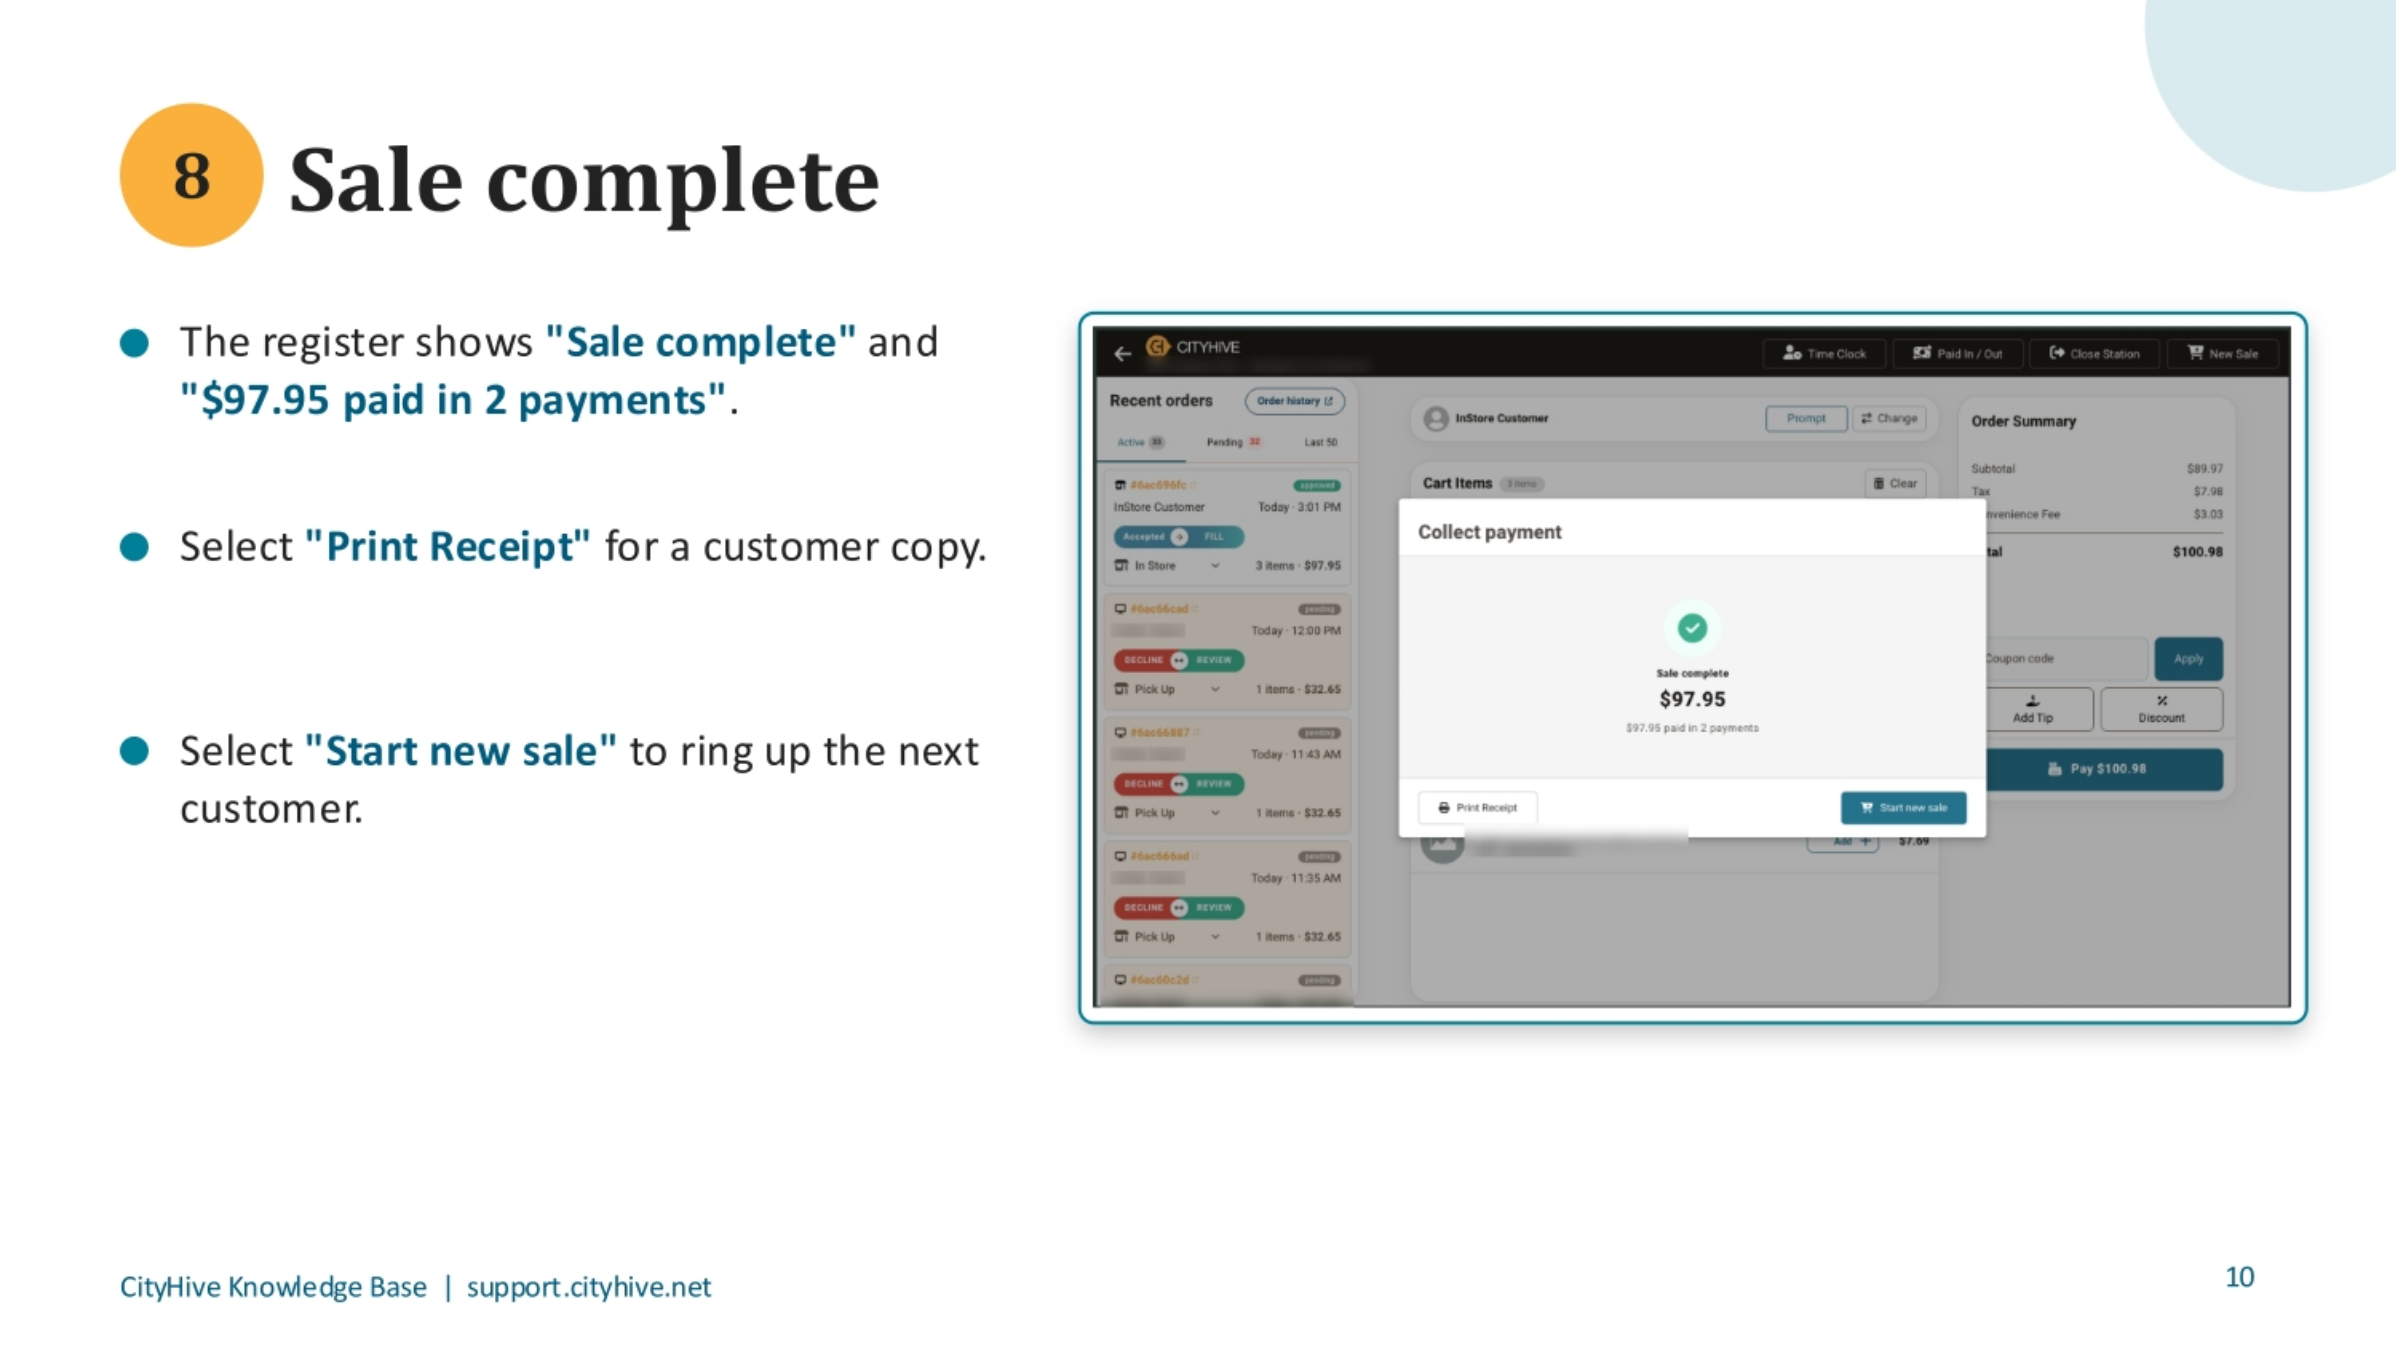
Upon completion, the register will display 'Sale complete' and confirm that '$97.95 paid in 2 payments.' You can then choose to 'Print Receipt' for the customer's records. If you're ready to assist the next customer, select 'Start new sale' to clear the register and begin a new transaction.
10. Payment Splitting Recap
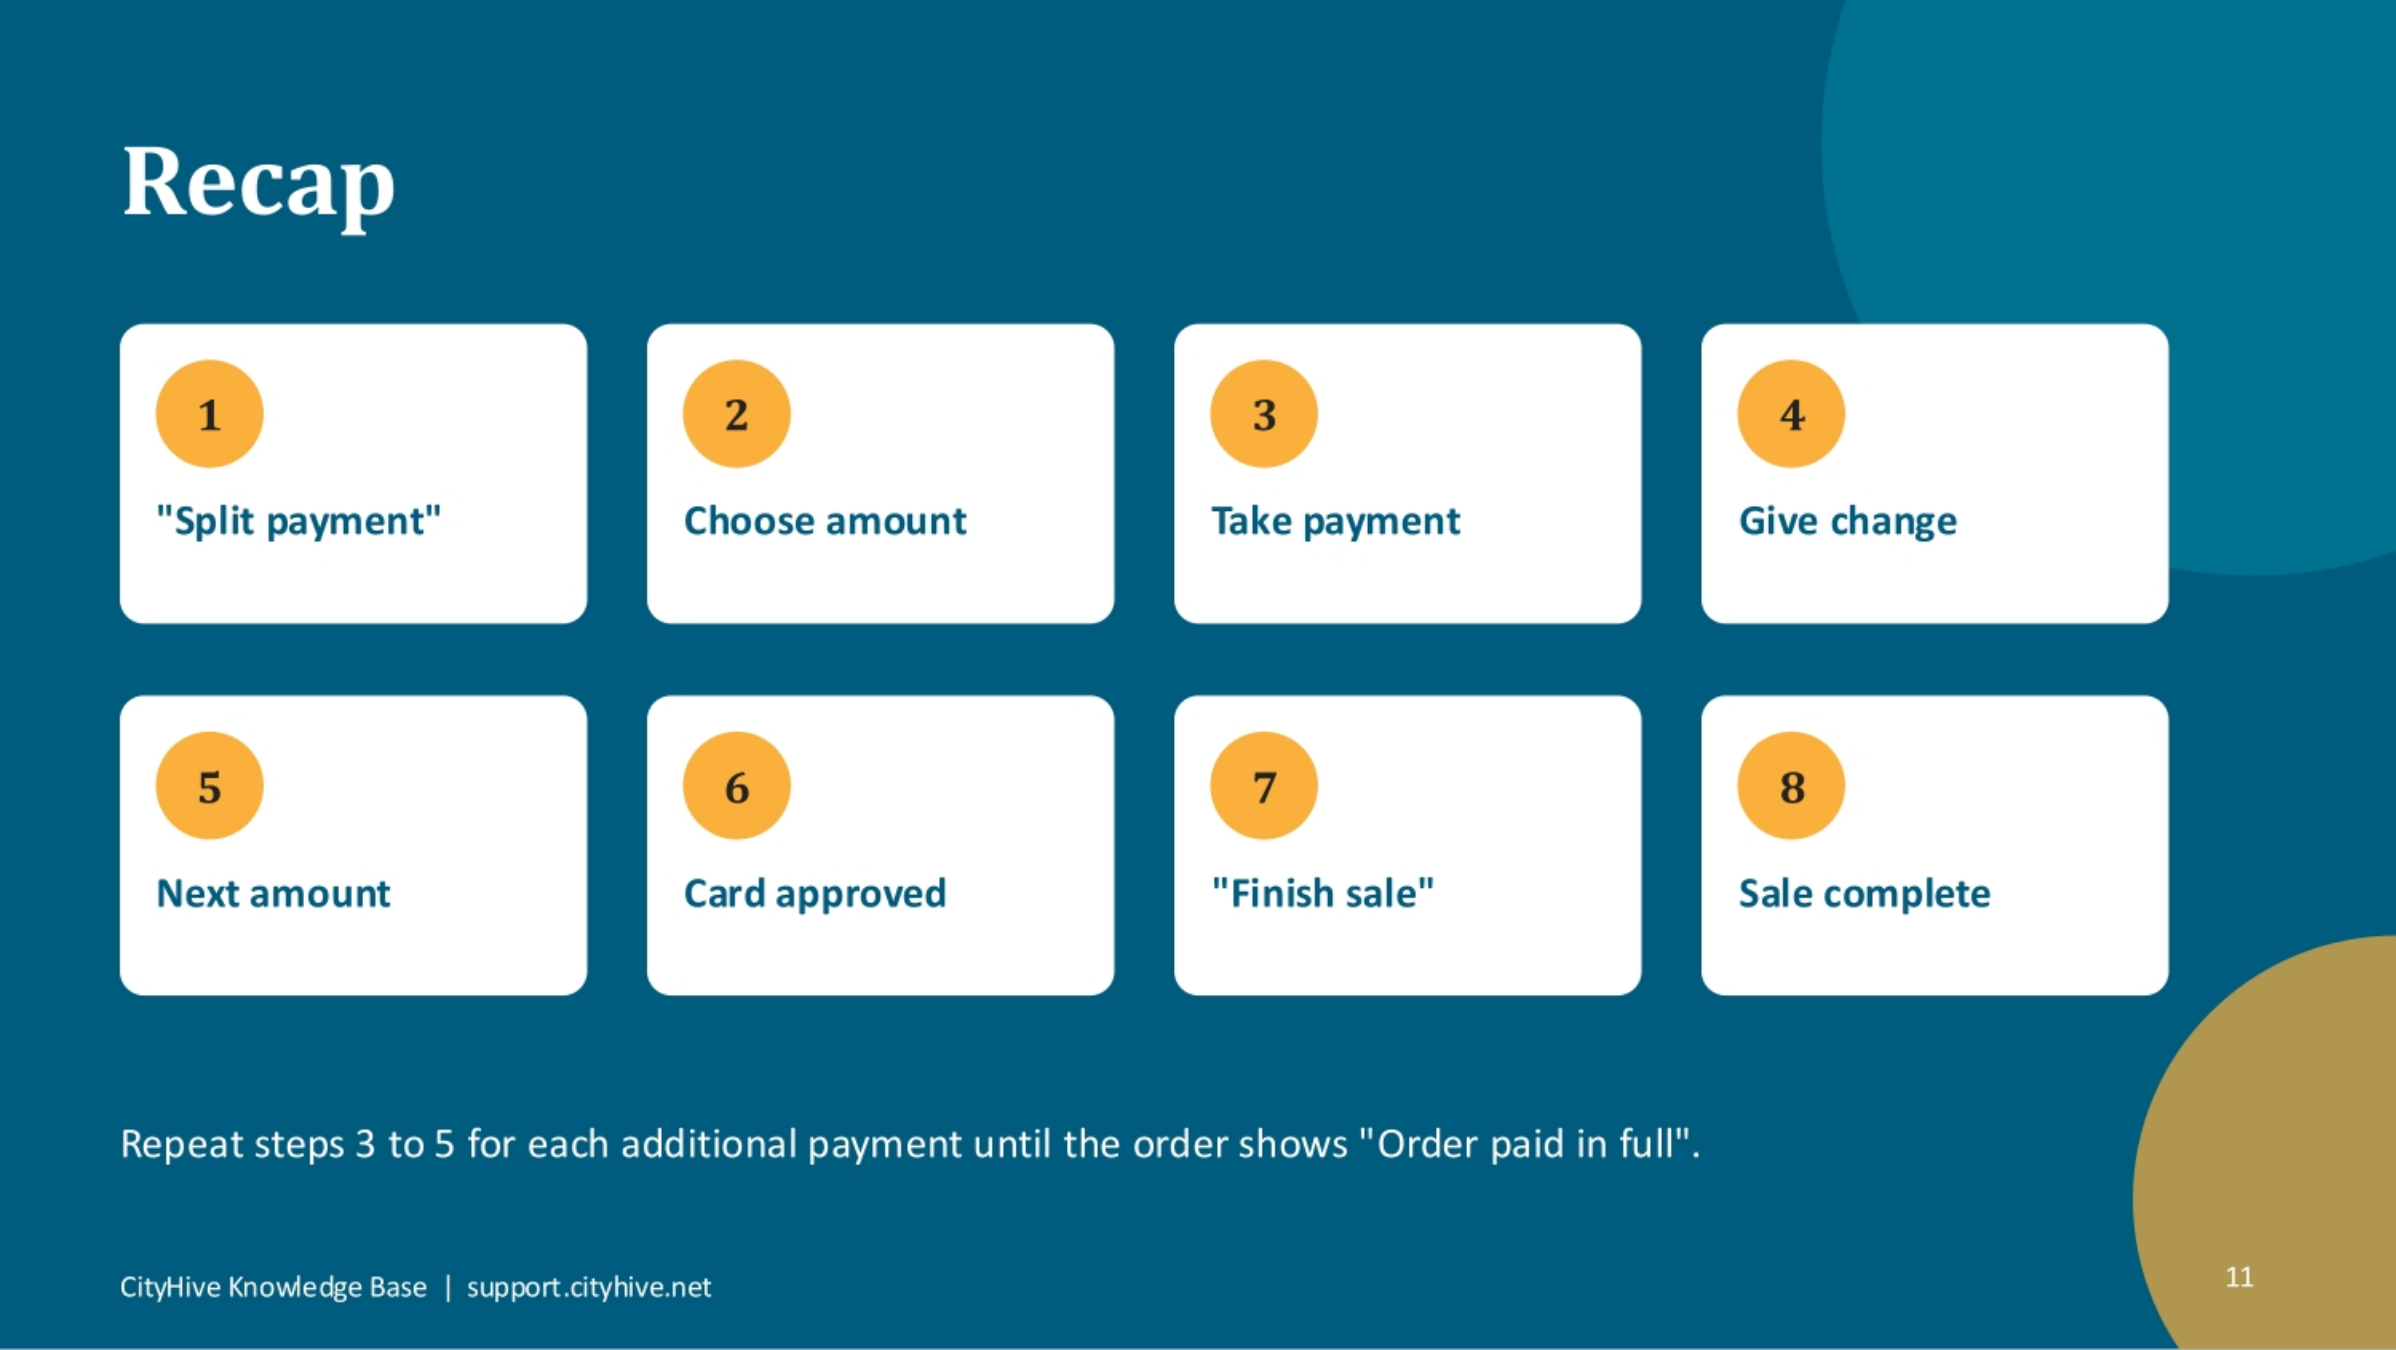
To recap, the process involves opening split payment, choosing the amount, taking payment, giving change, selecting the next amount, confirming card approval, and finally, finishing the sale. Repeat steps three to five for any additional payments until the order is fully paid.