![City Hive Logo-2.png]](https://support.cityhive.net/hs-fs/hubfs/City%20Hive%20Logo-2.png?width=62&height=60&name=City%20Hive%20Logo-2.png)
Setting Up Military, First Responder, and Teacher Discounts (POS)
This training provides essential information on setting up special discounts for military personnel, first responders, and teachers within the CityHive platform. We will guide you through creating both an in-store coupon and an ongoing automatic discount to support these valued community members.
1. Discount Workflow Overview
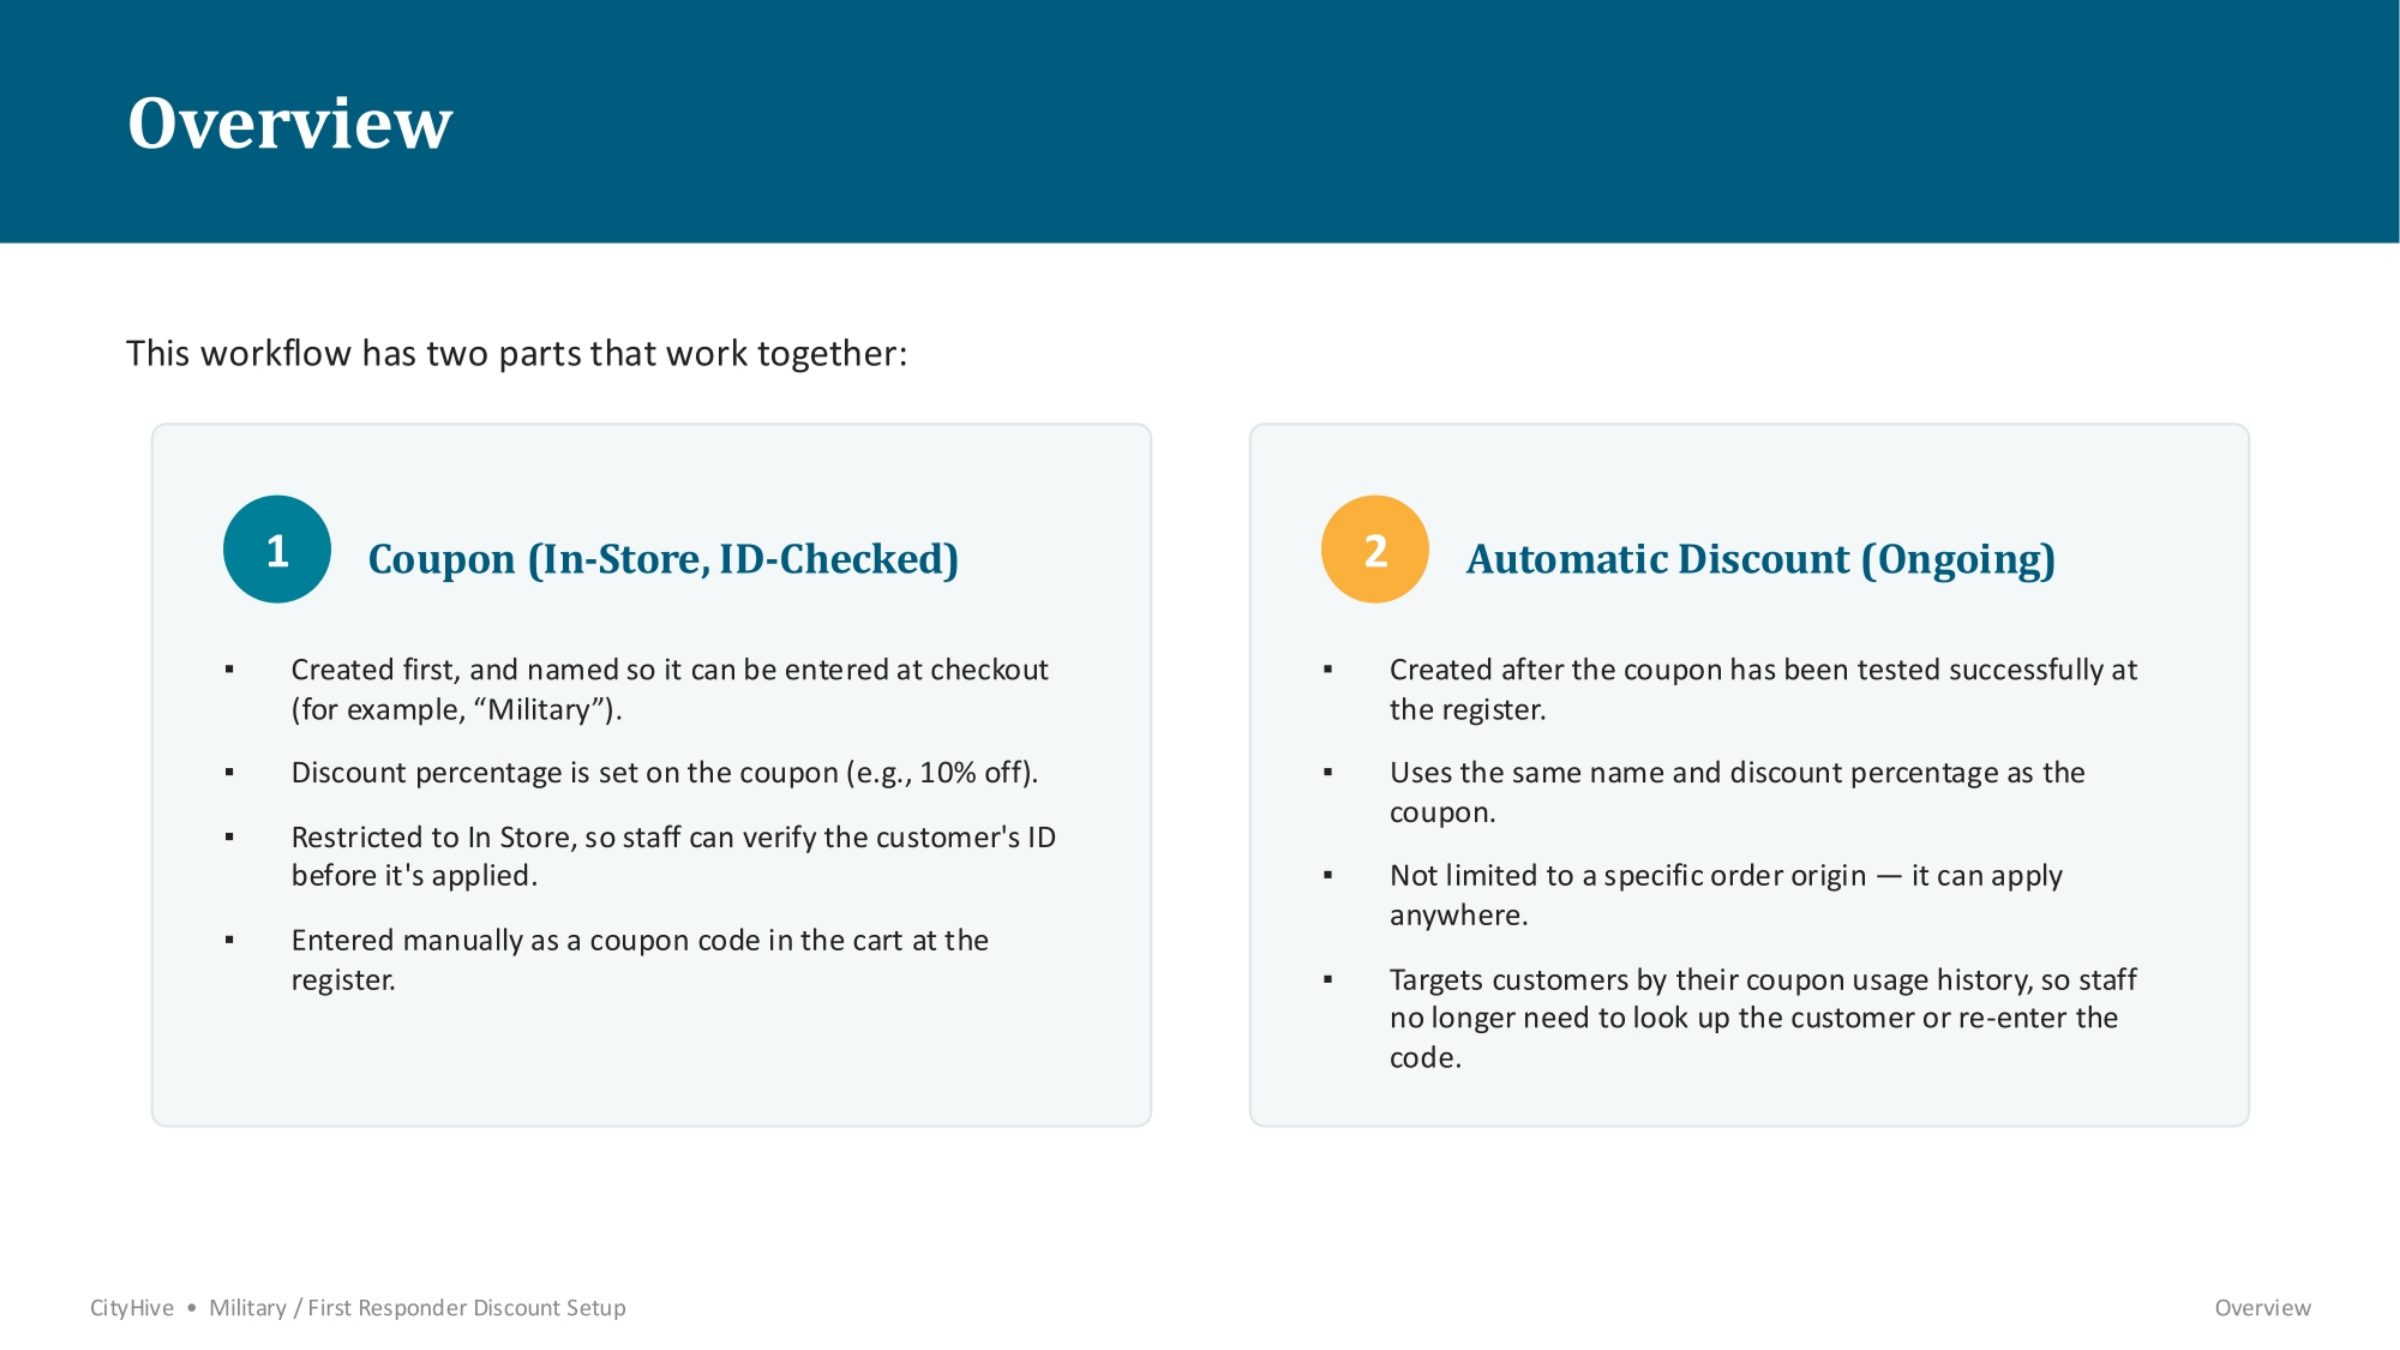
This discount workflow involves two interconnected parts. First, a coupon is created for in-store use, requiring ID verification. Once that's successfully tested, an automatic, ongoing discount is established, which applies to customers based on their prior coupon usage, streamlining future purchases.
2. Initiating a New Coupon Setup
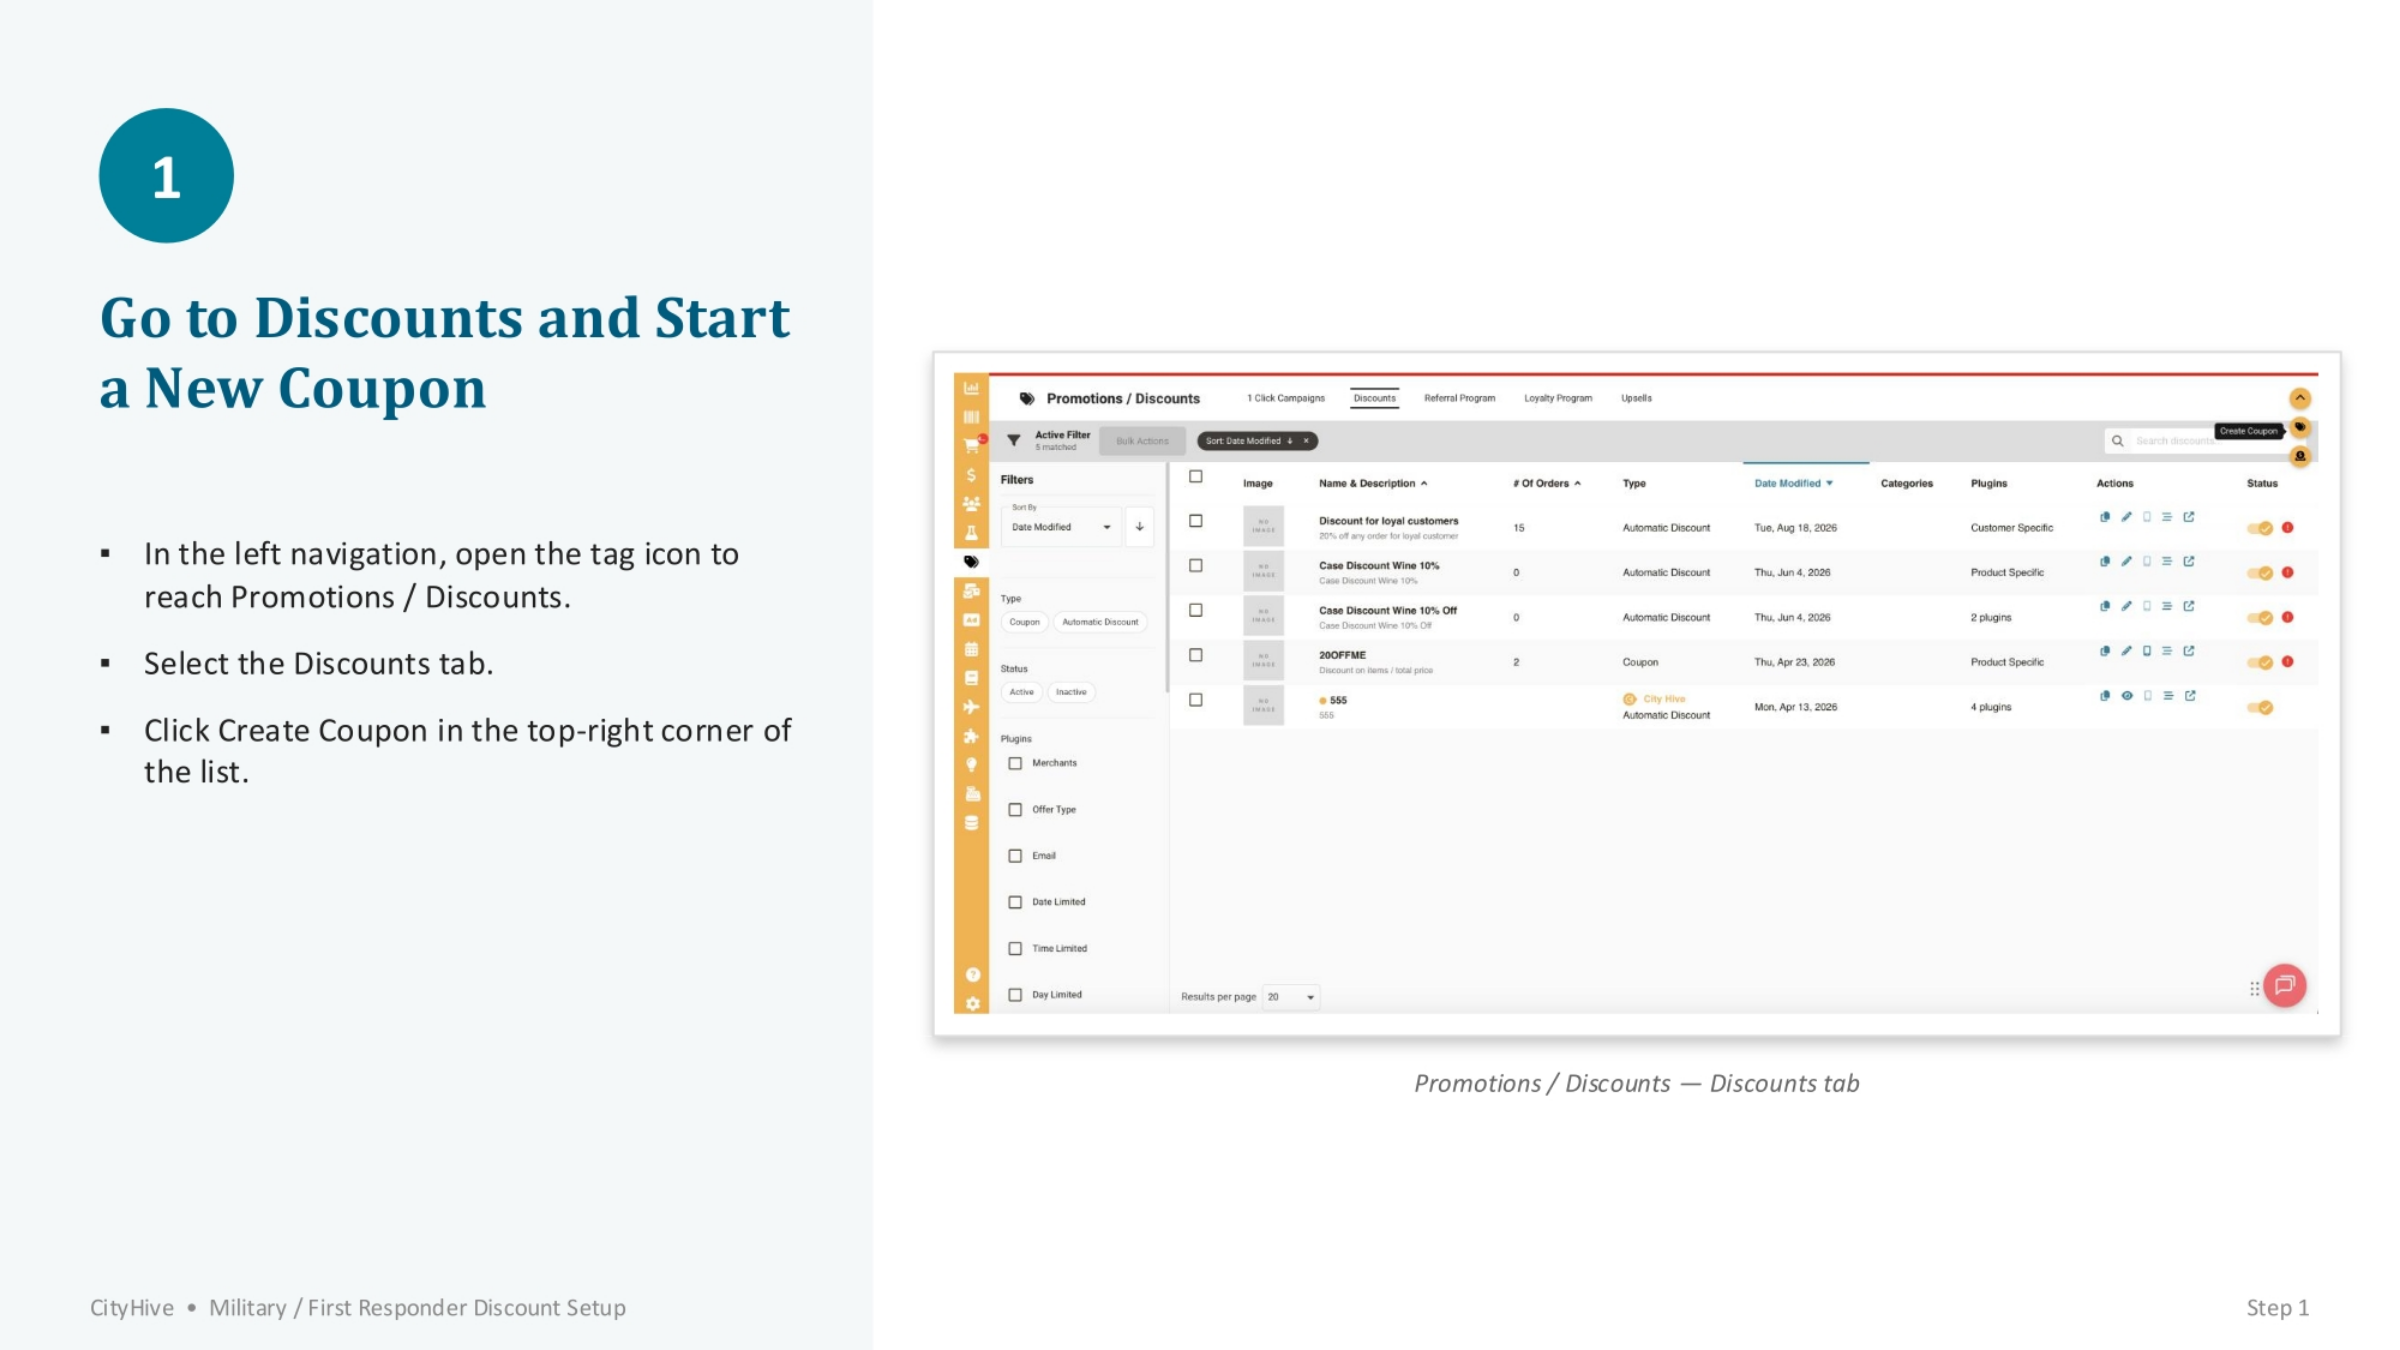
To begin, navigate to the Promotions and Discounts section using the tag icon in the left navigation menu. From there, select the Discounts tab. Once on the Discounts page, locate and click the 'Create Coupon' button in the top-right corner of the list to start setting up your new discount.
3. Selecting the Coupon Template
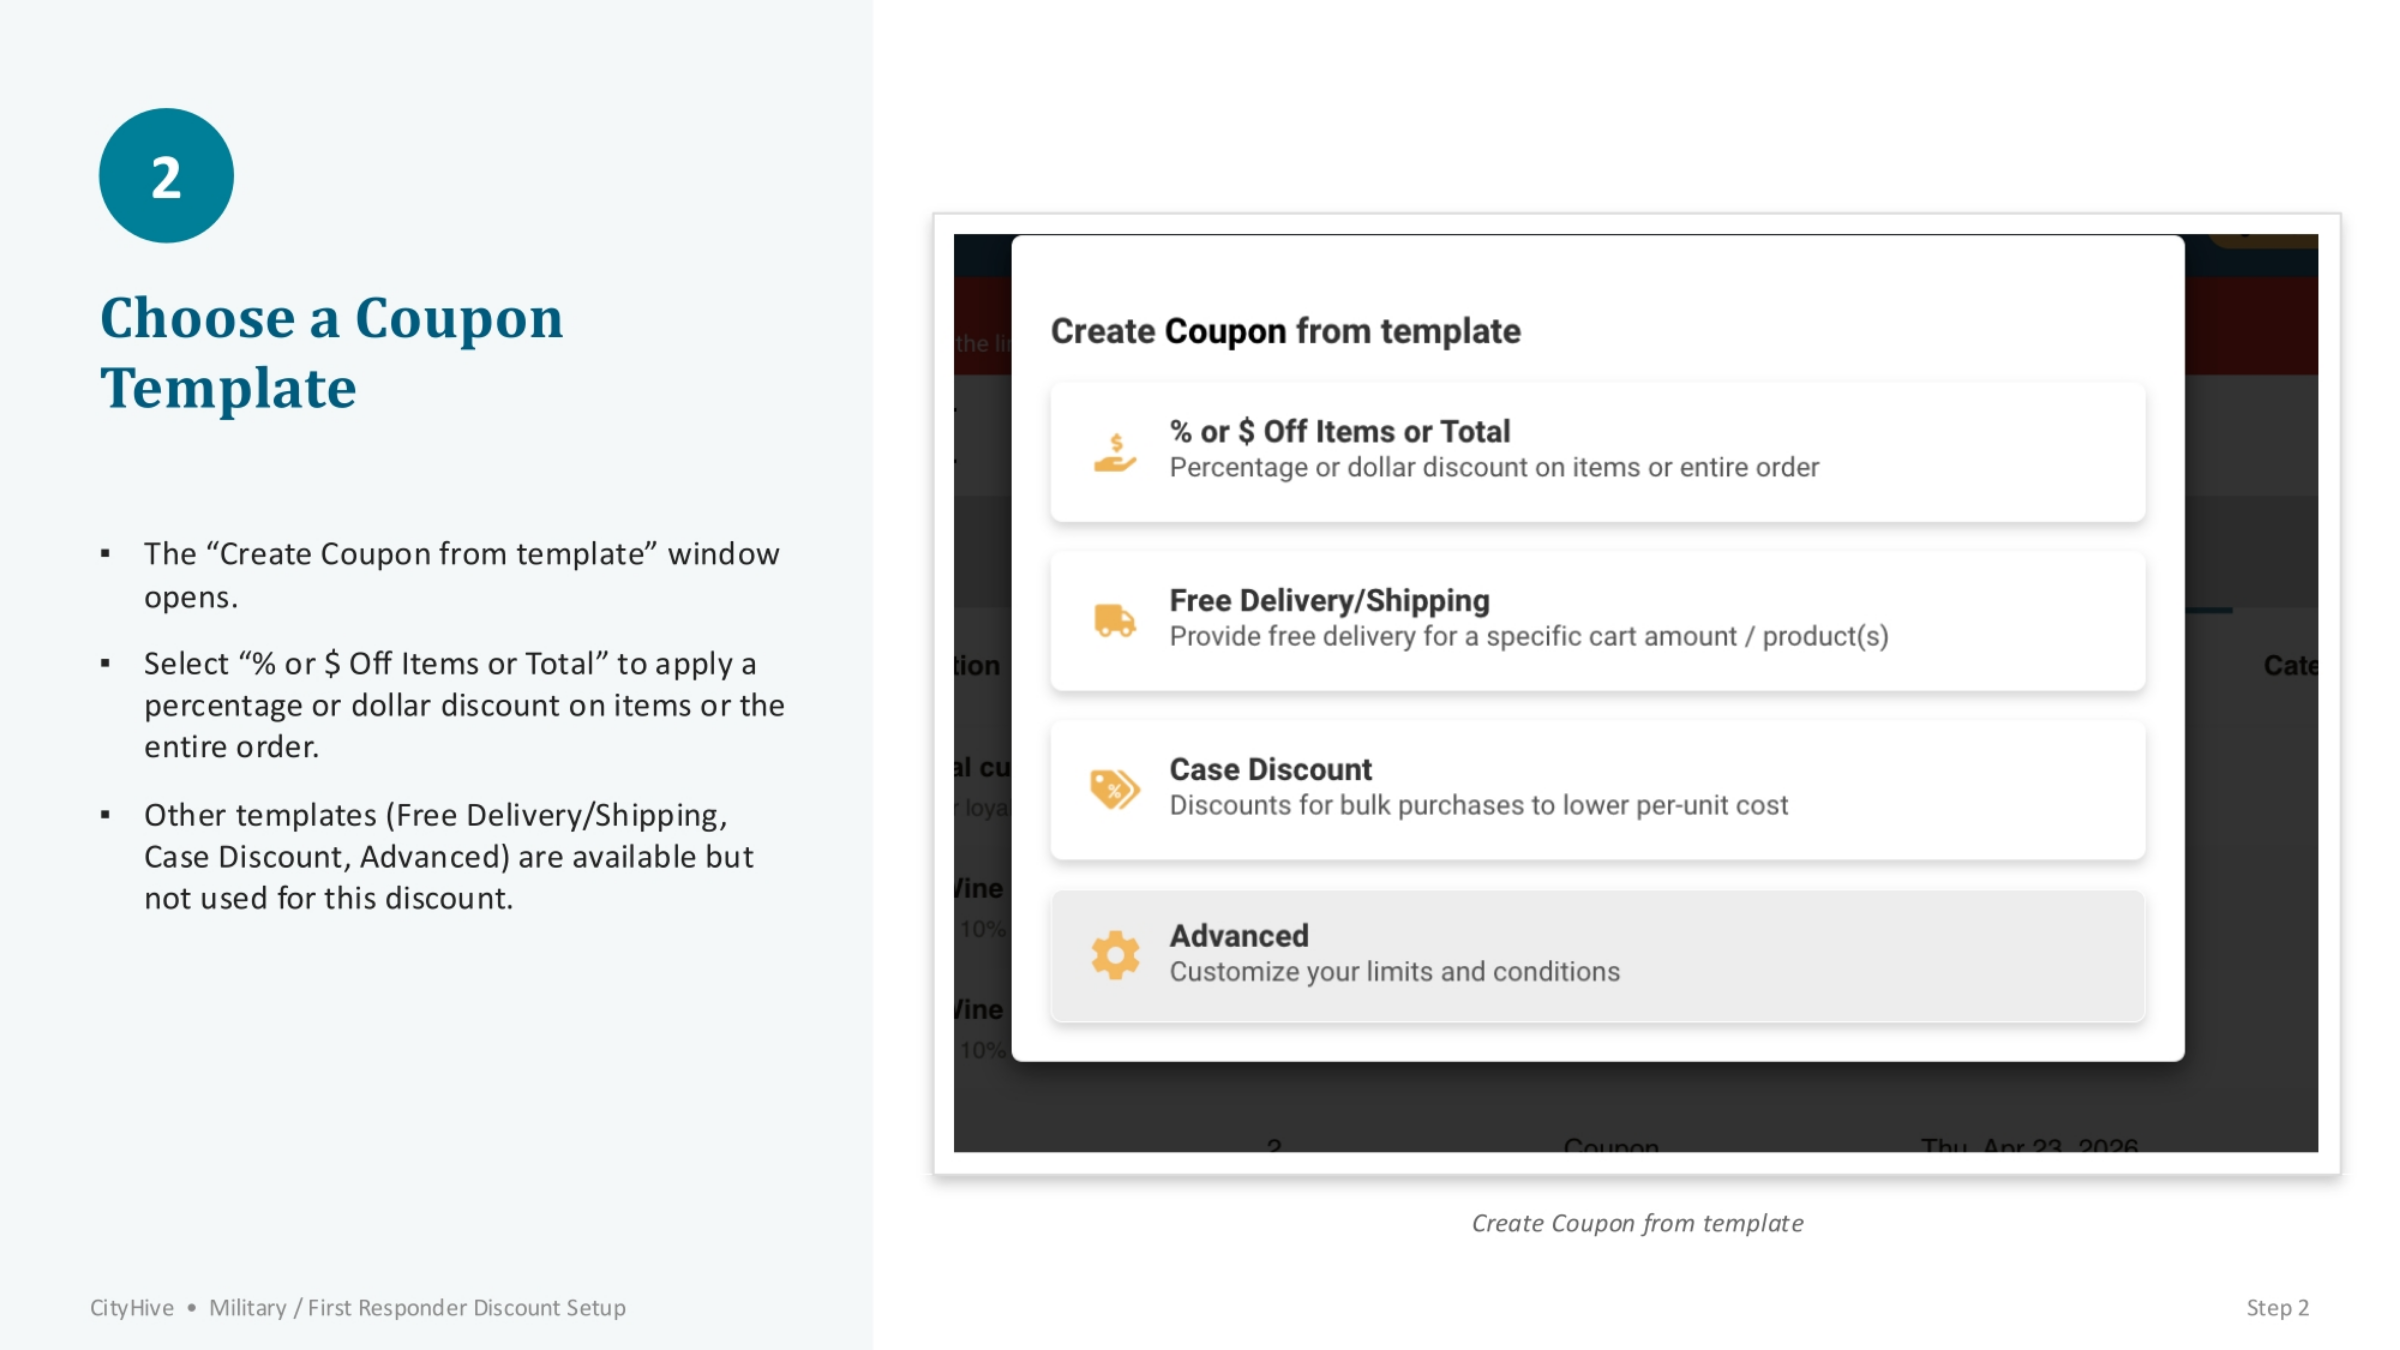
Upon clicking 'Create Coupon,' a 'Create Coupon from template' window will appear. For this type of discount, you'll need to select the '% or $ Off Items or Total' option. This template allows you to apply either a percentage or a fixed dollar amount discount to specific items or the entire order. Other templates, such as Free Delivery/Shipping or Case Discount, are available but are not used for this particular setup.
4. Naming the Coupon and Defining Discount
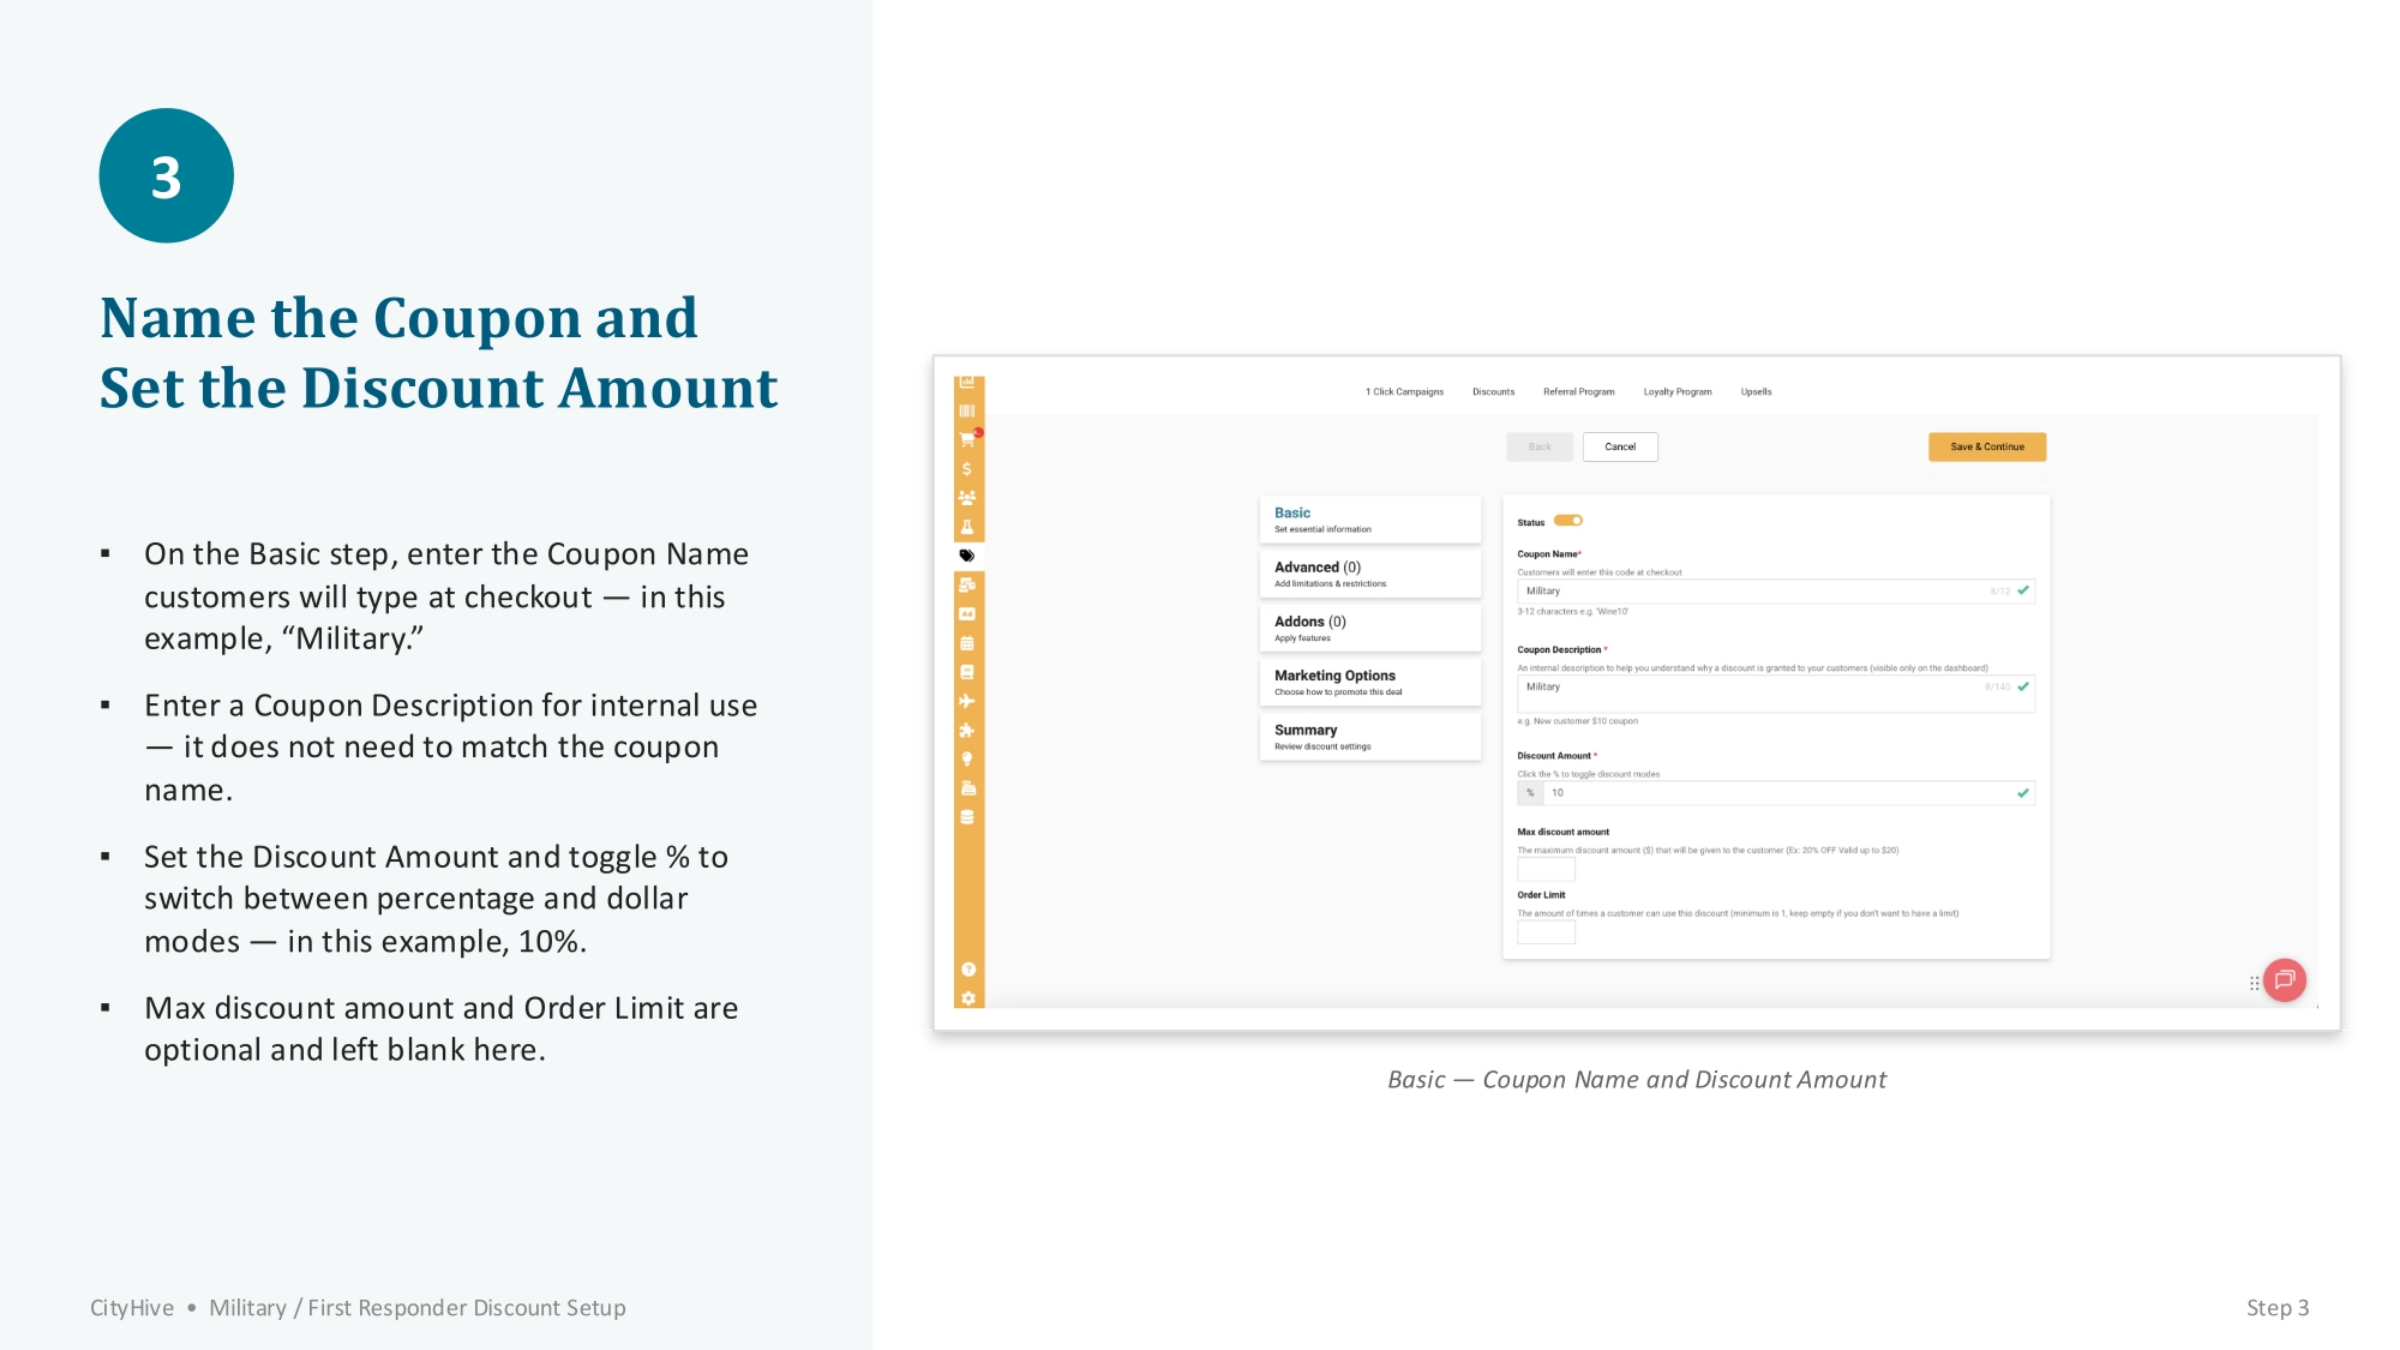
On the Basic step, you'll define the coupon's core details. Enter a clear 'Coupon Name' that customers will type at checkout, such as 'Military.' Provide an internal 'Coupon Description' for your team's reference, which doesn't need to match the customer-facing name. Finally, set the 'Discount Amount,' toggling to a percentage mode and entering the desired value, for example, 10%.
5. Restricting Coupon Redemption to In-Store
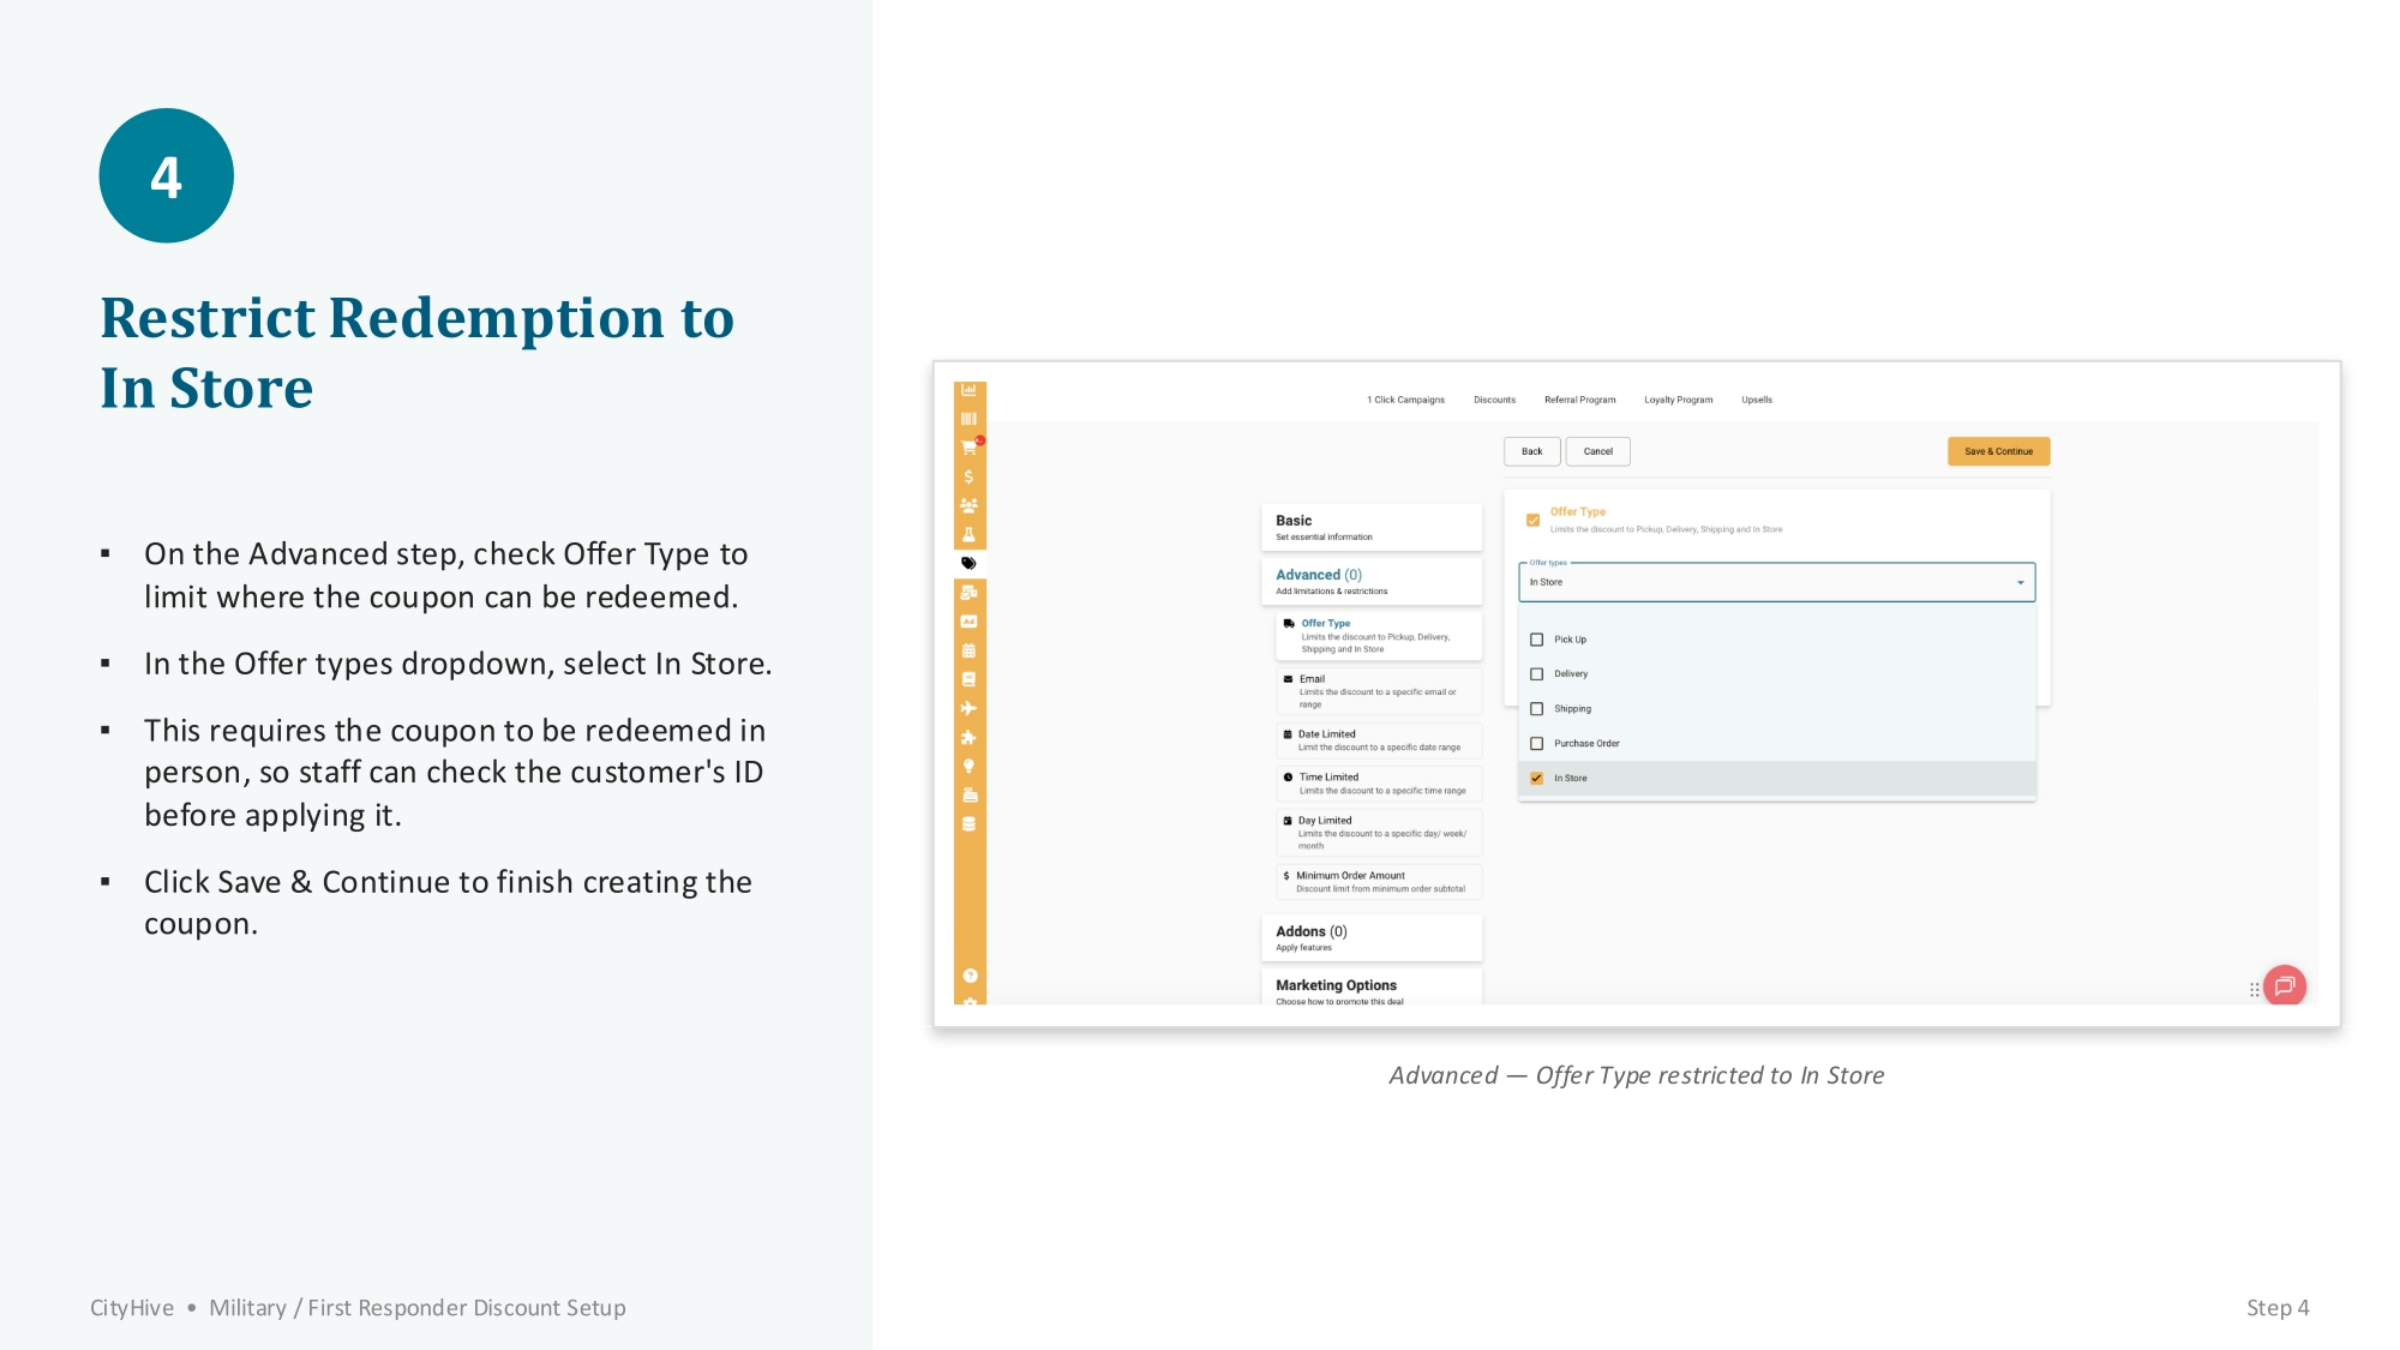
To ensure proper ID verification, you must restrict the coupon's redemption to in-store only. On the Advanced step, check the 'Offer Type' box to limit where the coupon can be redeemed. From the 'Offer types' dropdown menu, select 'In Store.' This crucial step ensures that staff can physically check the customer's identification before the discount is applied. Once configured, click 'Save & Continue' to finalize the coupon creation.
6. Verifying Coupon List Appearance
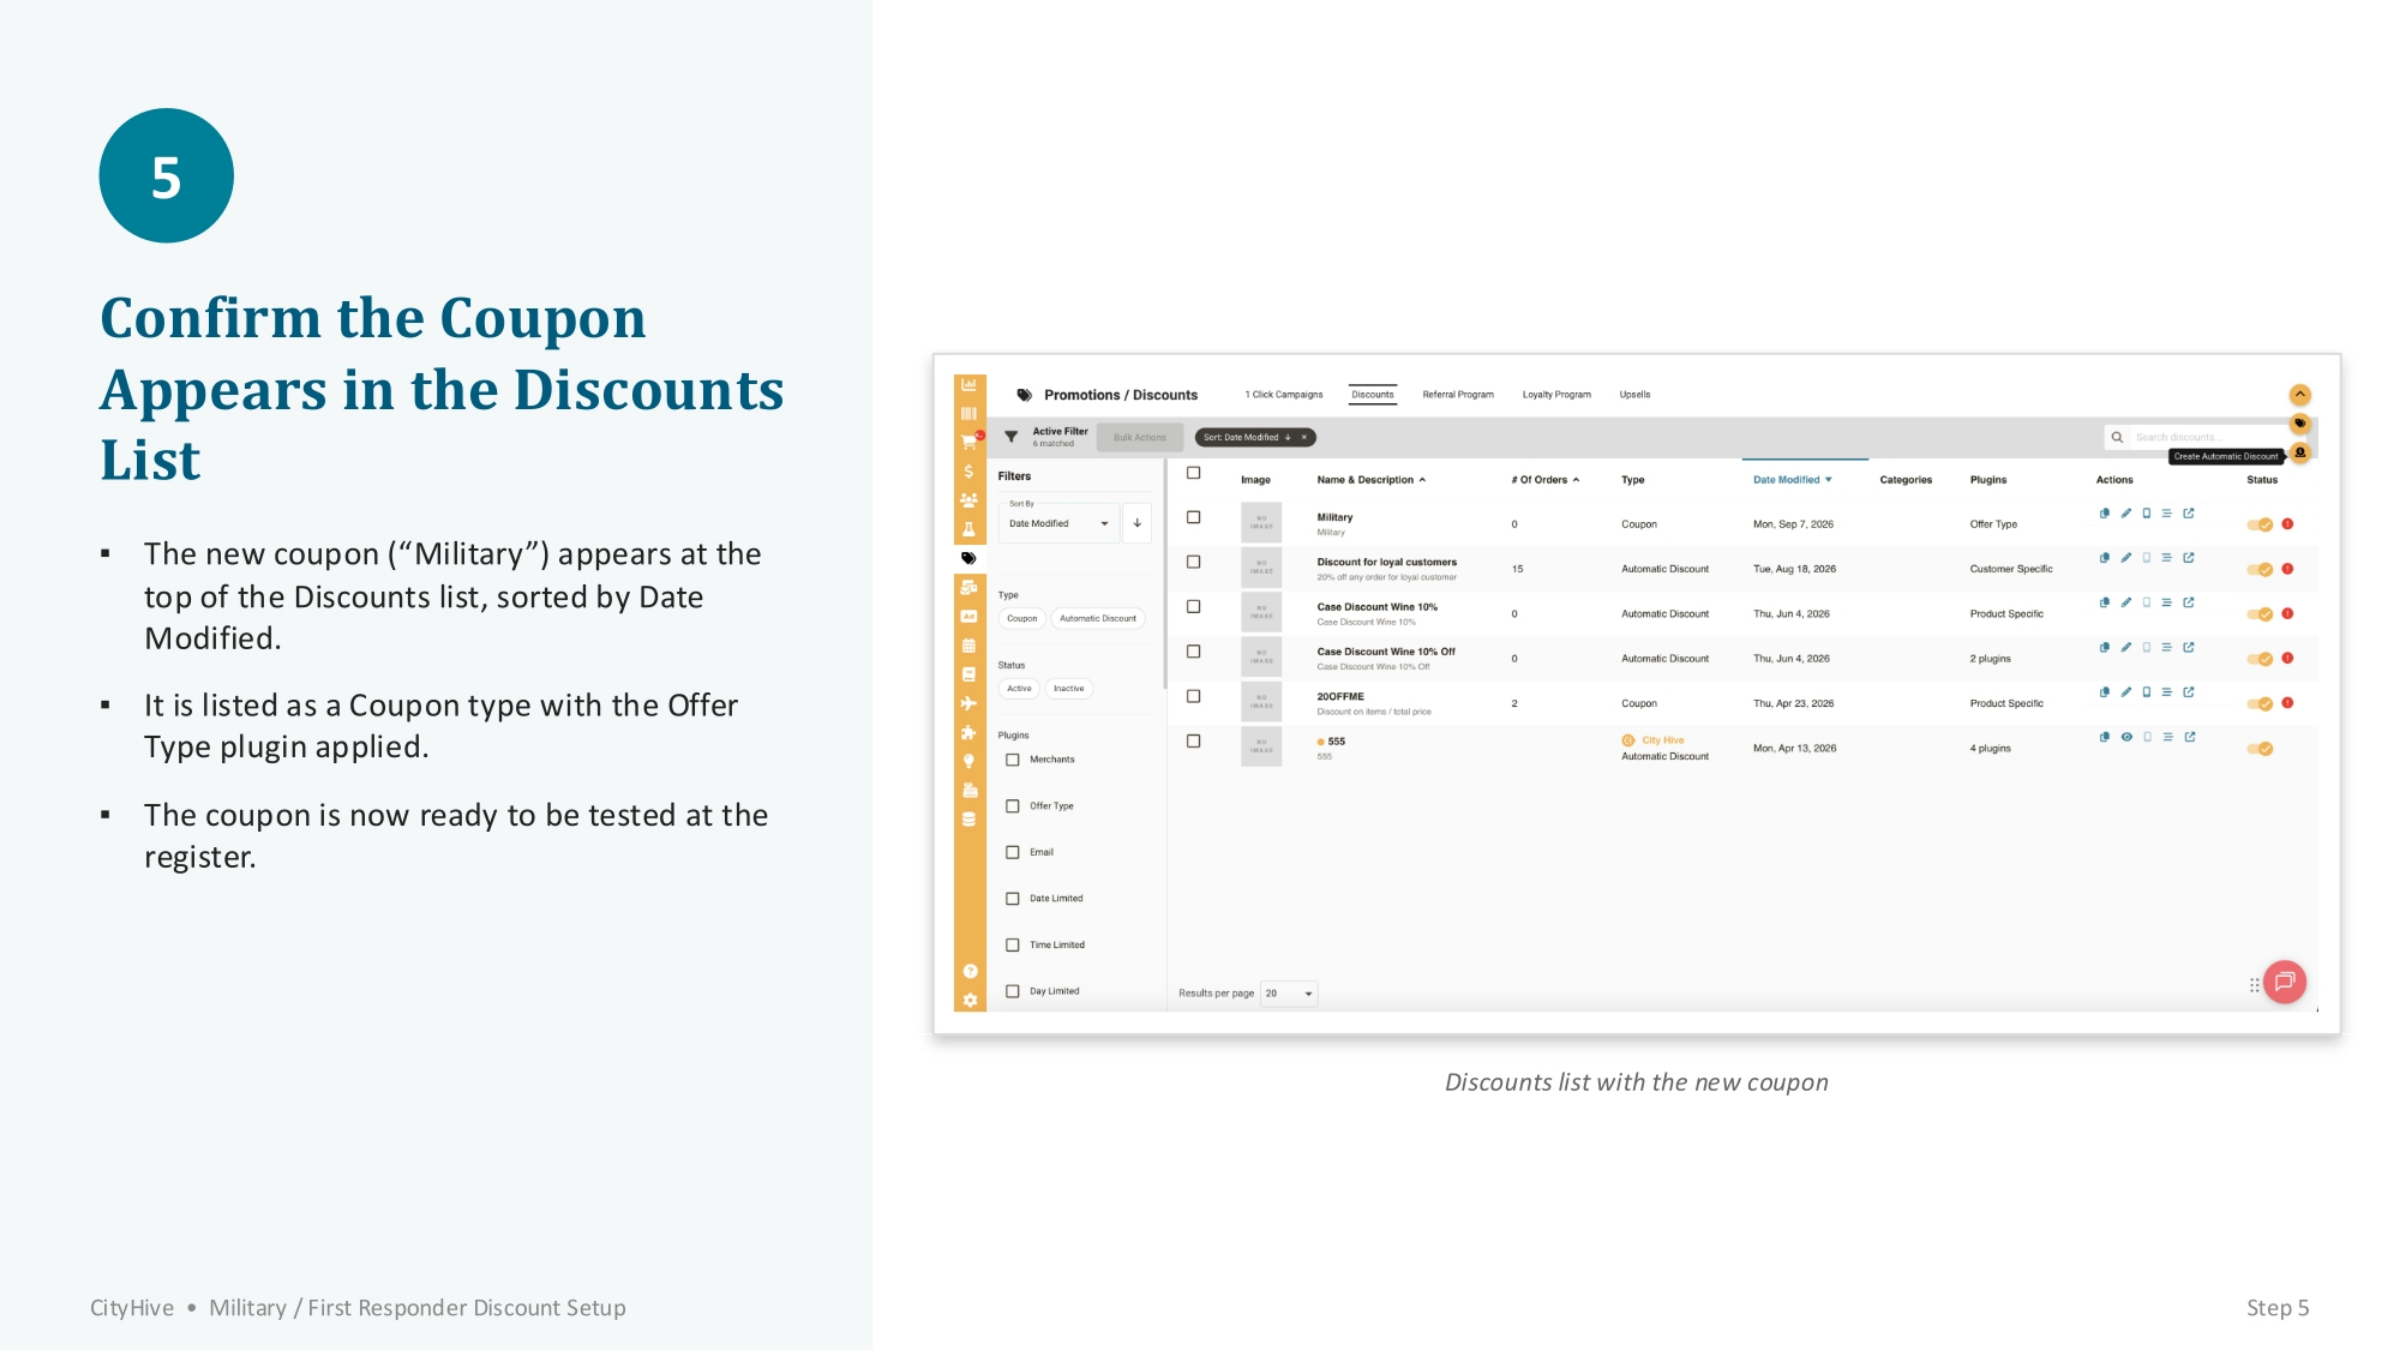
After saving, confirm that your new coupon, for instance, 'Military,' now appears at the top of your Discounts list. It should be sorted by 'Date Modified' and clearly listed as a 'Coupon' type, indicating that the 'Offer Type' plugin has been successfully applied. At this point, the coupon is fully configured and ready for testing at the register to ensure it functions as intended.
7. Applying the Coupon Code
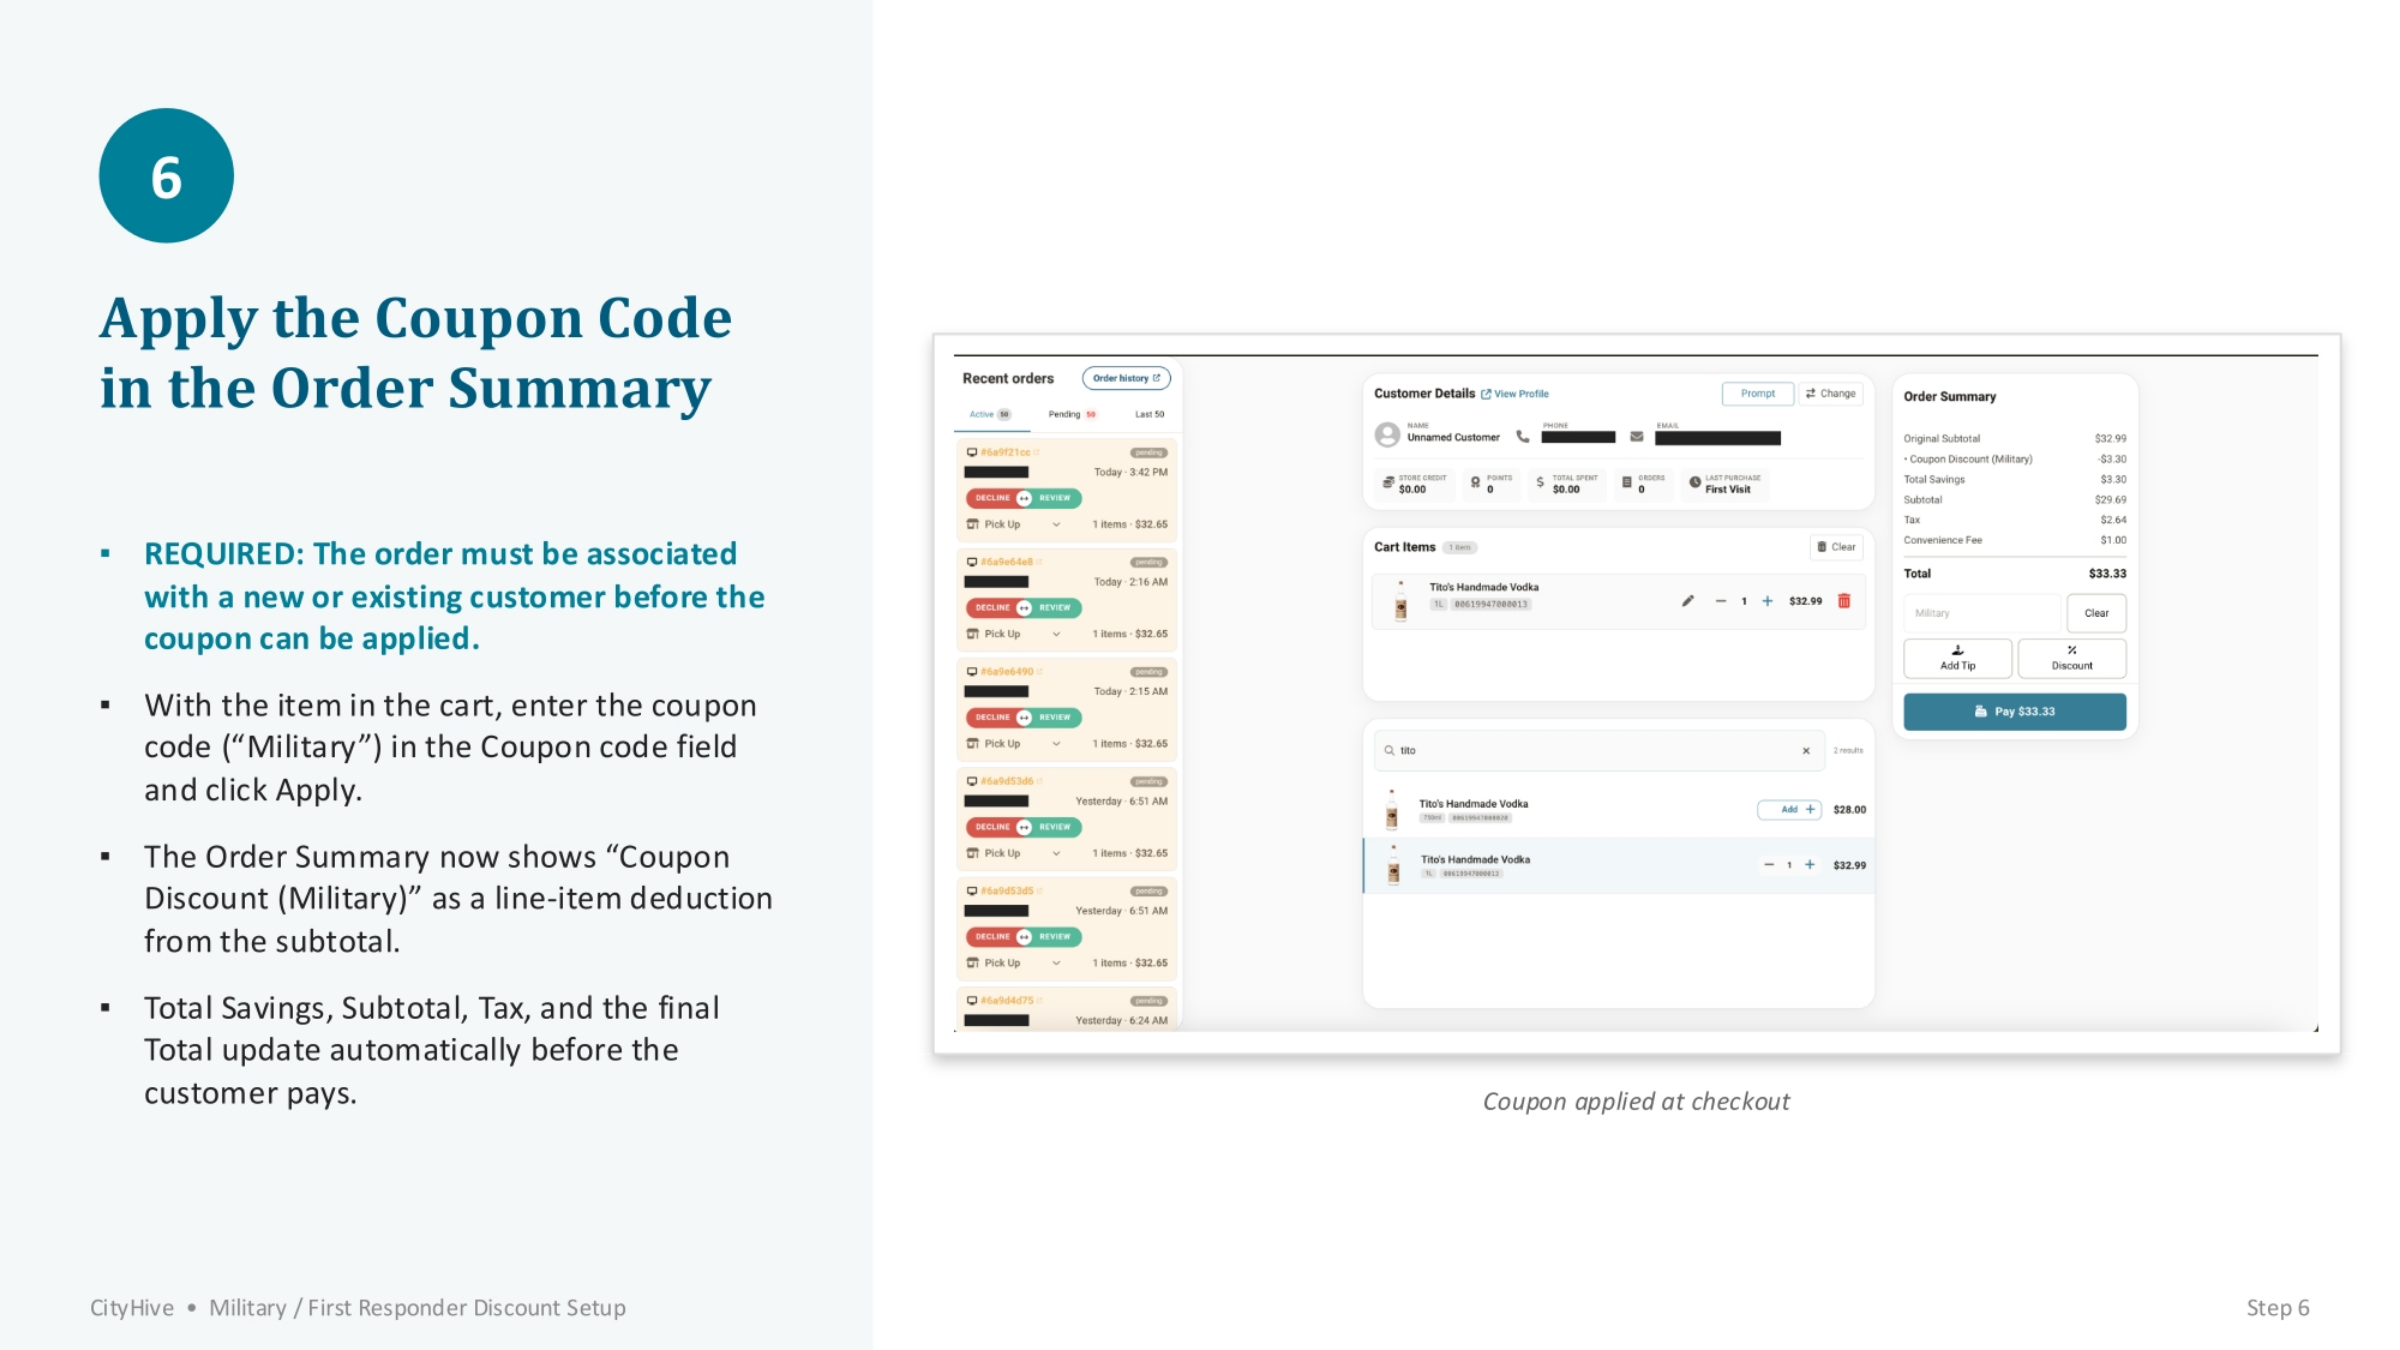
Before applying the coupon, it's essential that the order is associated with either a new or existing customer. With the item in the cart, proceed to enter the coupon code, such as 'Military,' into the designated 'Coupon code' field and click 'Apply.' The 'Order Summary' will then update, displaying 'Coupon Discount (Military)' as a line-item deduction from the subtotal, and the total savings, subtotal, tax, and final total will automatically adjust.
8. Setting Up the Automatic Discount
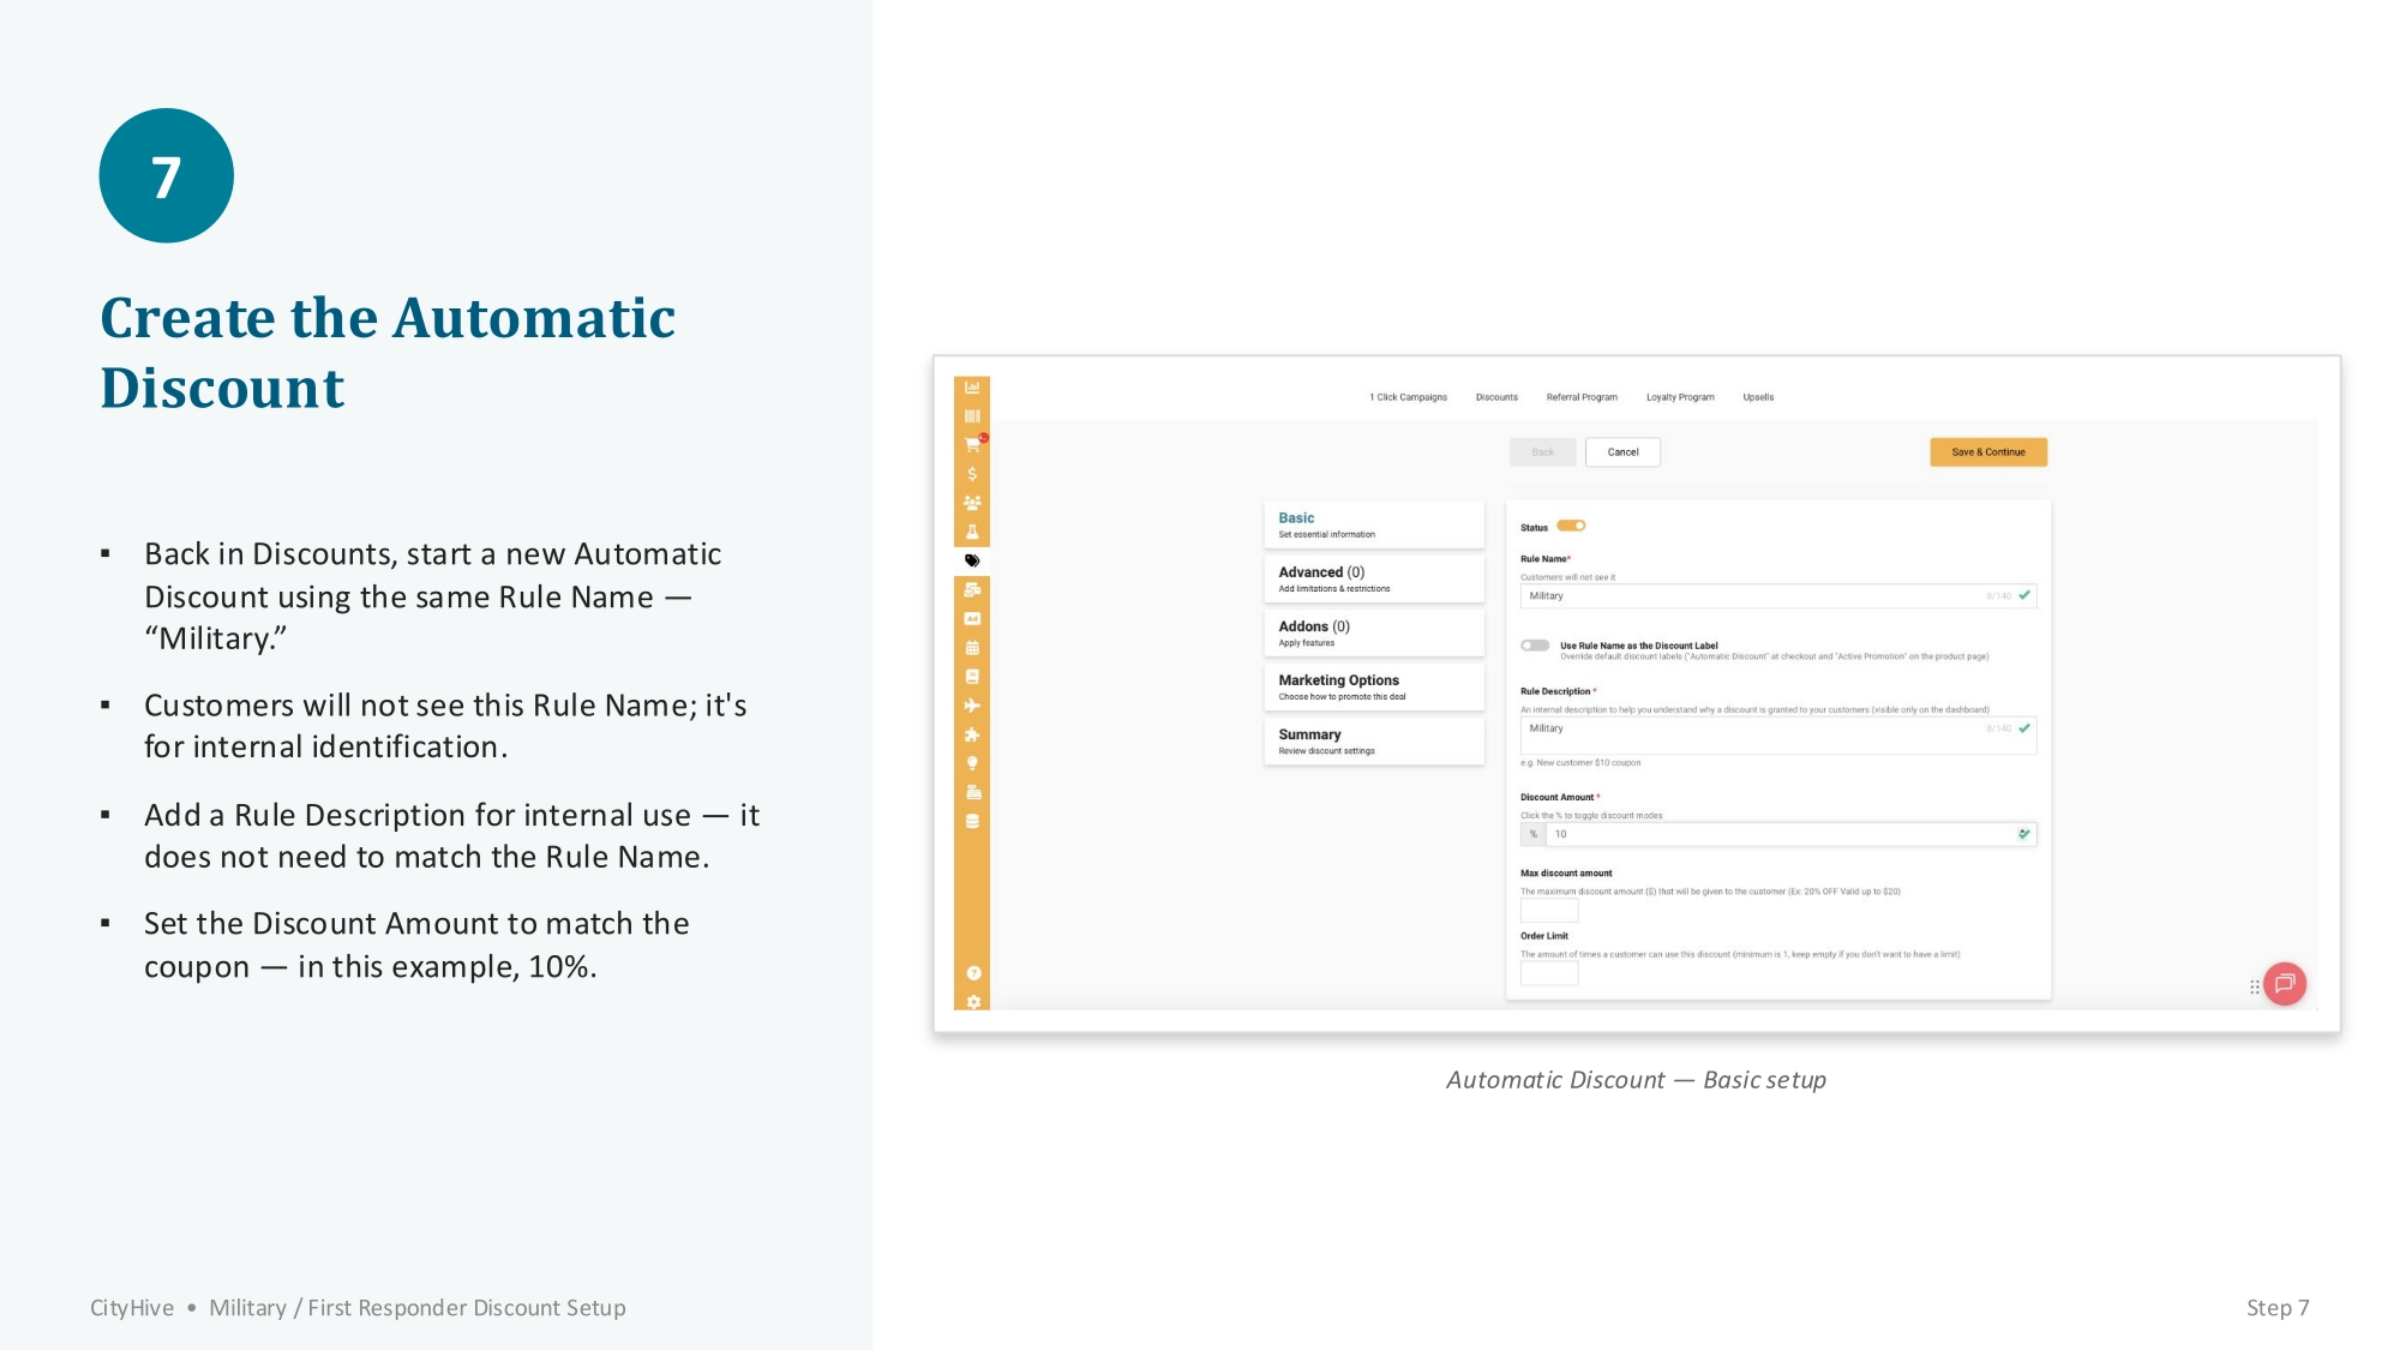
Once the initial coupon is tested, return to the Discounts section to create the automatic discount. Start a new 'Automatic Discount' and use the same 'Rule Name' and percentage as your initial coupon, for example, 'Military.' This rule name is for internal identification only; customers will not see it. Also, add a 'Rule Description' for internal use and set the 'Discount Amount' to match the coupon, typically 10%.
9. Unrestricted Offer Type for Automatic Discount
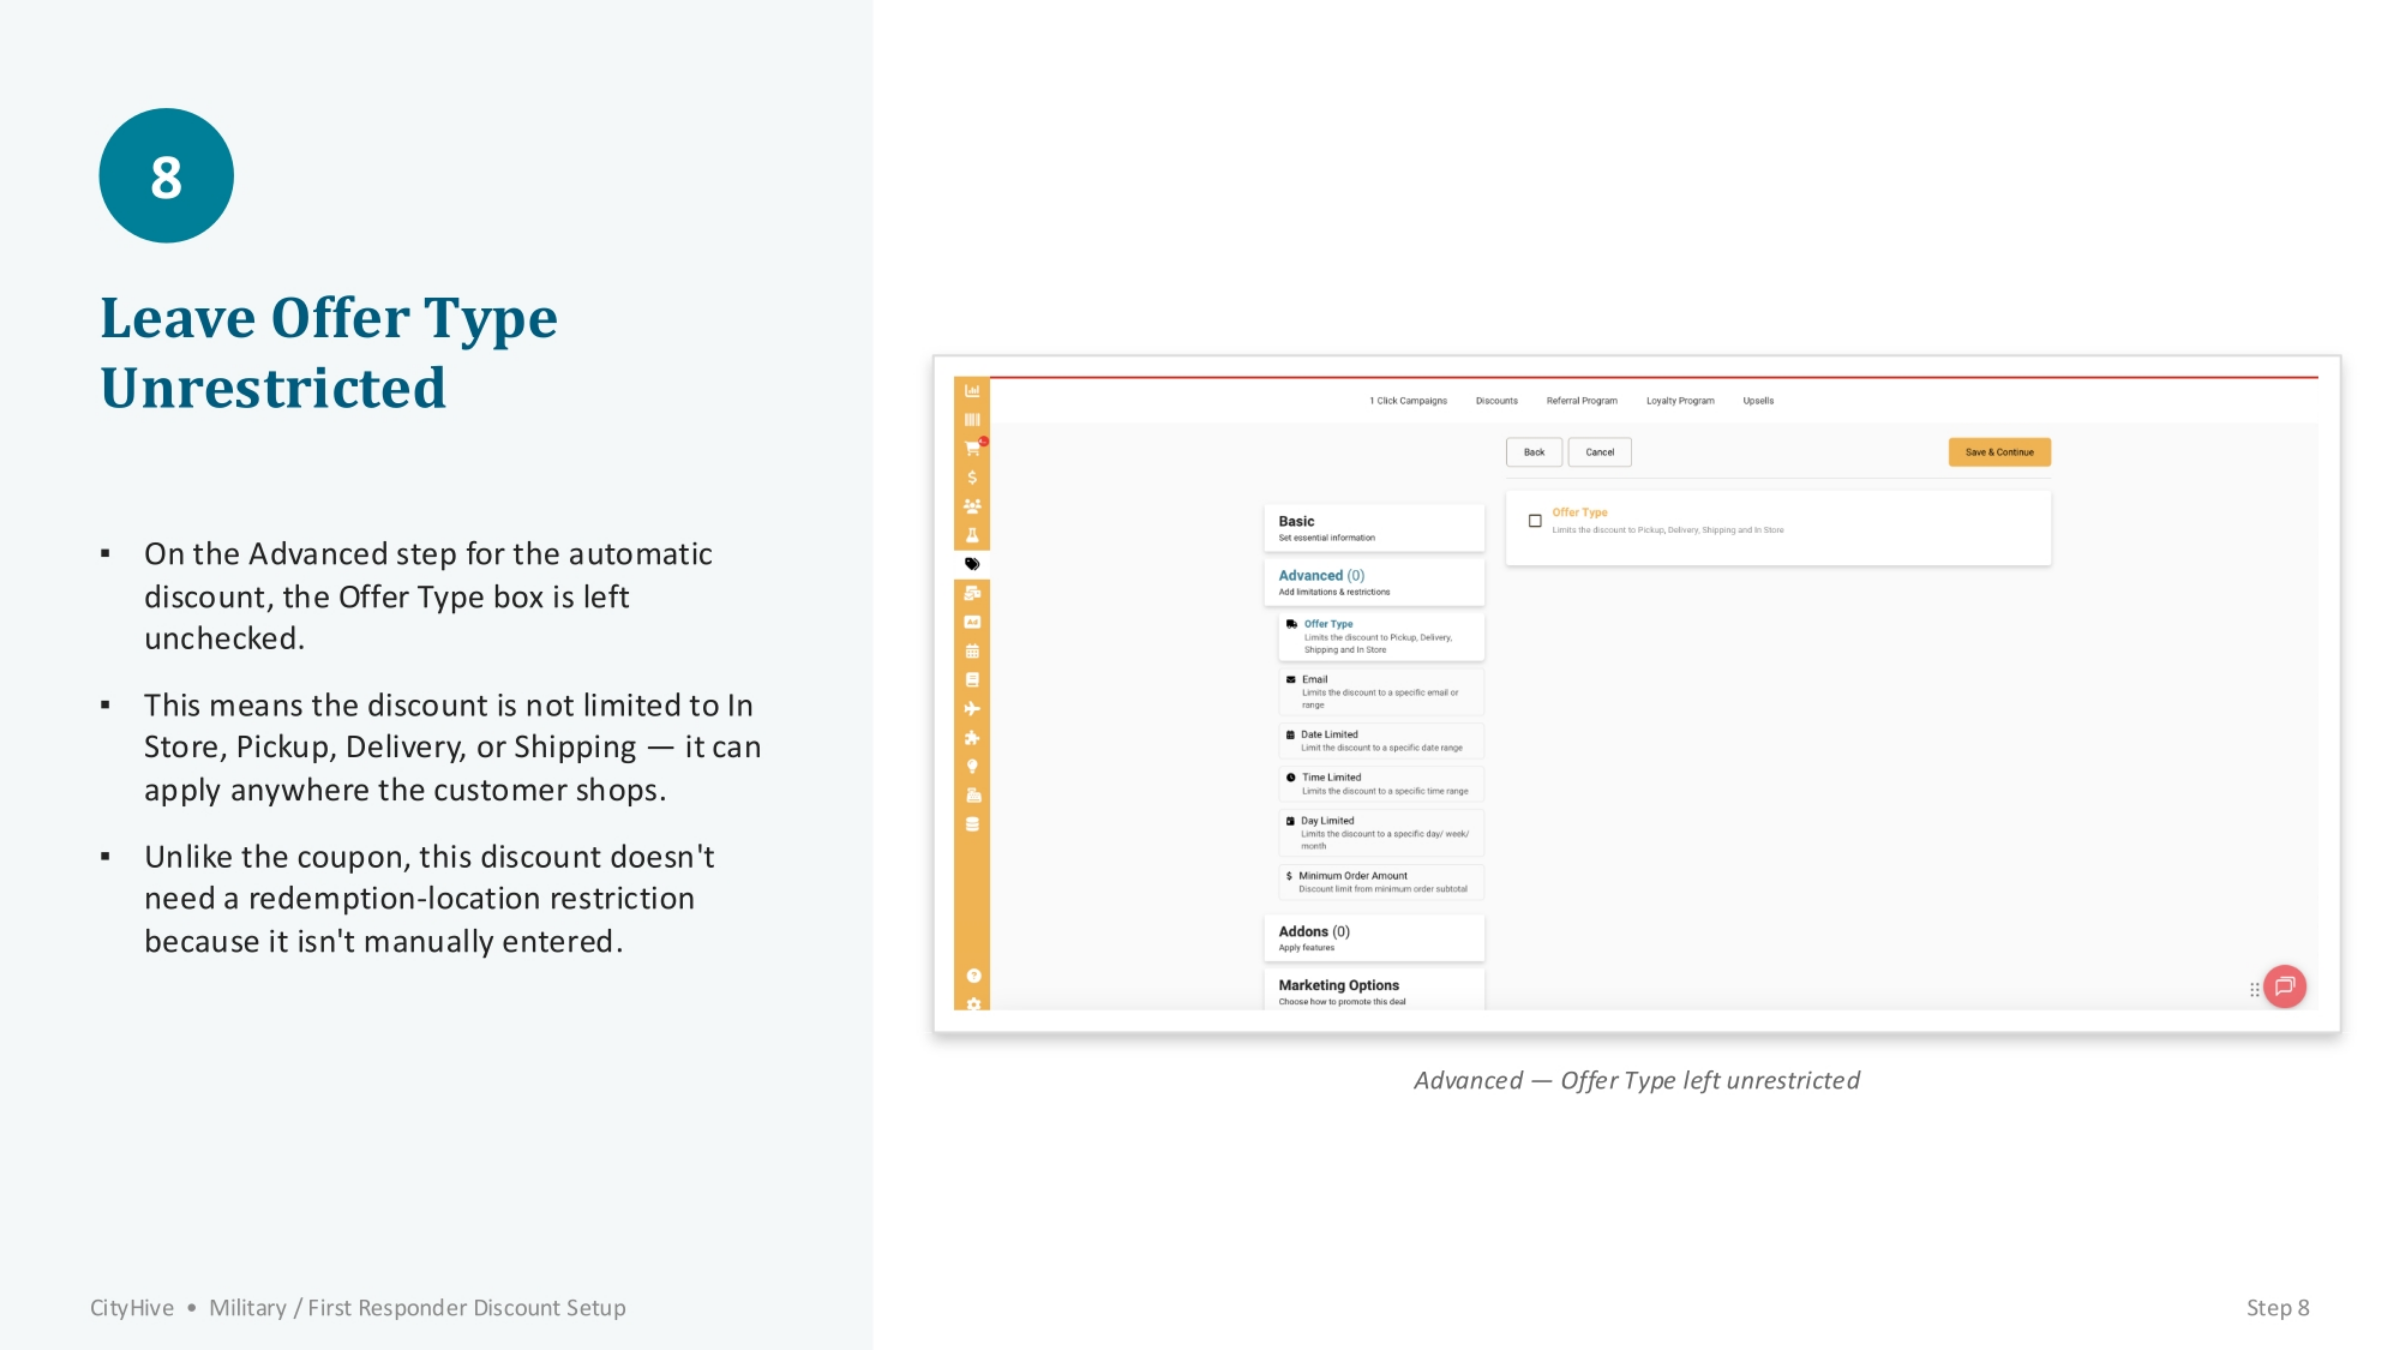
For the automatic discount, it's important to leave the 'Offer Type' unrestricted. On the Advanced step, ensure the 'Offer Type' box is left unchecked. This allows the discount to apply across all order origins, including in-store, pickup, delivery, or shipping, providing maximum flexibility. Unlike the initial coupon, this automatic discount doesn't require a redemption-location restriction because it's not manually entered by the customer.
10. Targeting Customers by Coupon Usage
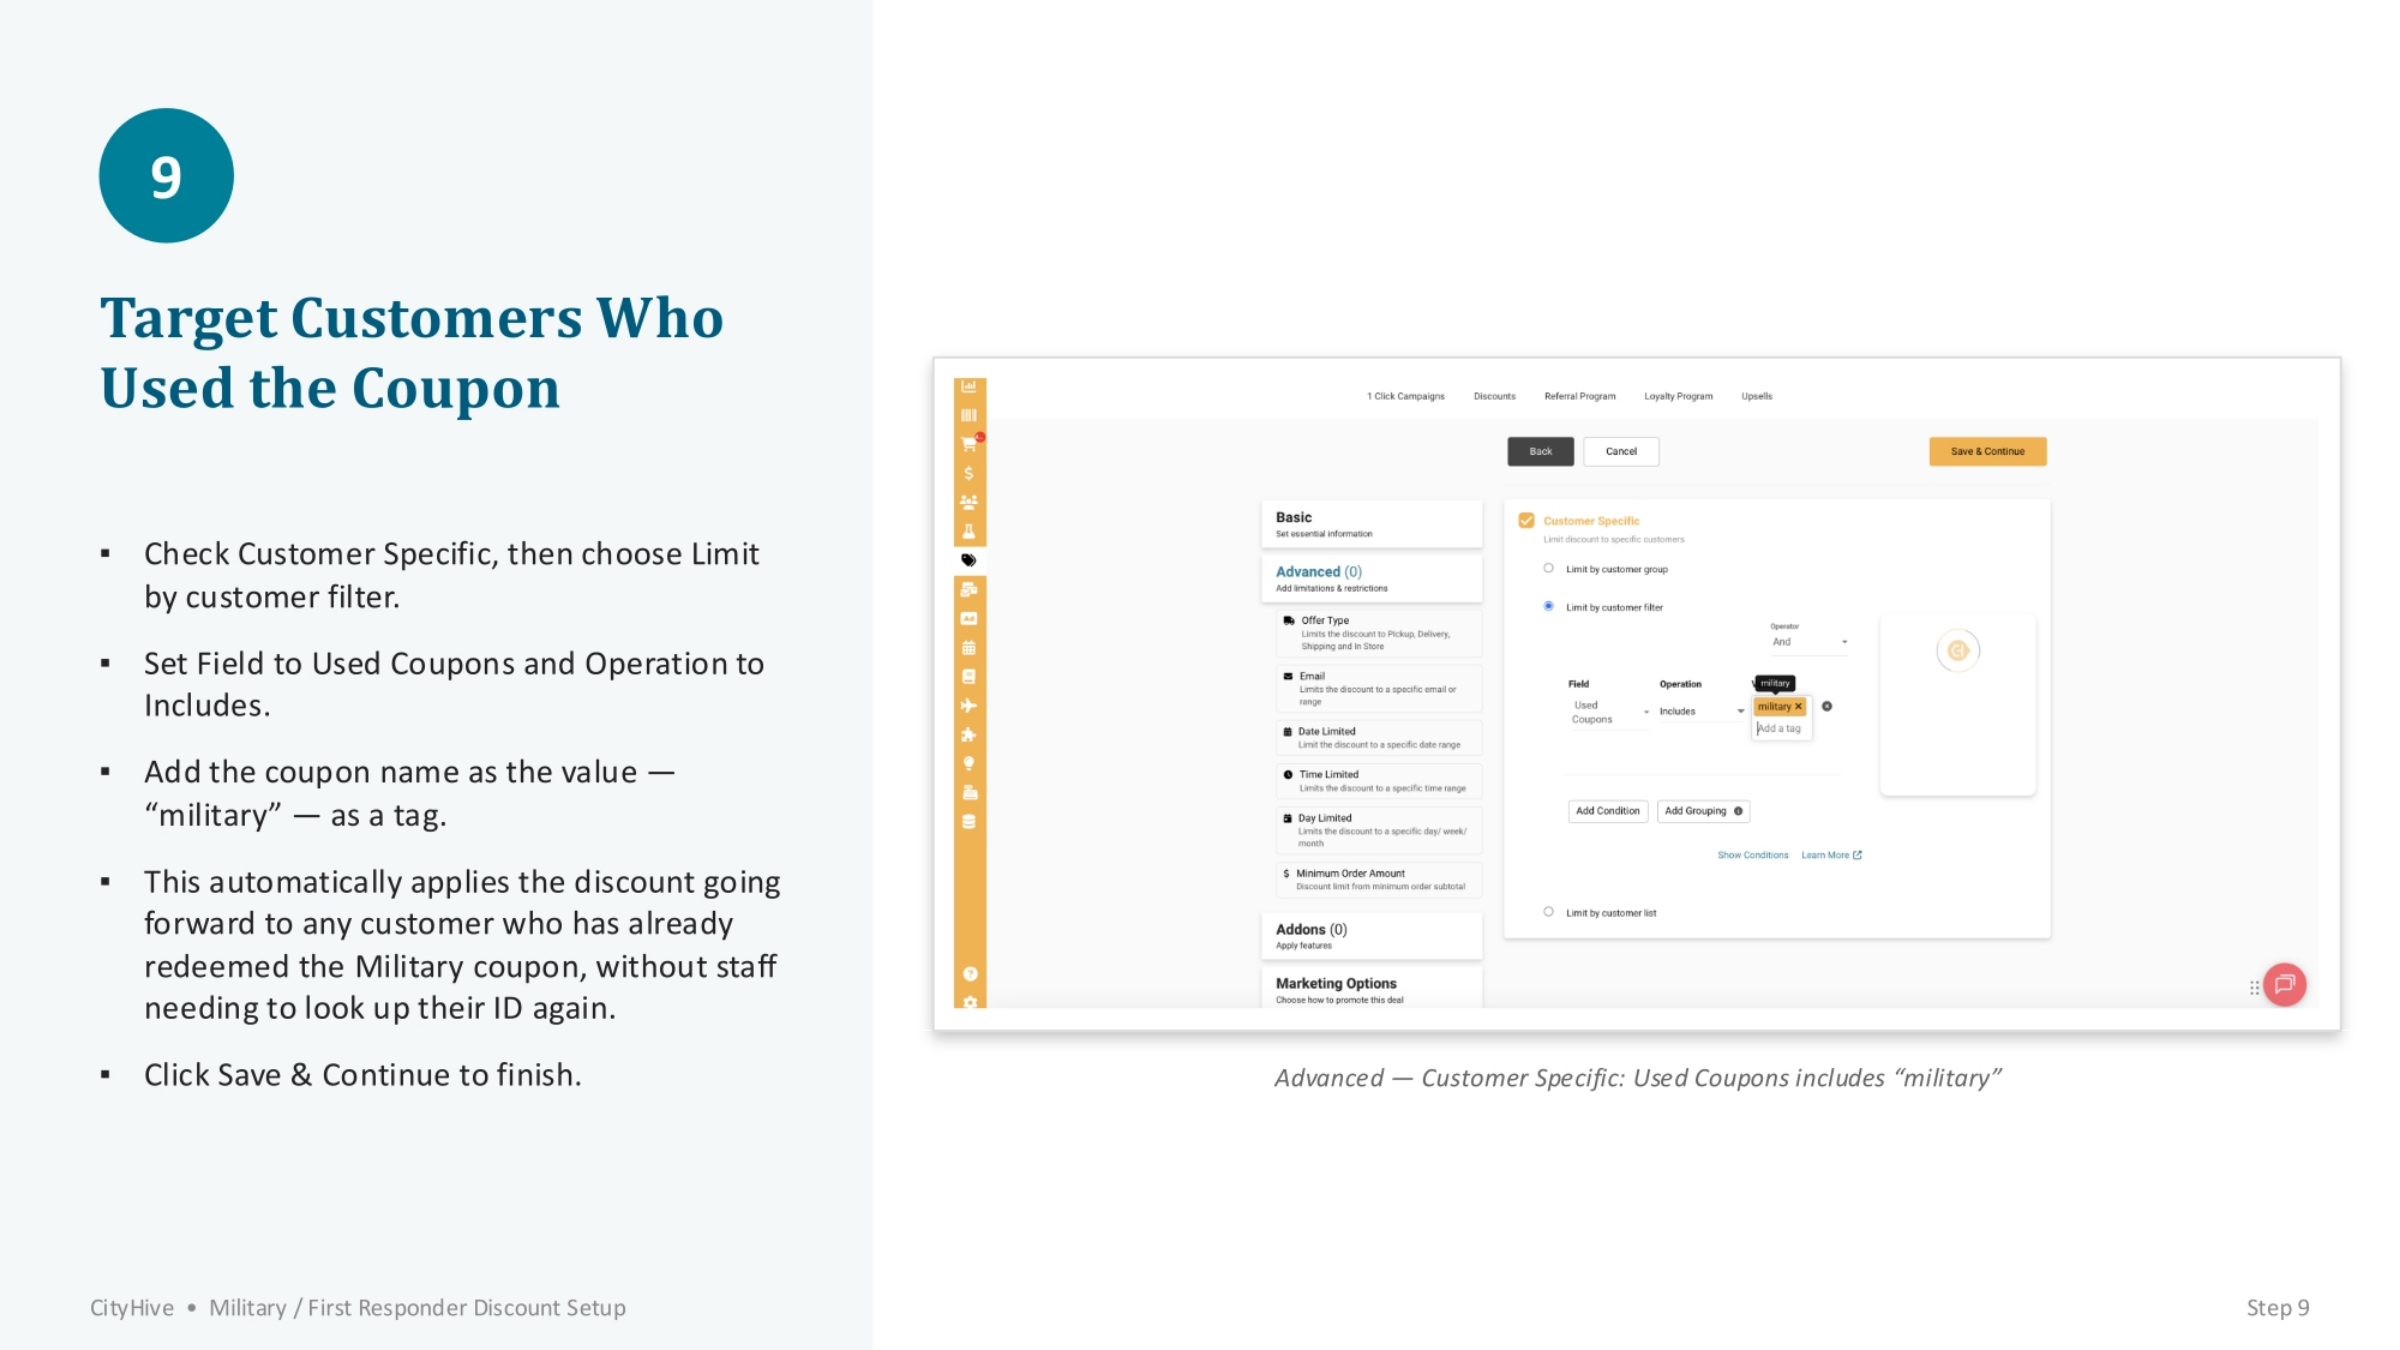
To ensure the automatic discount applies correctly, you need to target customers who have already used the initial coupon. Check 'Customer Specific' and choose to limit by customer filter. Set the 'Field' to 'Used Coupons' and the 'Operation' to 'Includes,' then add the coupon name, 'military,' as the value. This configuration automatically applies the discount to future purchases from verified customers, eliminating the need for staff to repeatedly verify their ID.
11. Key Steps Recap
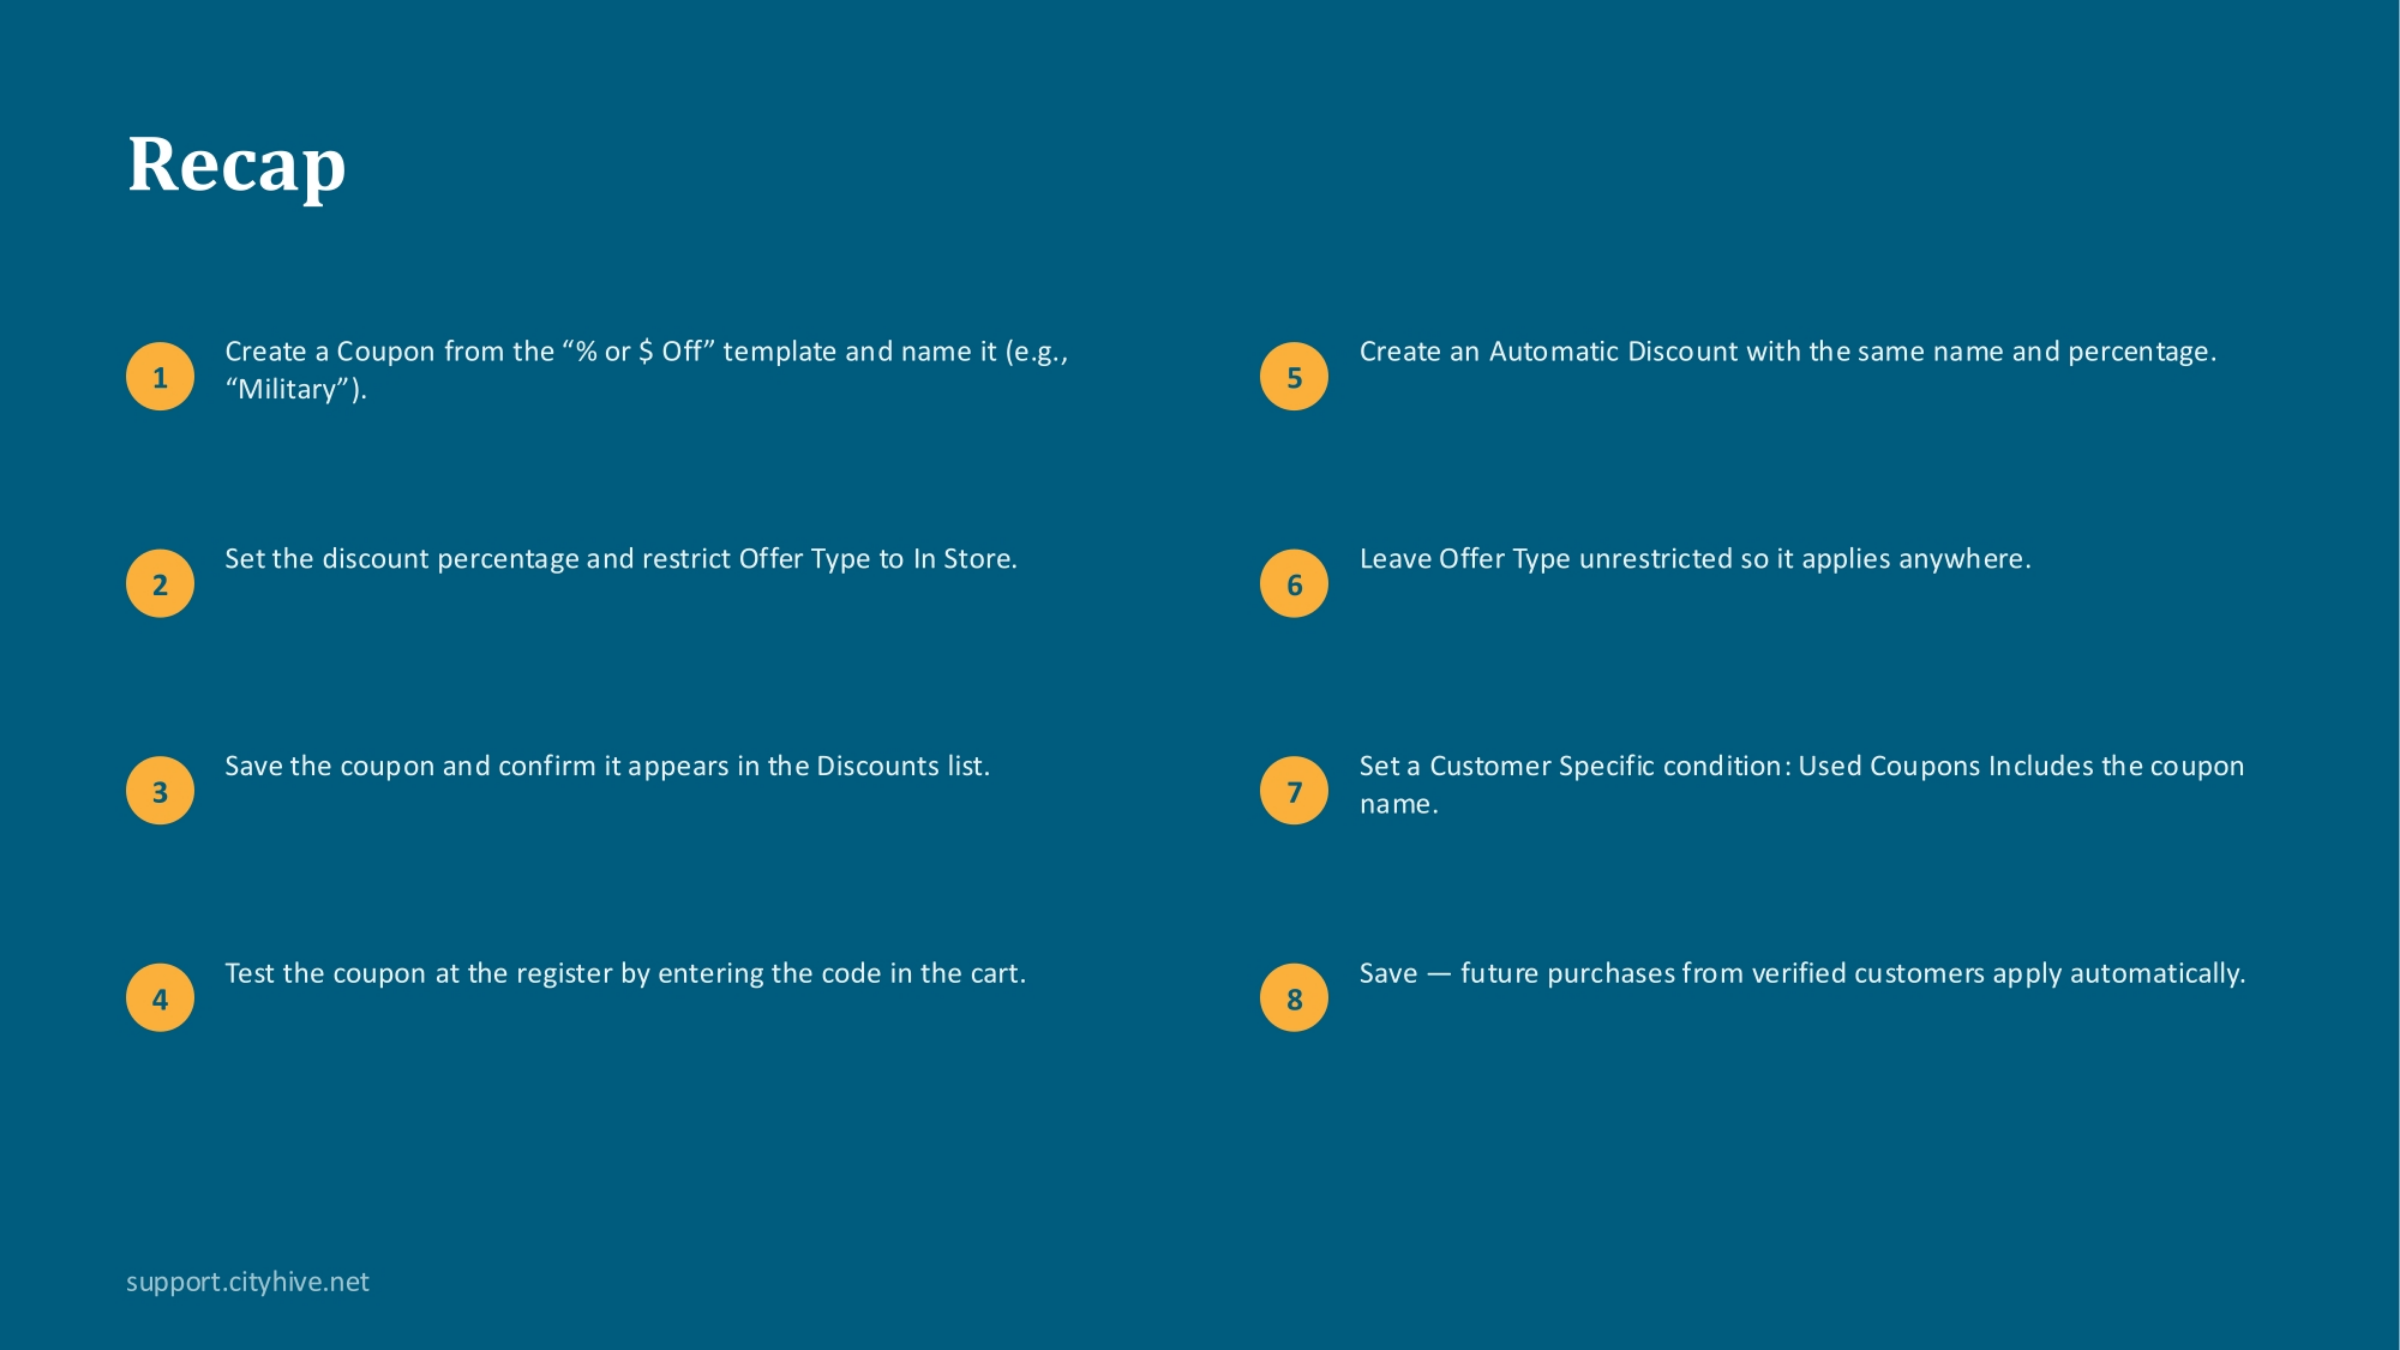
To recap, the process involves creating an in-store coupon with a specific name and percentage, restricting its offer type to in-store, and then testing it at the register. Following this, you create an automatic discount with the same name and percentage, leaving its offer type unrestricted, and setting a customer-specific condition to target those who previously used the coupon. This ensures future purchases from verified customers apply automatically.