![City Hive Logo-2.png]](https://support.cityhive.net/hs-fs/hubfs/City%20Hive%20Logo-2.png?width=62&height=60&name=City%20Hive%20Logo-2.png)
Manual Receiving by Scanning Cases & Bottles (POS)
This guide provides a step-by-step overview of manual receiving within CityHive. We will cover how to scan cases and bottles, match them to your catalog, and commit quantities to inventory.
1. How Manual Receiving Works
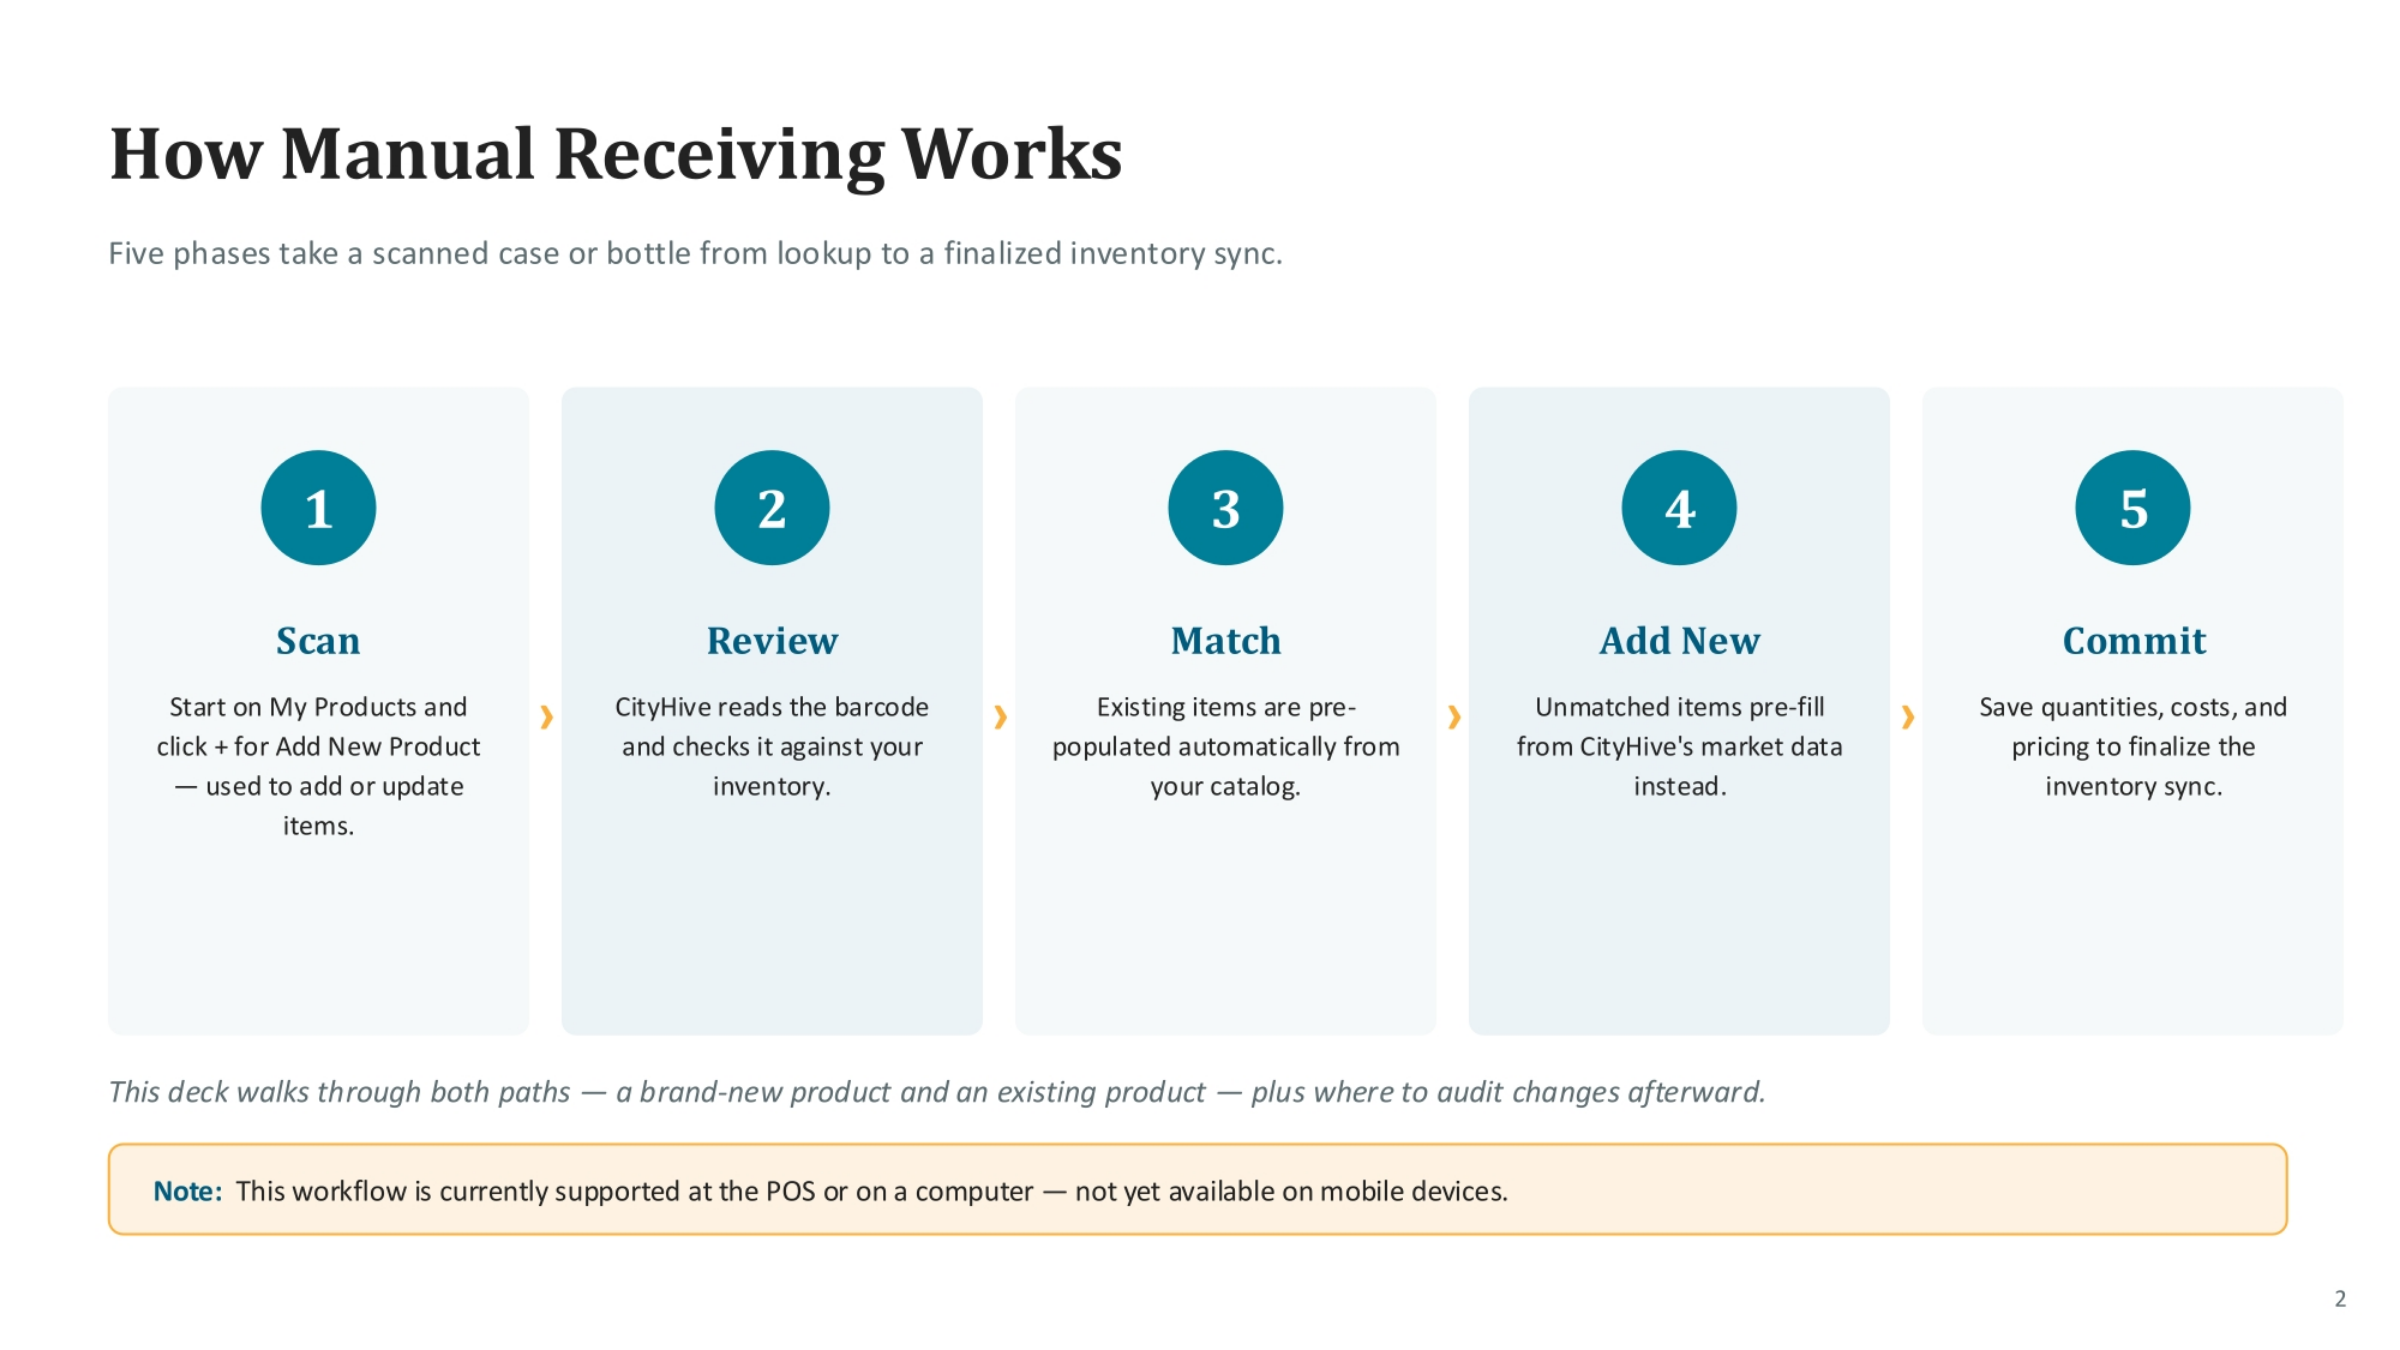
Manual receiving involves five key phases, transforming a scanned item into a finalized inventory sync. First, you scan the product. CityHive then reviews the barcode against your inventory. Next, existing items are matched and pre-populated from your catalog. For new items, CityHive's market data pre-fills details. Finally, you commit the quantities, costs, and pricing to complete the inventory sync. This workflow is currently supported on POS or computer, not mobile devices.
2. Starting a New Receiving from My Products
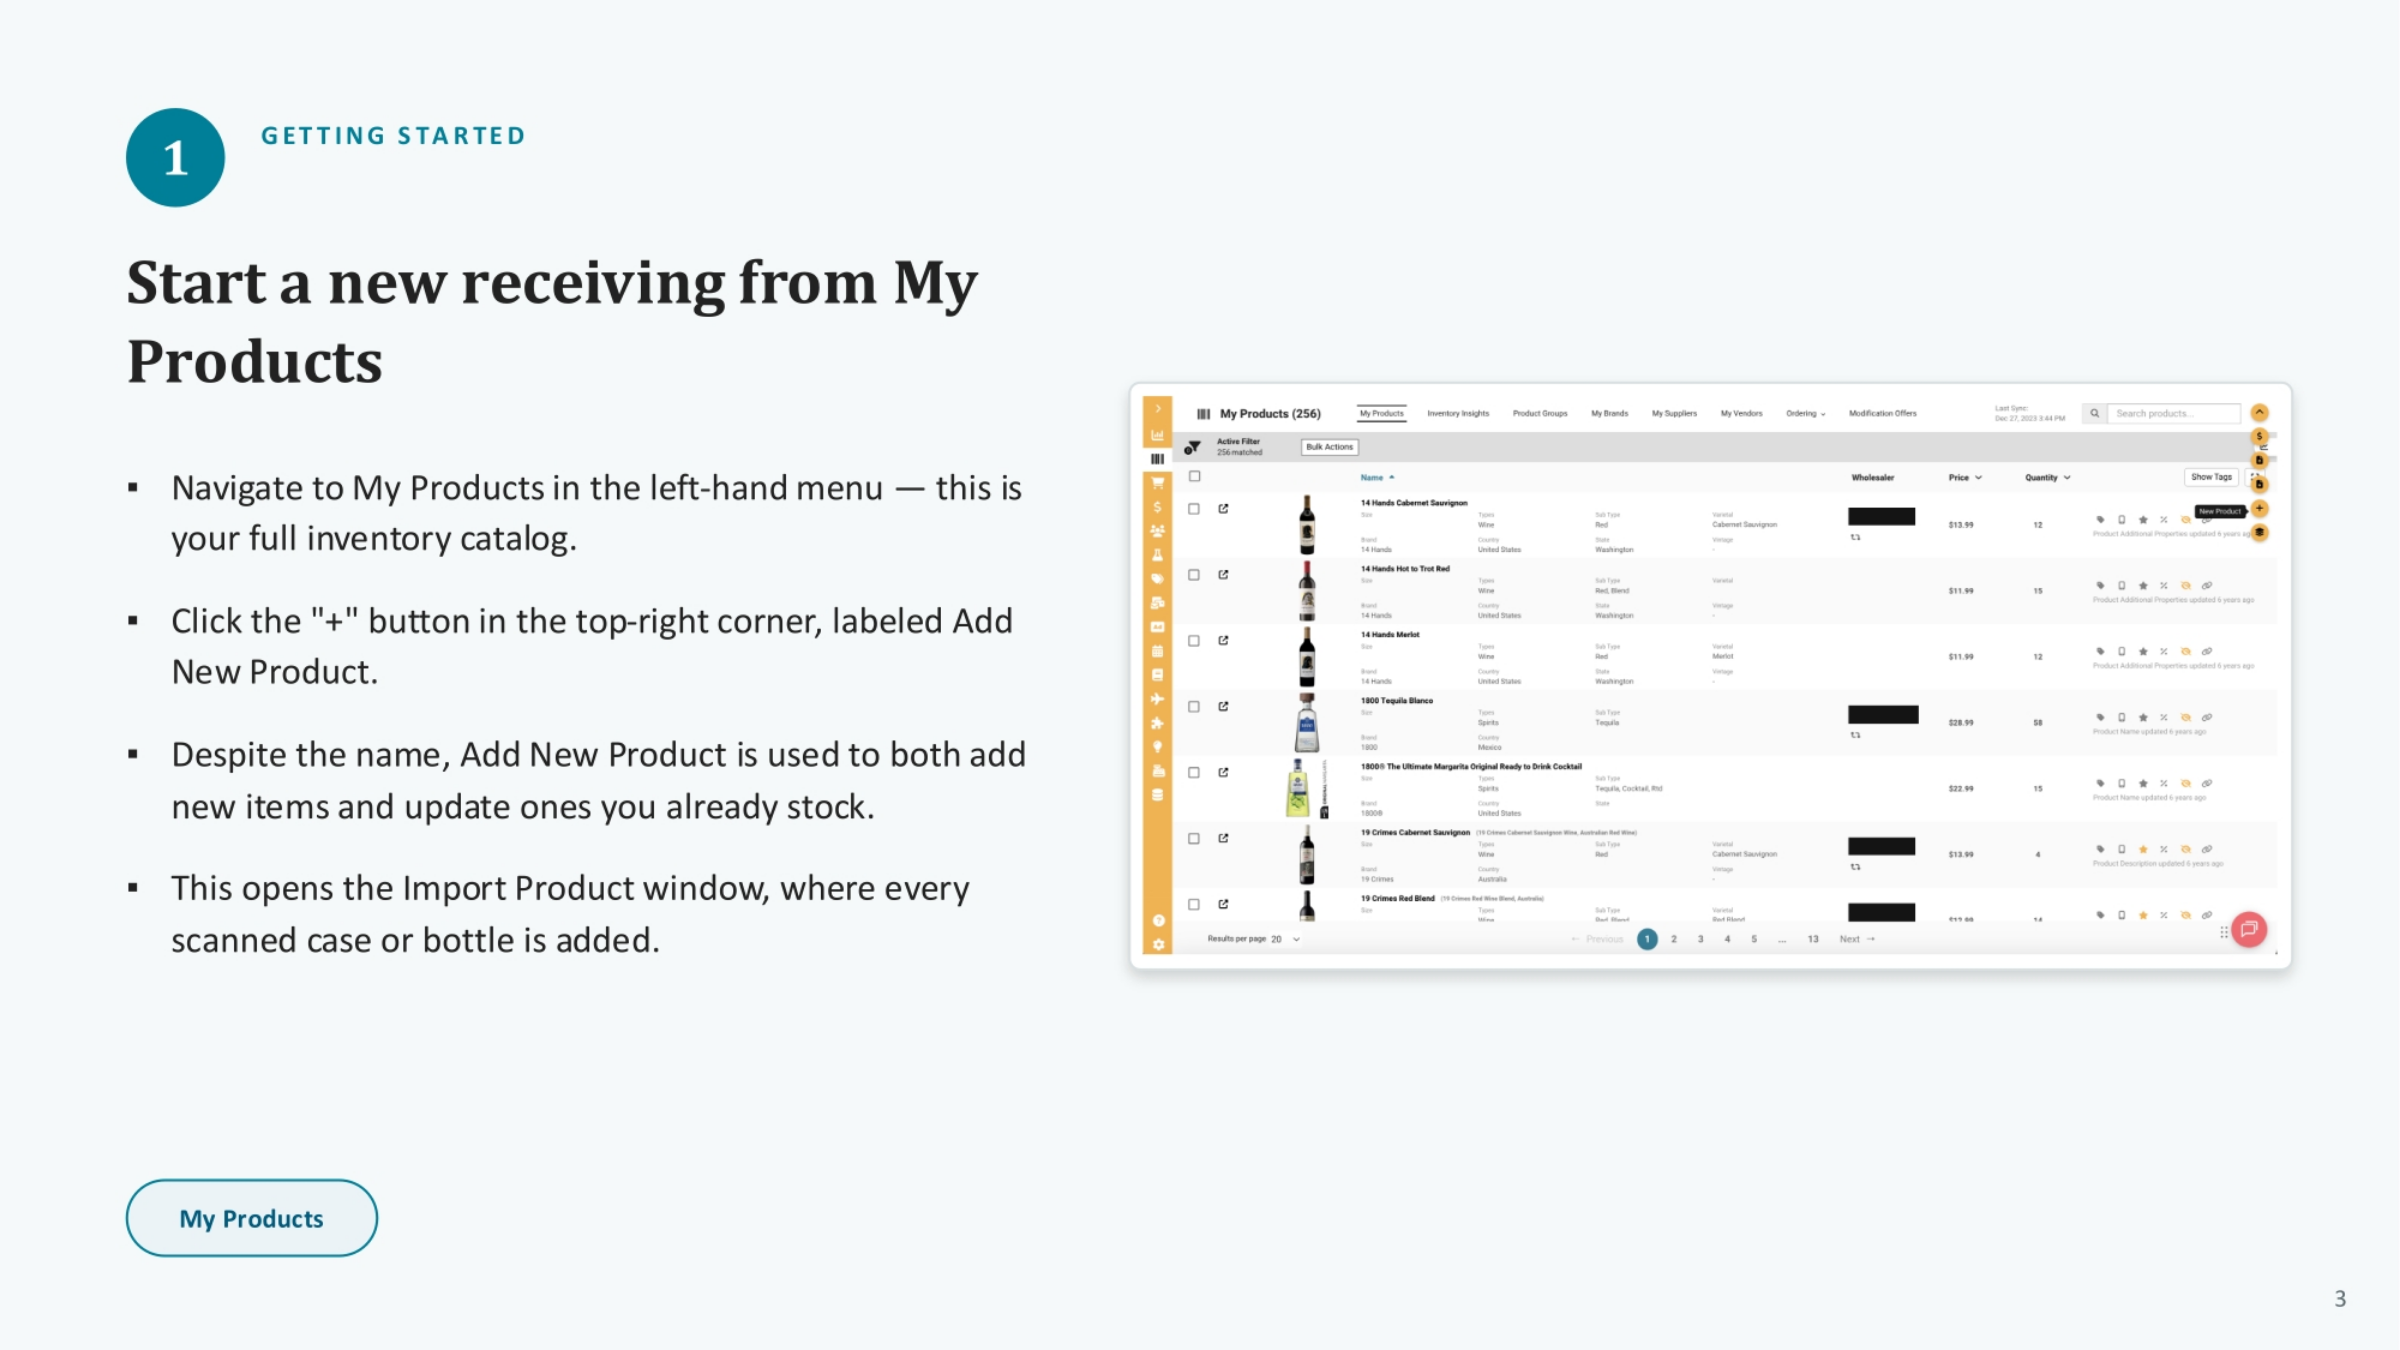
To begin a new receiving process, navigate to "My Products" in the left-hand menu. This section serves as your complete inventory catalog. Click the plus button, labeled "Add New Product," located in the top-right corner. Despite its name, this function is used for both adding new items and updating existing stock. This action opens the "Import Product" window, where all scanned cases or bottles will be added.
3. Scanning the Barcode to Look Up the Item
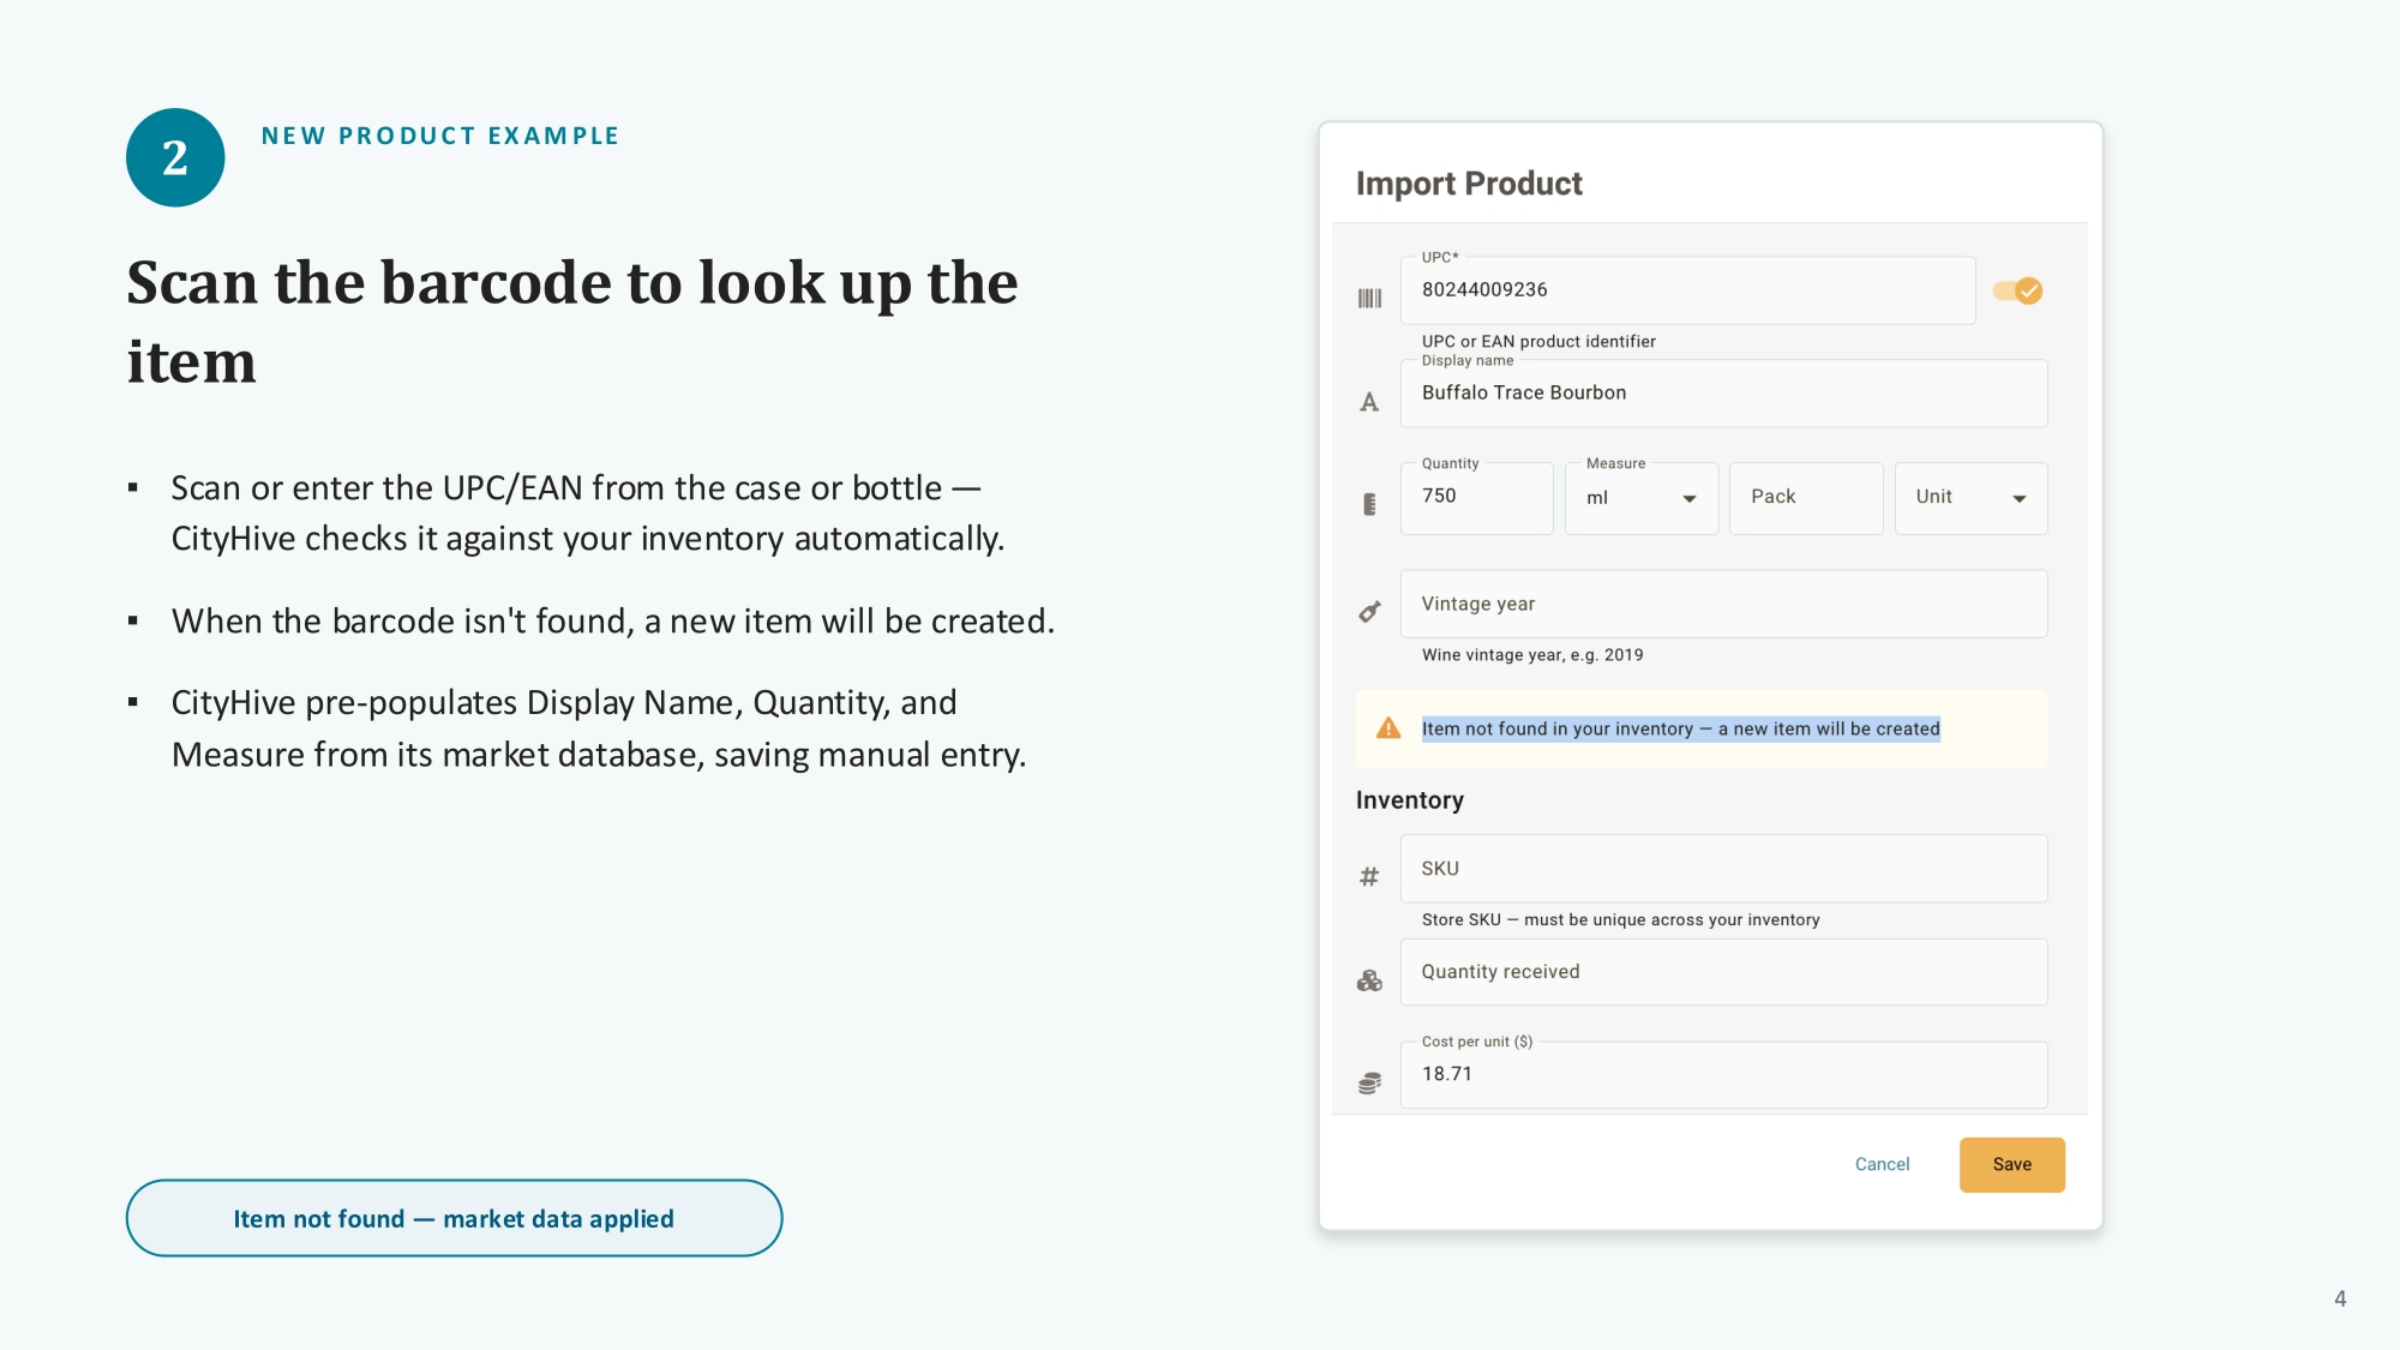
Scan or manually enter the UPC/EAN from the case or bottle. CityHive automatically checks this against your existing inventory. If the barcode is not found, a new item record will be created. For new items, CityHive efficiently pre-populates the display name, quantity, and measure using its market database, significantly reducing the need for manual data entry.
4. Entering the Quantity Received
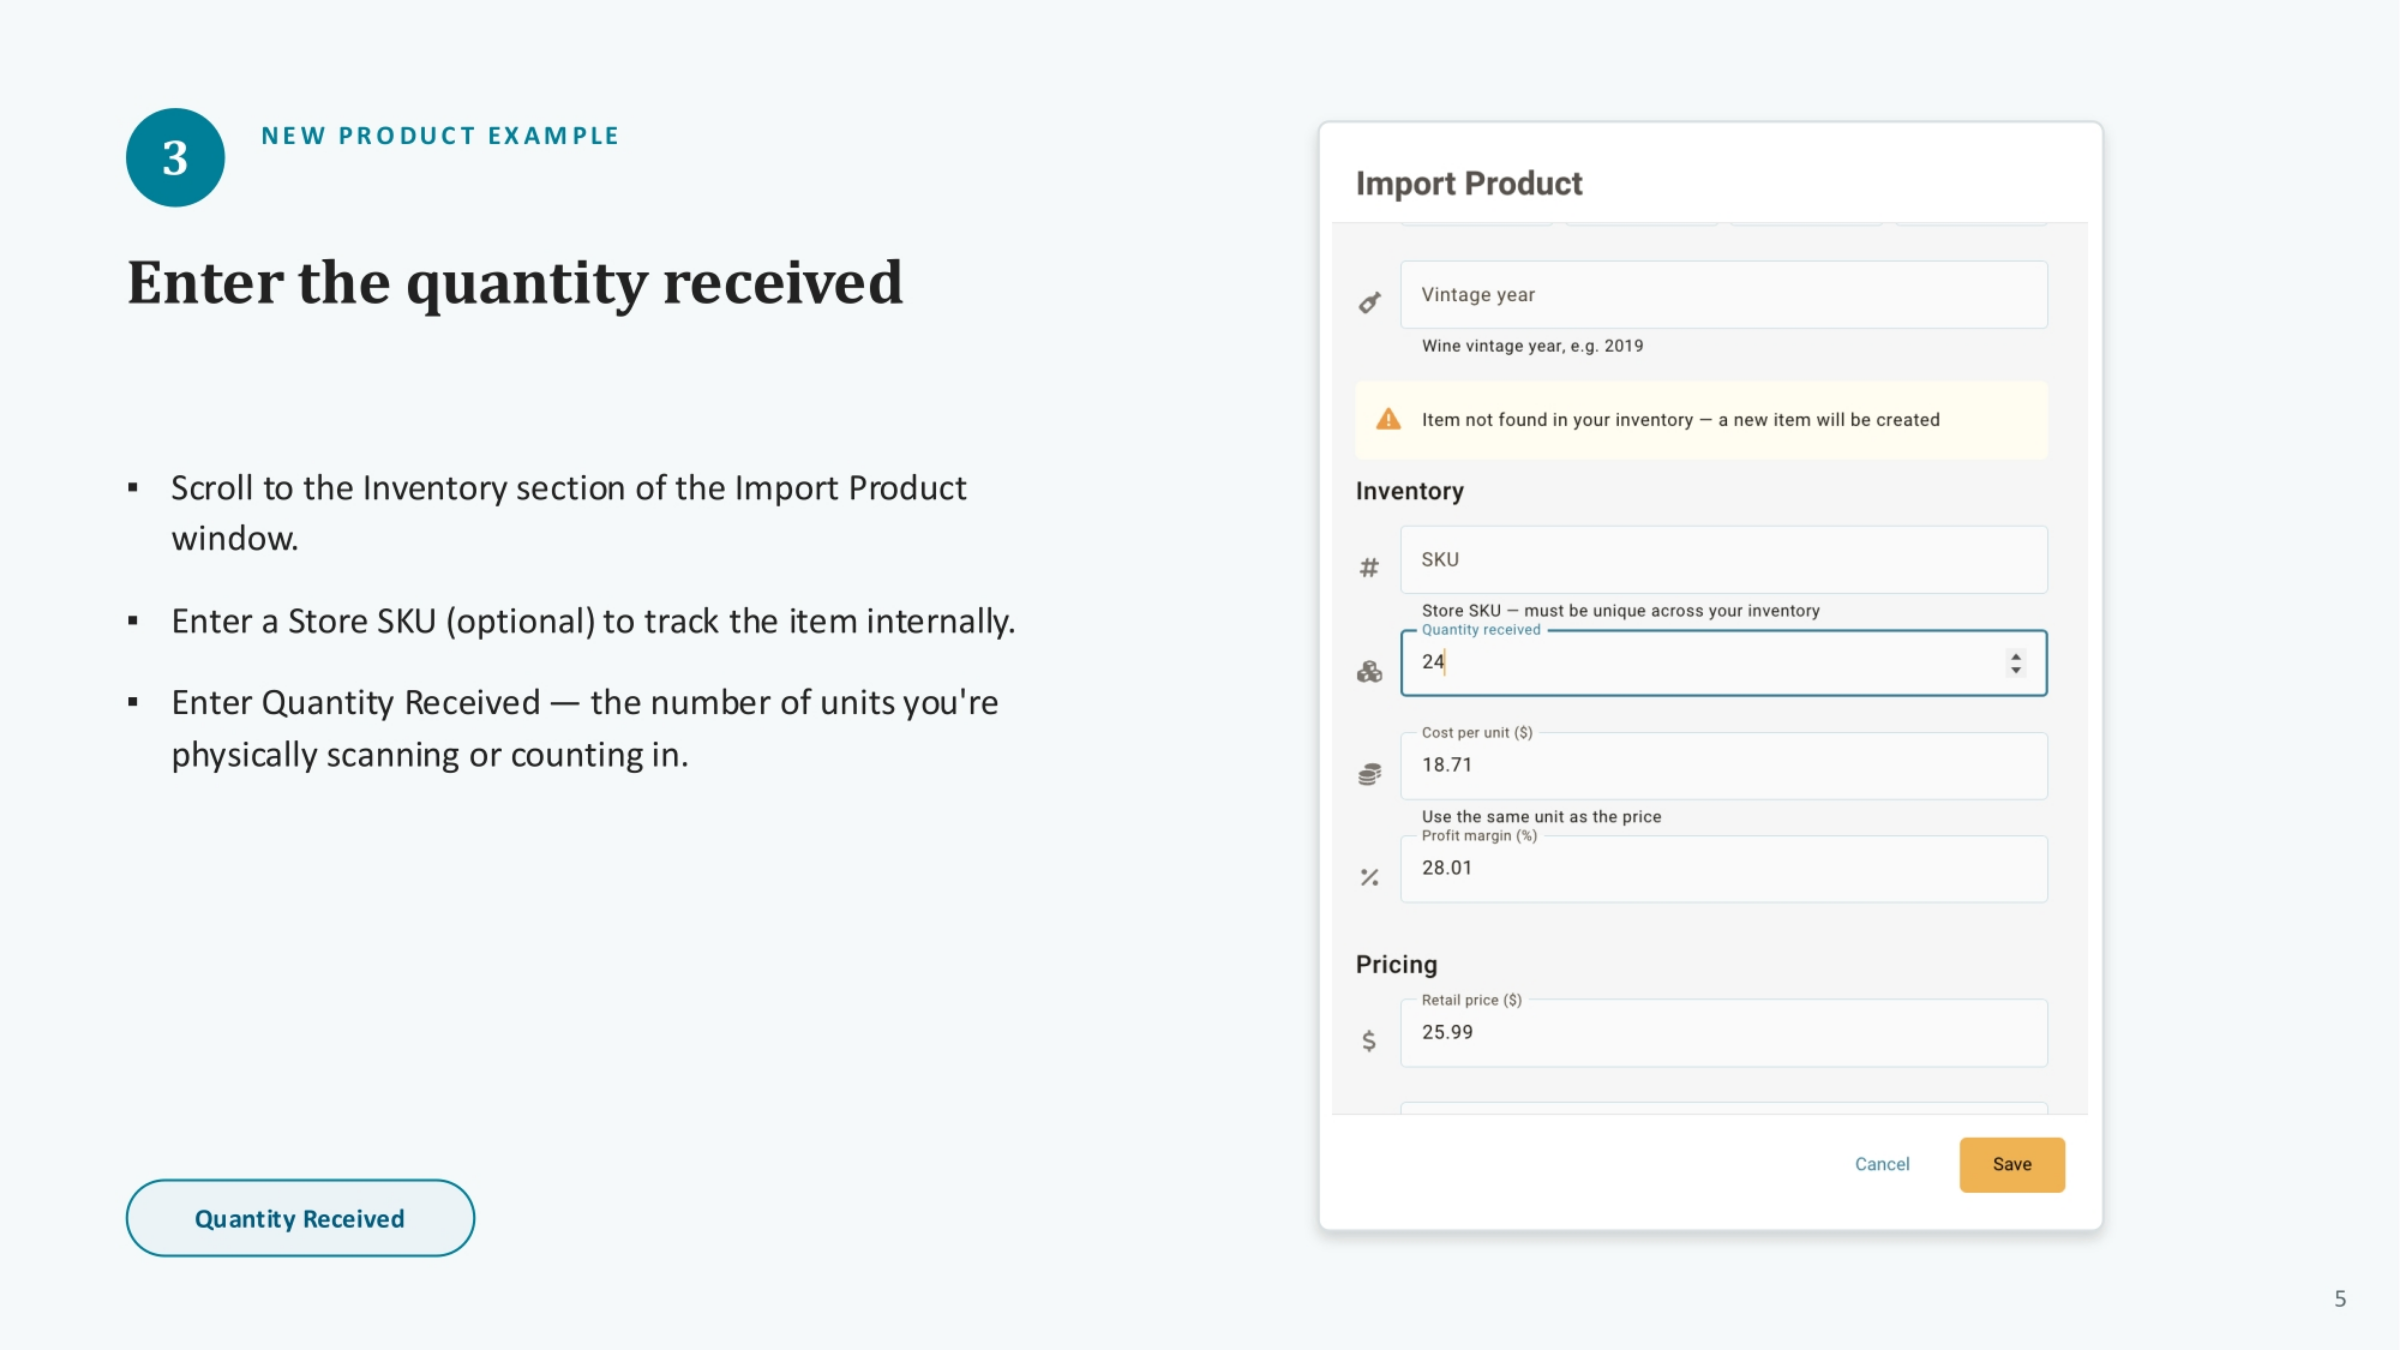
After scanning, scroll to the "Inventory" section within the "Import Product" window. Here, you can optionally enter a "Store SKU" to track the item internally within your system. Most importantly, enter the "Quantity Received," which is the exact number of units you have physically scanned or counted in. This step ensures your inventory count accurately reflects the new stock.
5. Entering the Cost Per Unit
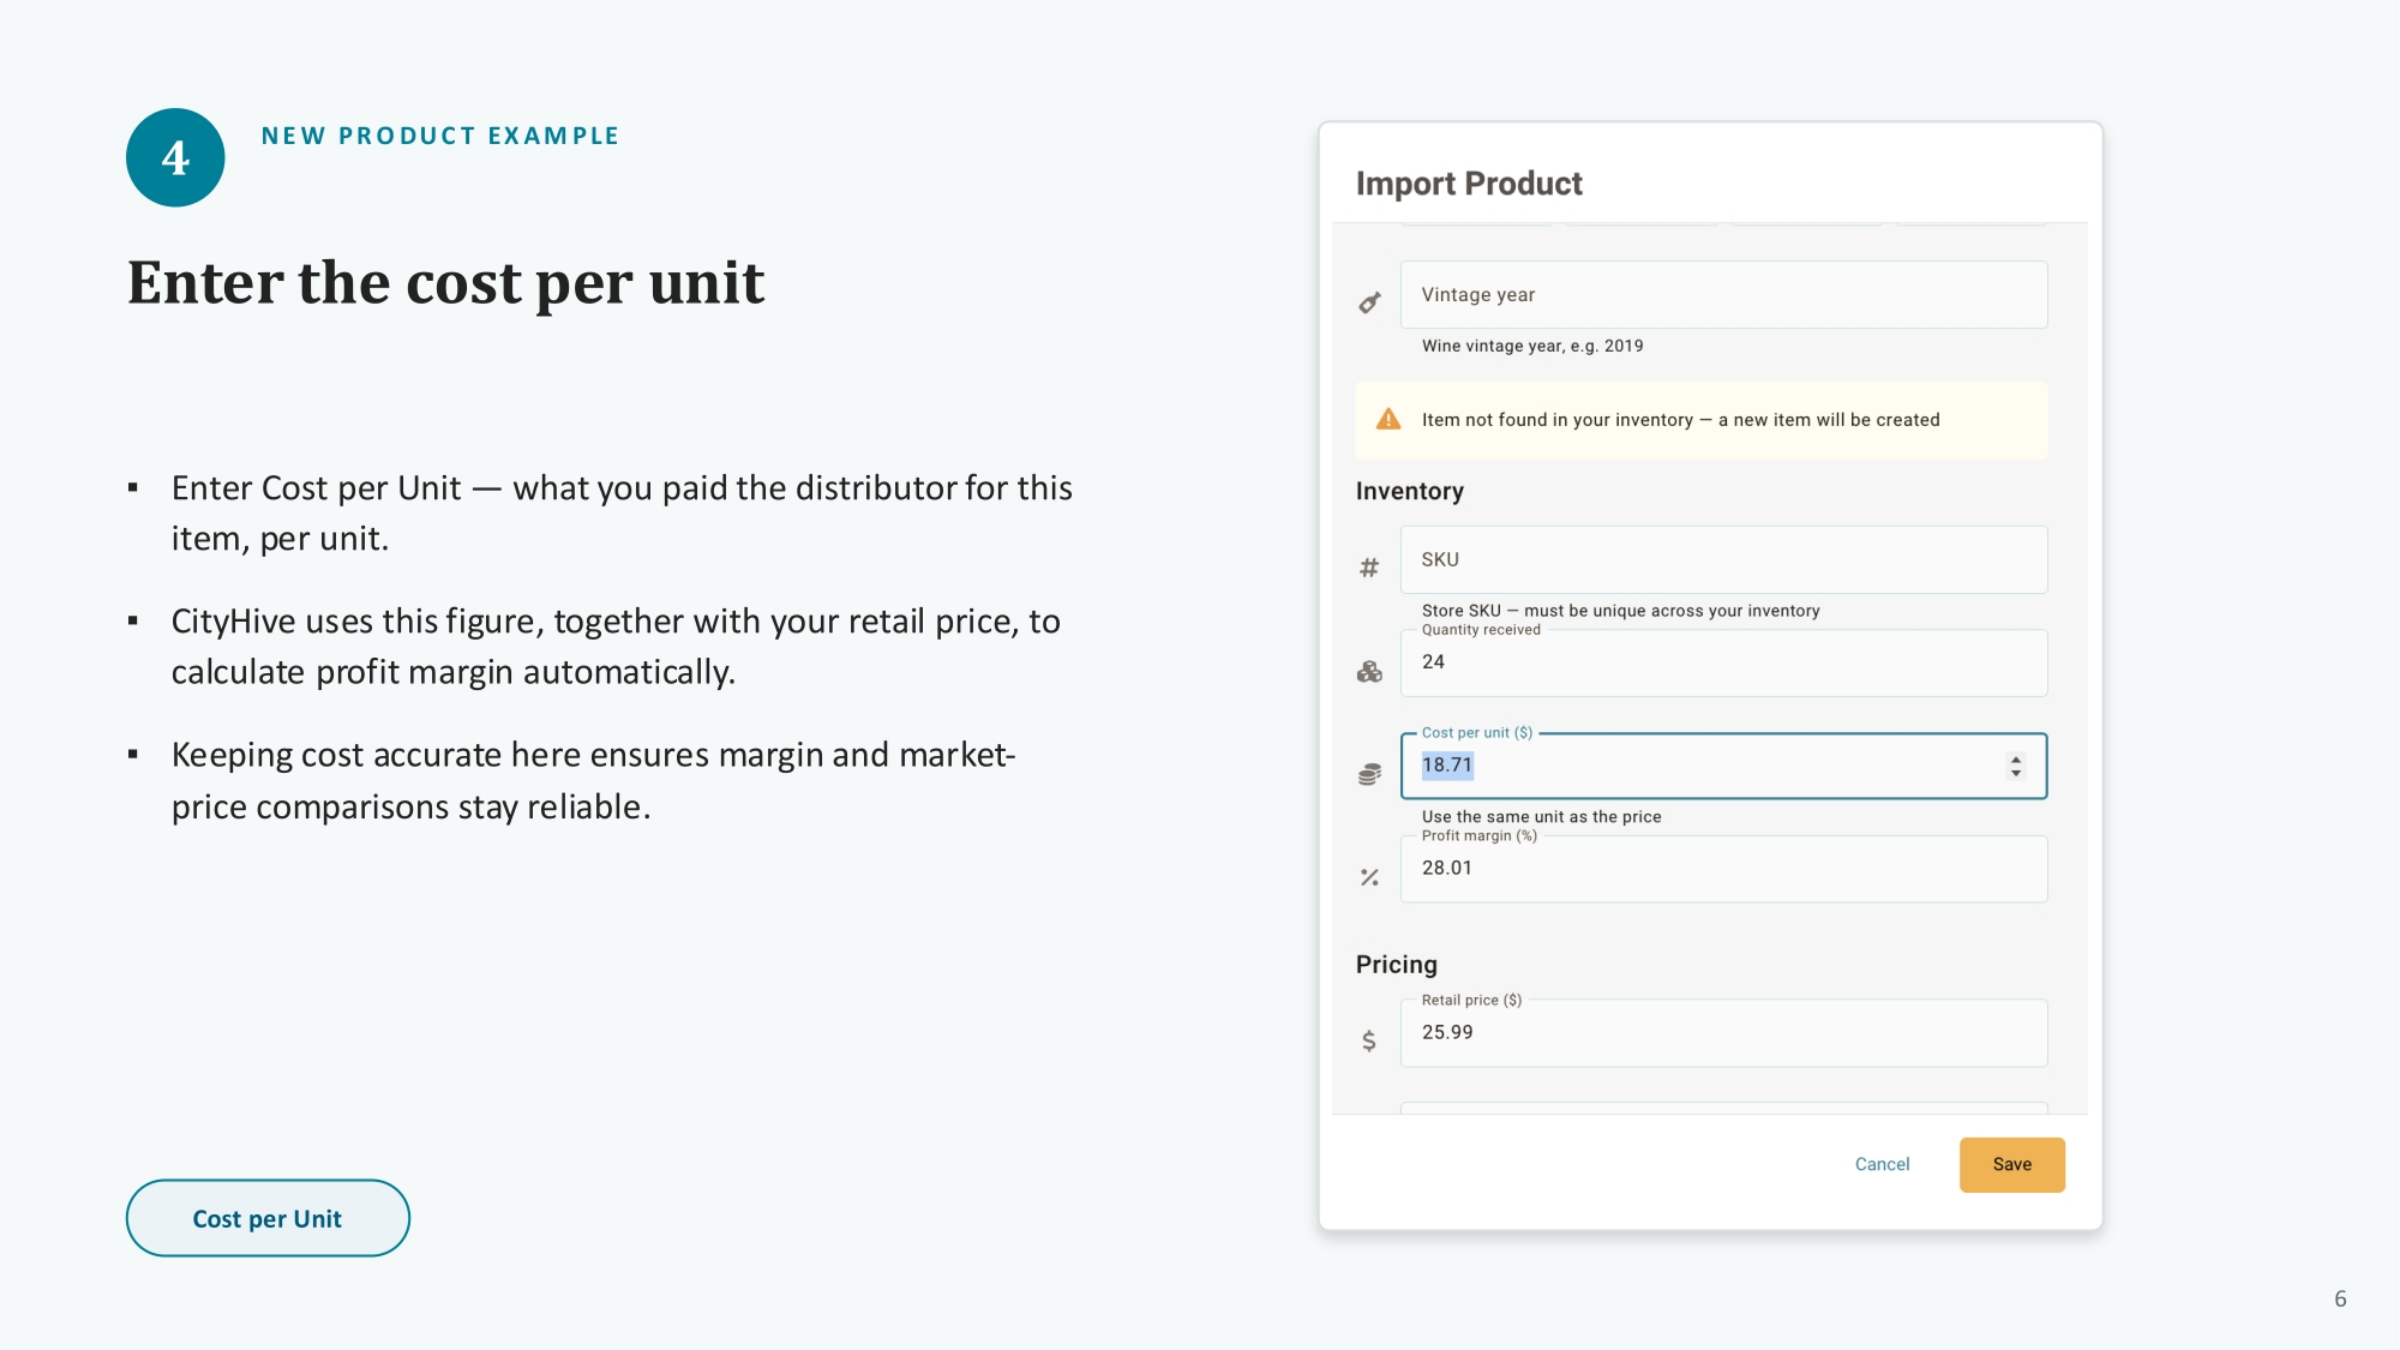
Next, enter the "Cost per Unit," which represents the amount you paid the distributor for each individual item. CityHive utilizes this cost, in conjunction with your retail price, to automatically calculate the profit margin. Maintaining accurate cost data is crucial for reliable margin calculations and for making informed market-price comparisons.
6. Setting the Profit Margin
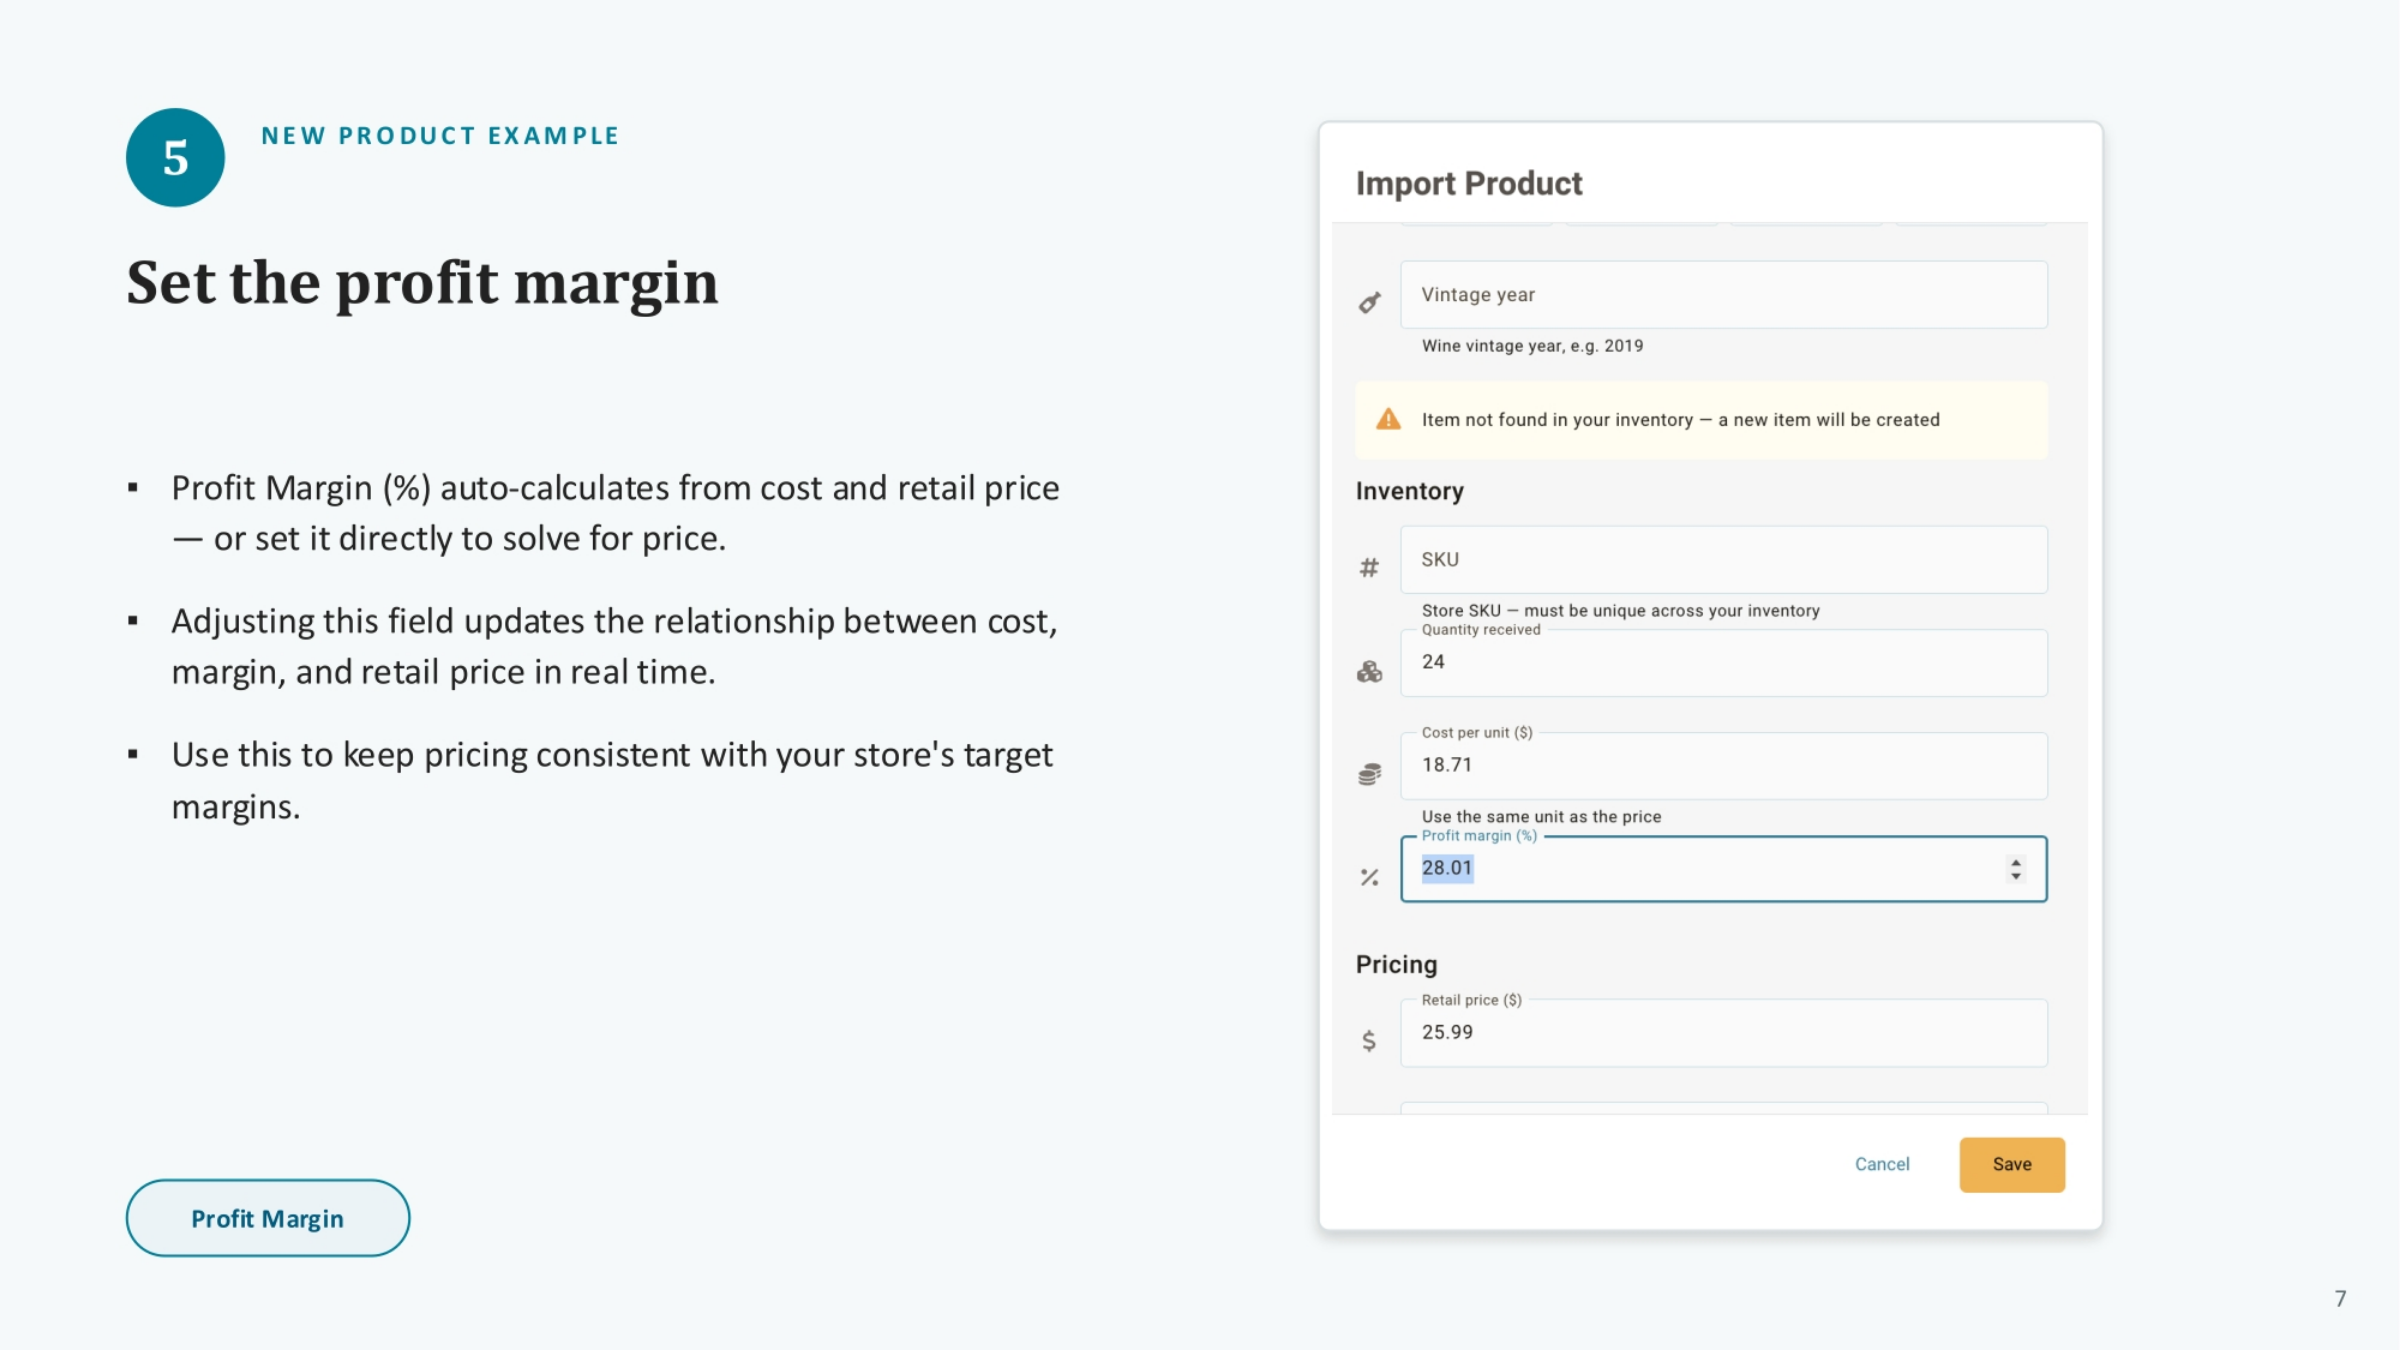
The "Profit Margin (%)" field automatically calculates based on the cost and retail price you've entered. Alternatively, you can directly set the profit margin, and the system will solve for the retail price. Adjusting this field dynamically updates the relationship between cost, margin, and retail price in real time, helping you keep your pricing consistent with your store's target margins.
7. Confirming the Retail Price
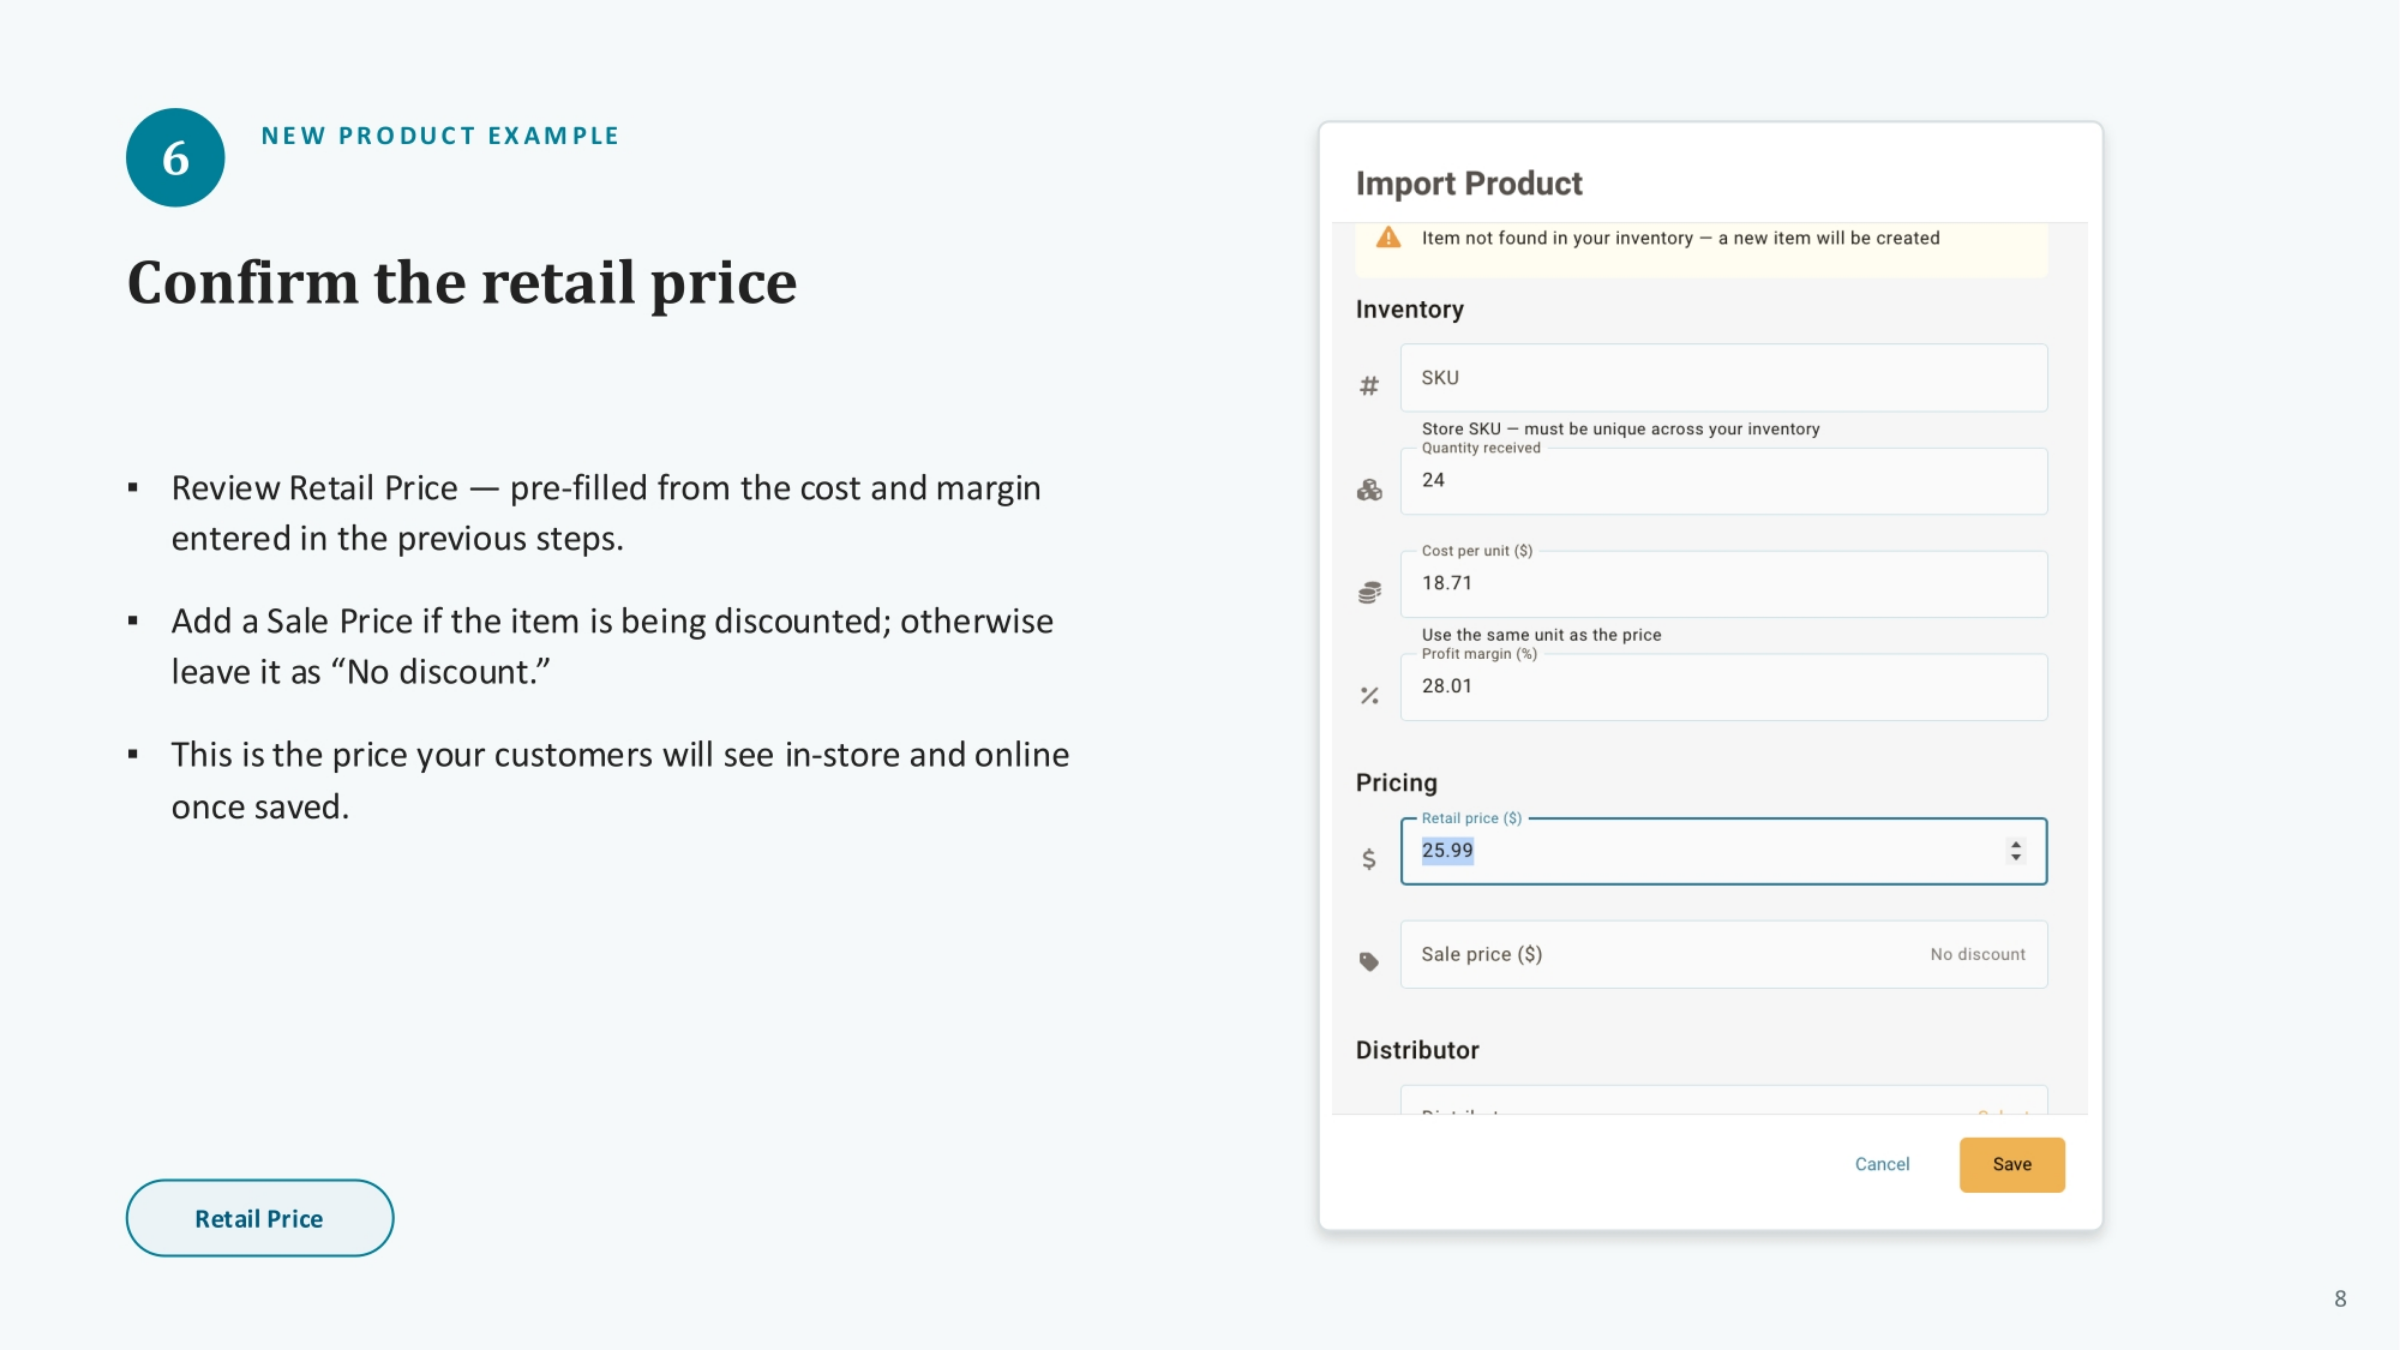
Review the "Retail Price," which is pre-filled based on the cost and profit margin entered in the previous steps. If the item is being discounted, you can add a "Sale Price"; otherwise, leave it as "No discount." This retail price is what your customers will see both in-store and online once the item is saved.
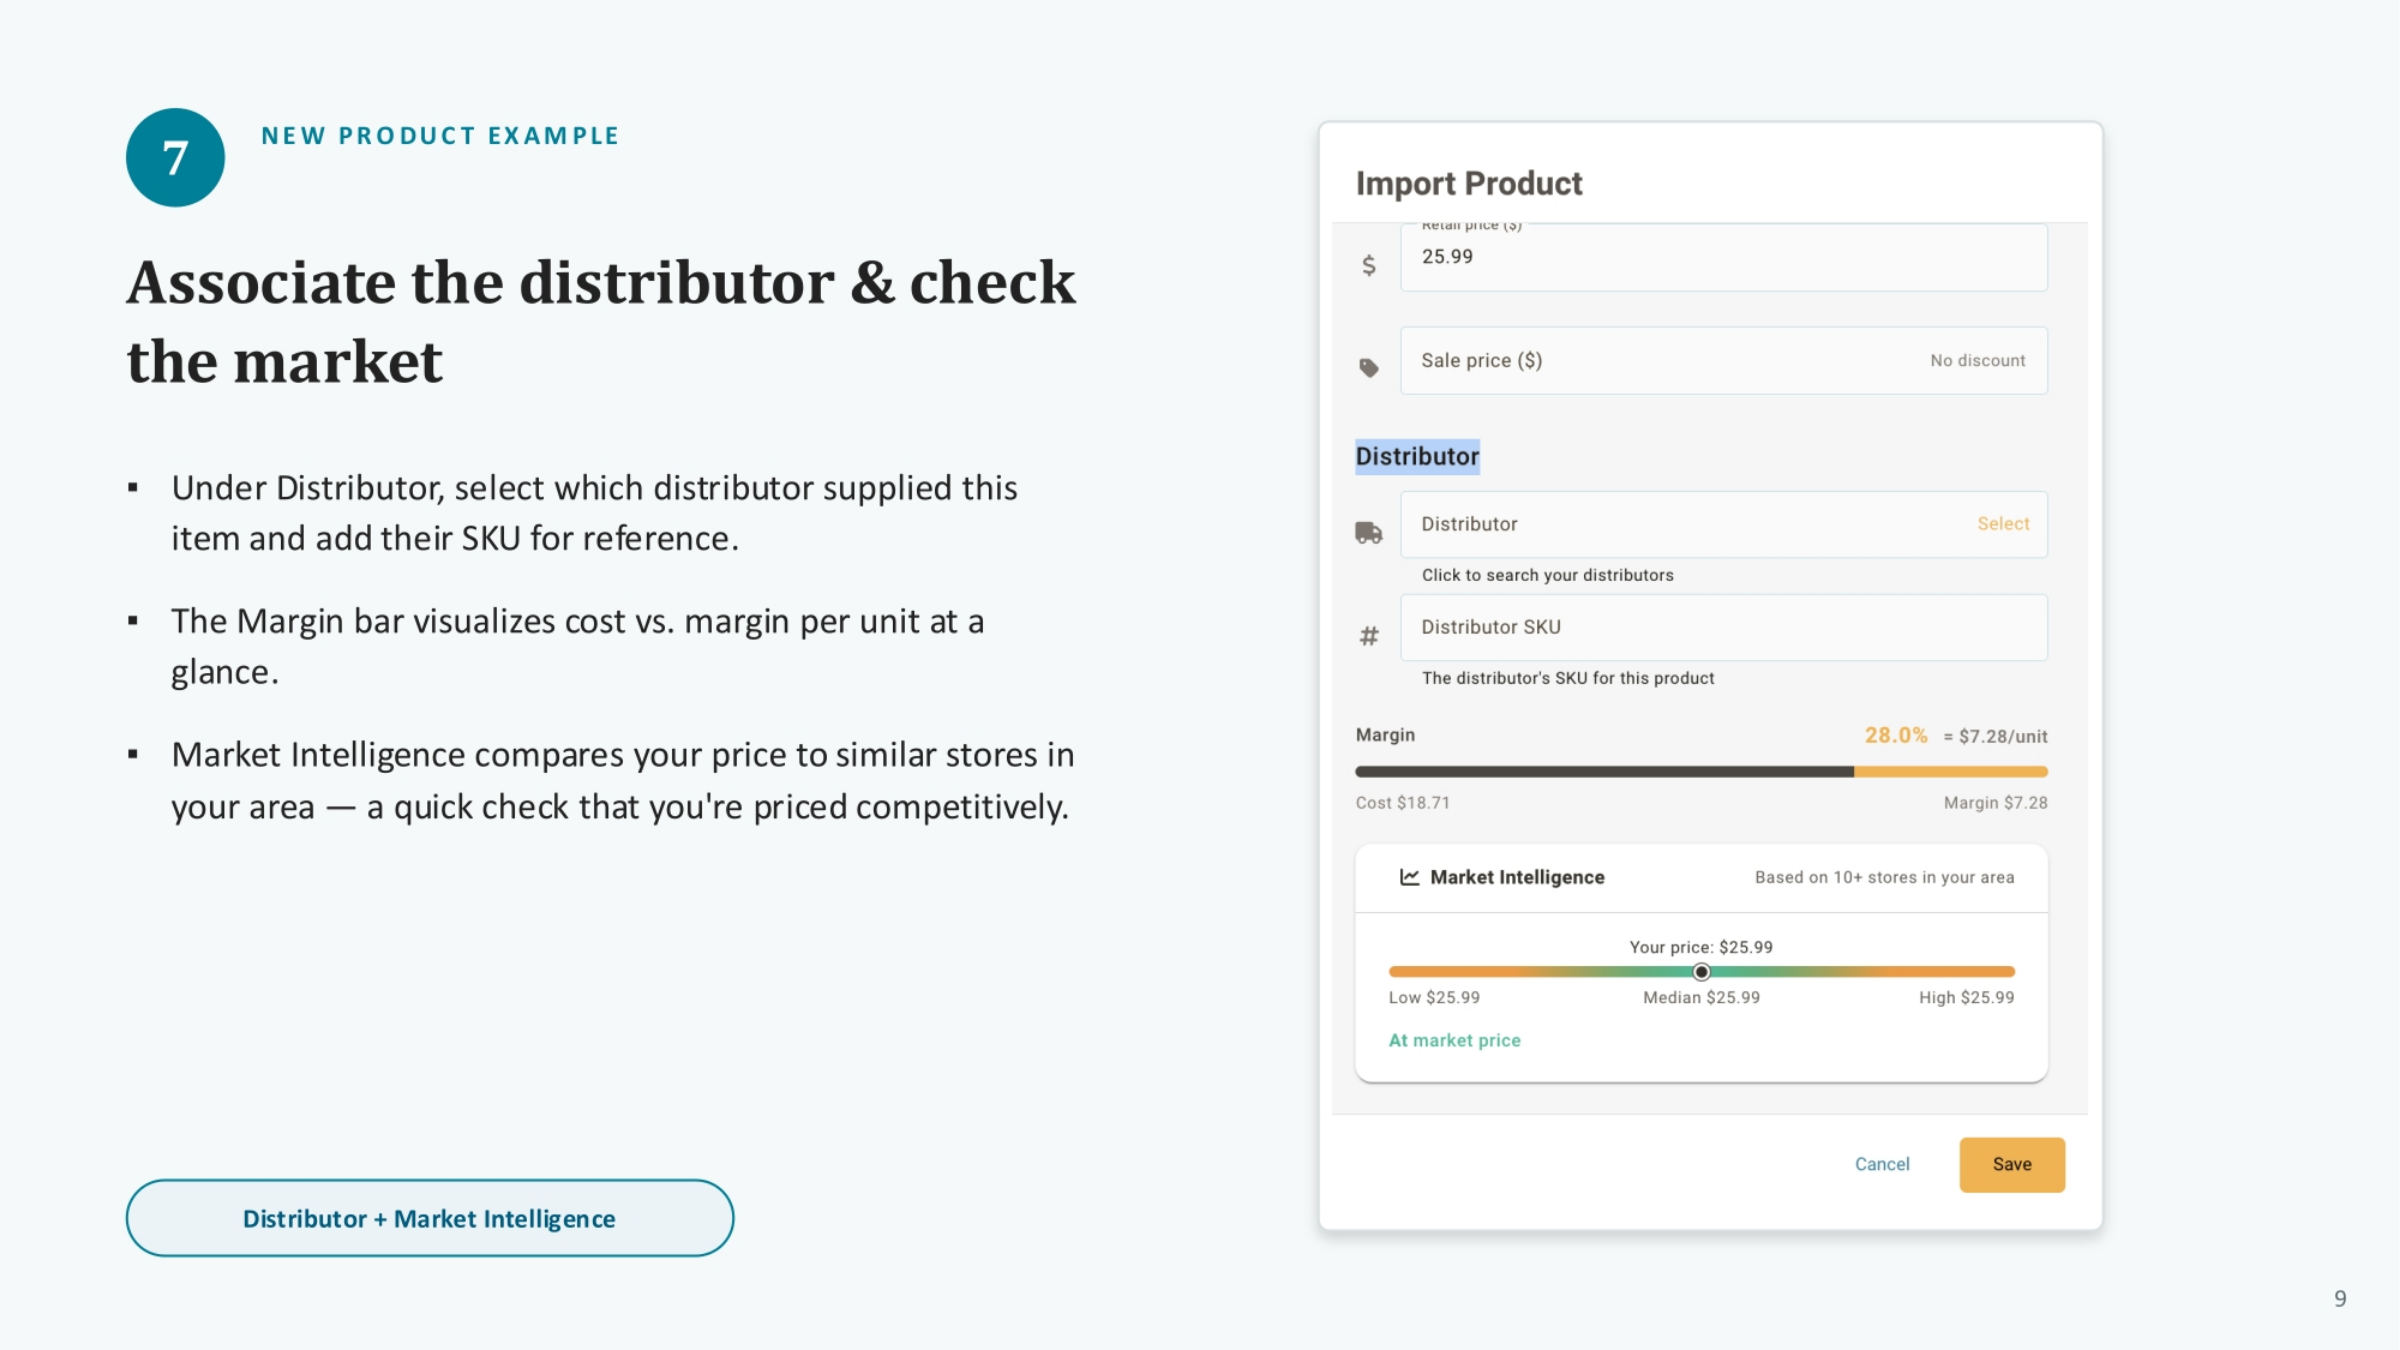
8. Associating the Distributor and Checking the Market
Under the "Distributor" section, select the supplier for this item and add their specific SKU for your reference. The "Margin bar" provides a quick visual comparison of your cost versus the margin per unit. Additionally, "Market Intelligence" compares your pricing to similar stores in your area, offering a valuable check to ensure you are priced competitively.
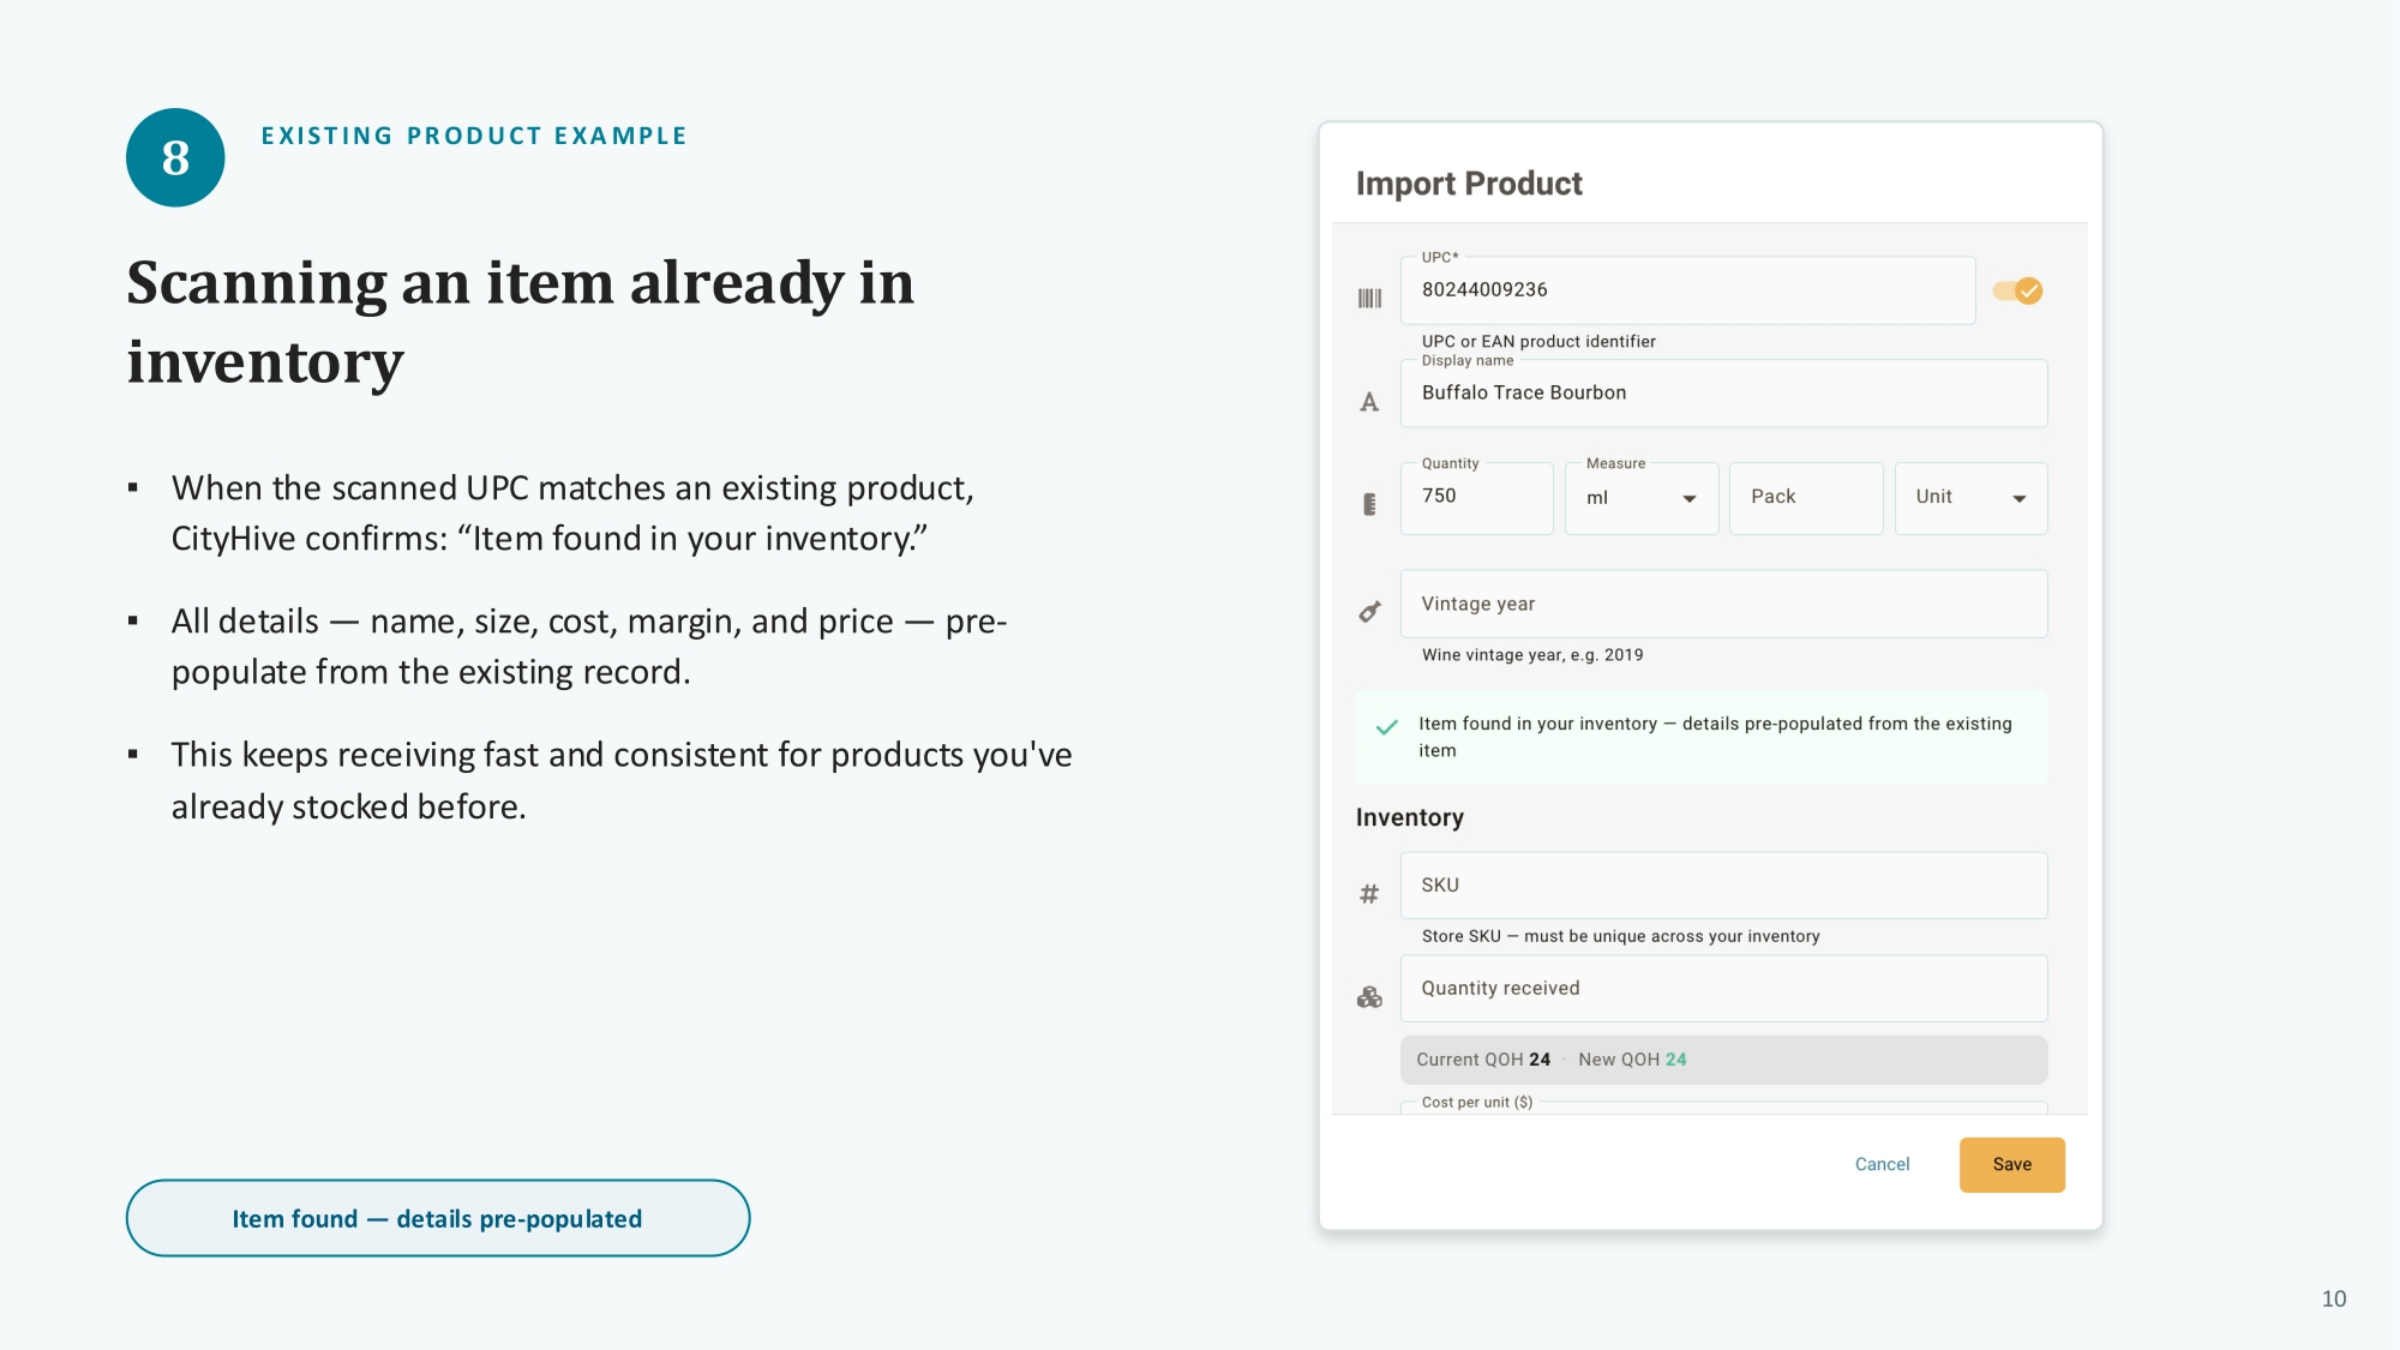
9. Scanning an Item Already in Inventory
When you scan a UPC that matches an existing product in your inventory, CityHive confirms this by displaying "Item found in your inventory." All relevant details, including the item's name, size, cost, margin, and price, are automatically pre-populated from the existing record. This feature streamlines the receiving process, ensuring speed and consistency for products you have previously stocked.
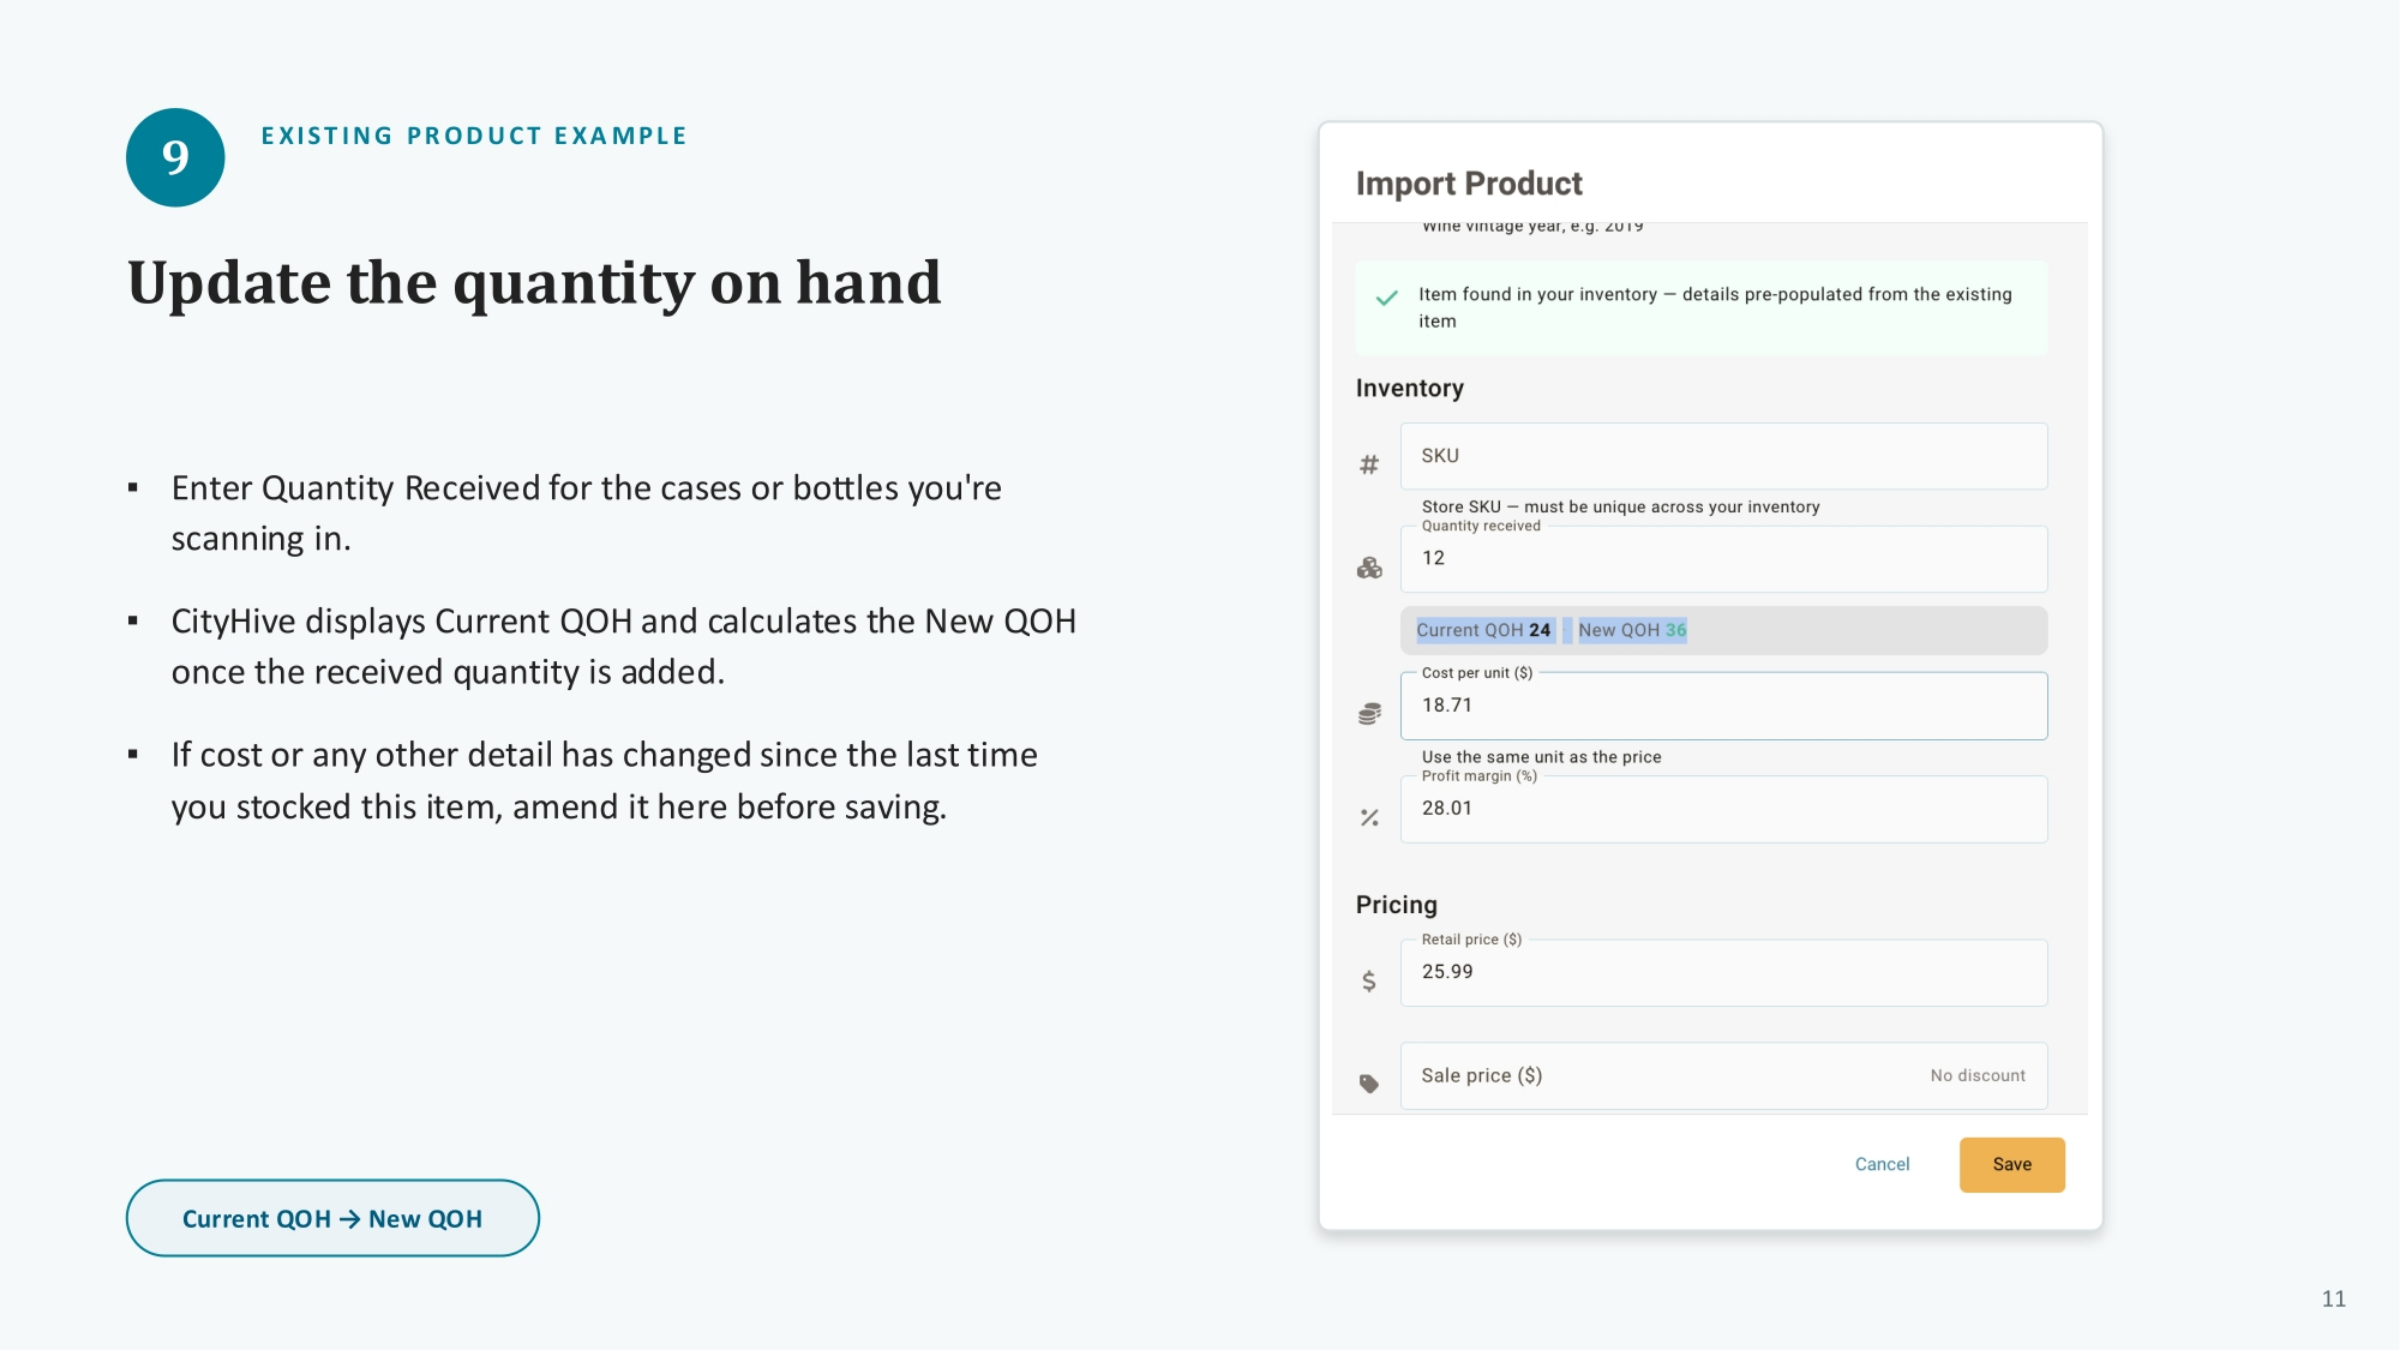
10. Updating the Quantity on Hand
For existing items, enter the "Quantity Received" for the cases or bottles you are scanning. CityHive will then display your "Current QOH" (Quantity on Hand) and automatically calculate the "New QOH" once the received quantity is added. If any details like cost have changed since the last time you stocked this item, you can amend them here before saving to ensure accuracy.
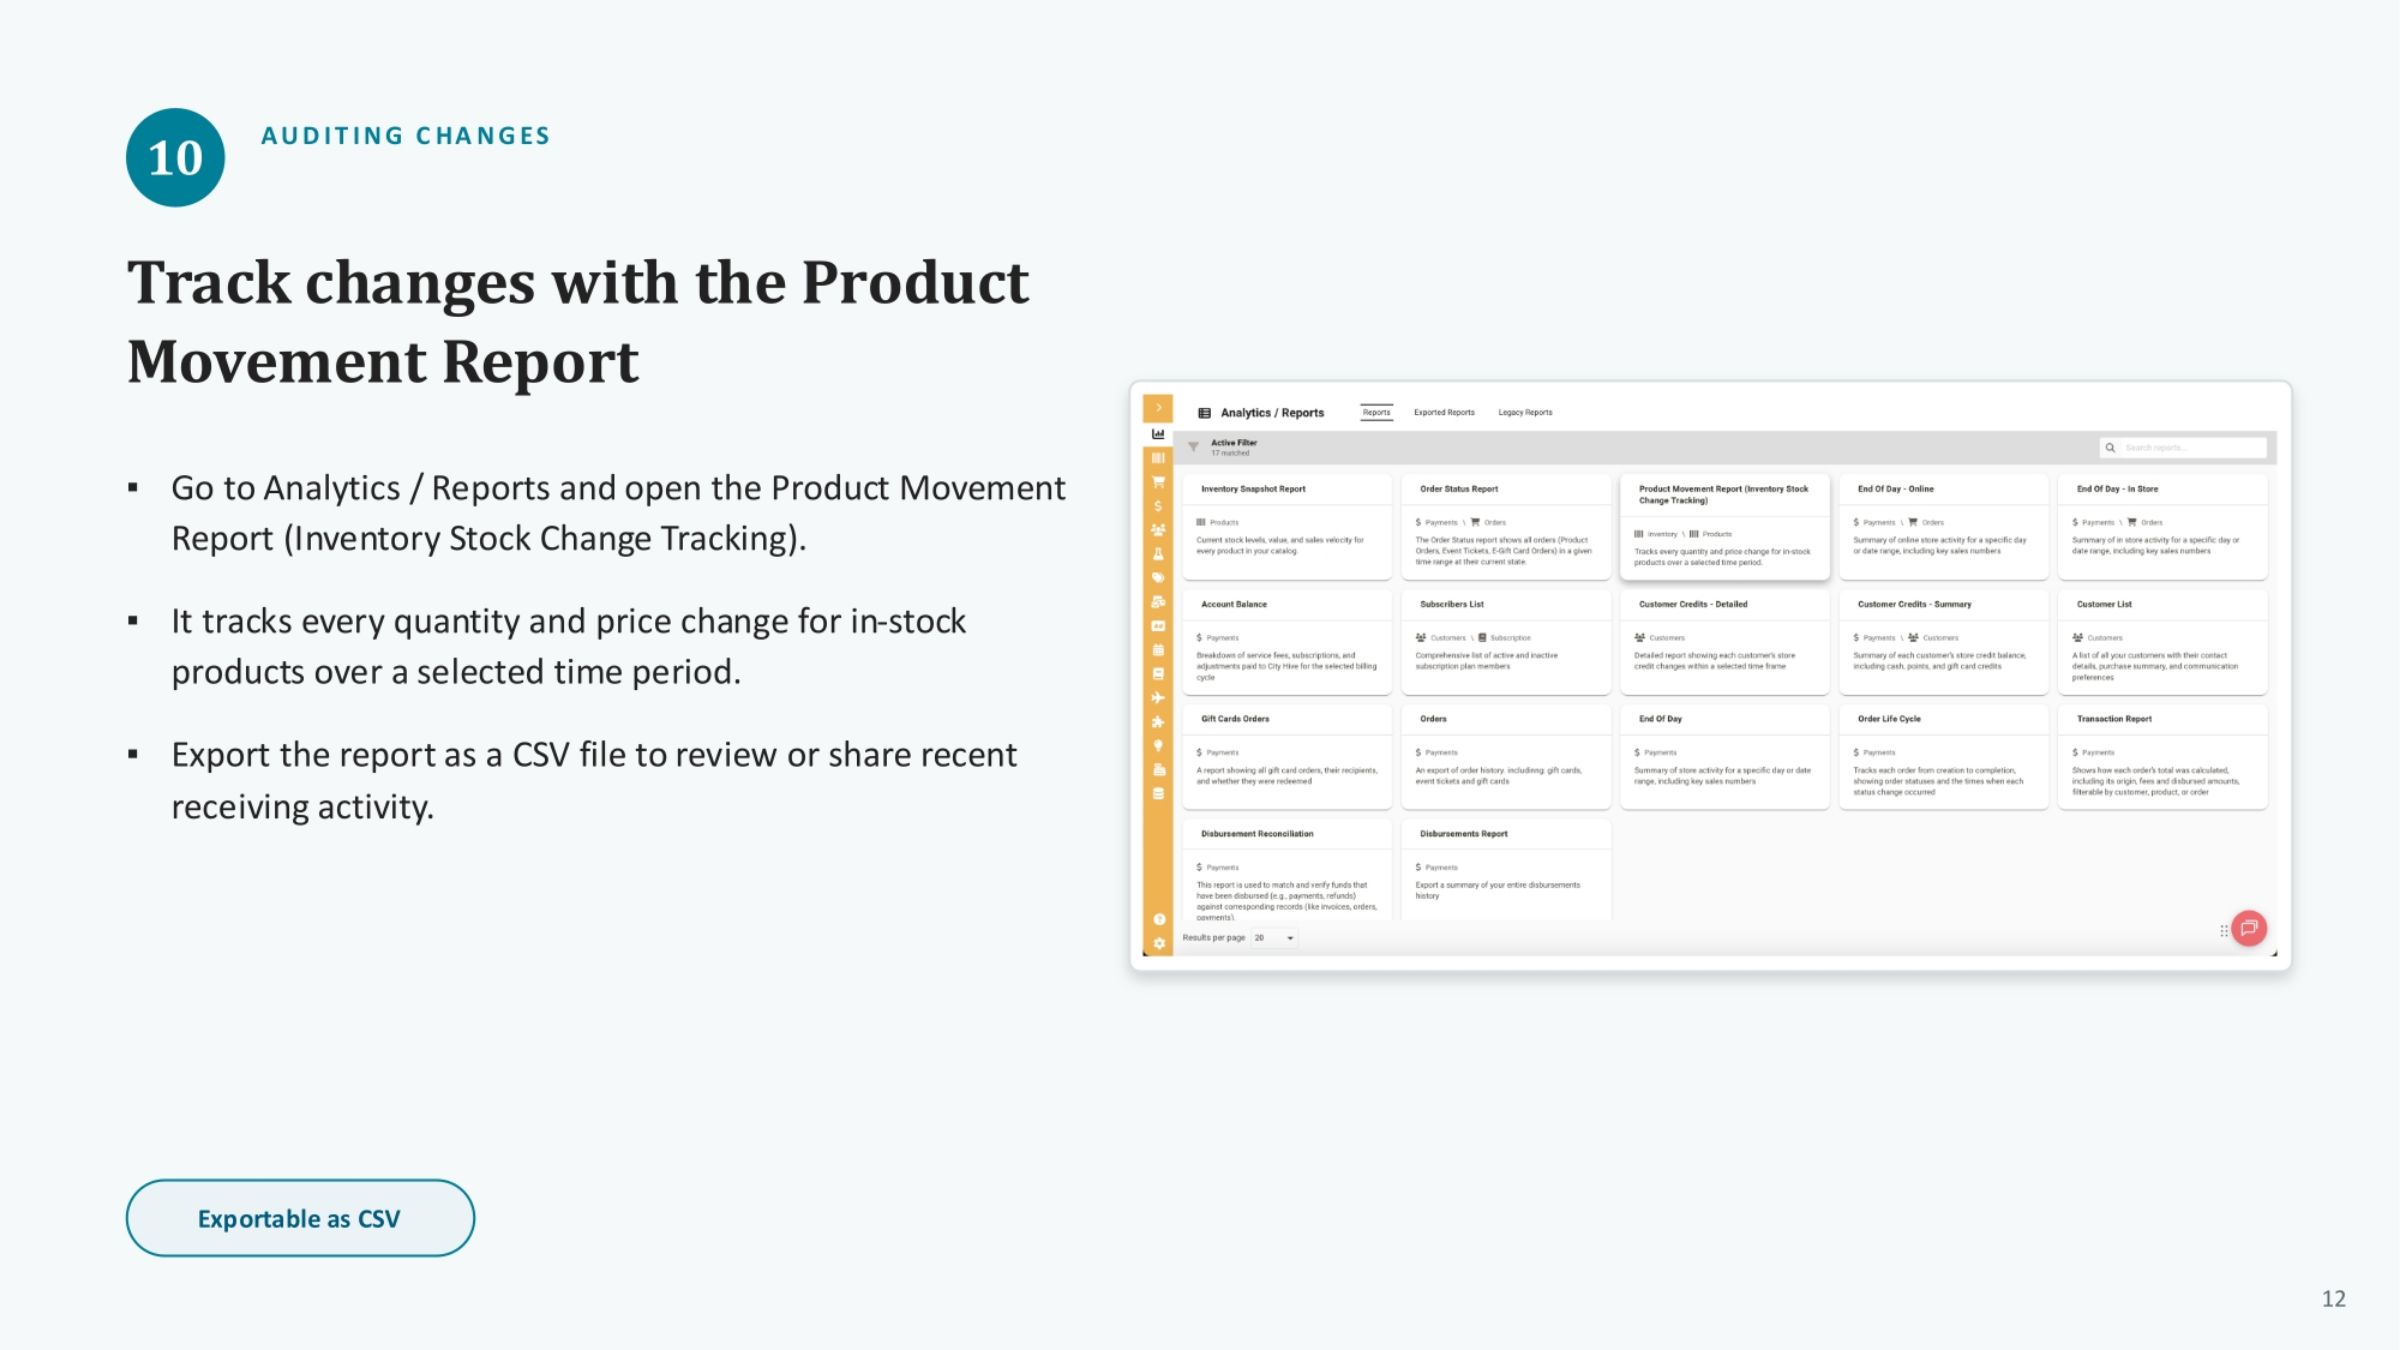
11. Tracking Changes with the Product Movement Report
To audit changes, navigate to "Analytics / Reports" and open the "Product Movement Report," also known as "Inventory Stock Change Tracking." This report meticulously tracks every quantity and price adjustment for in-stock products over a selected time period. You can export this report as a CSV file to easily review or share recent receiving activity and maintain clear records.
12. Recap of Manual Receiving
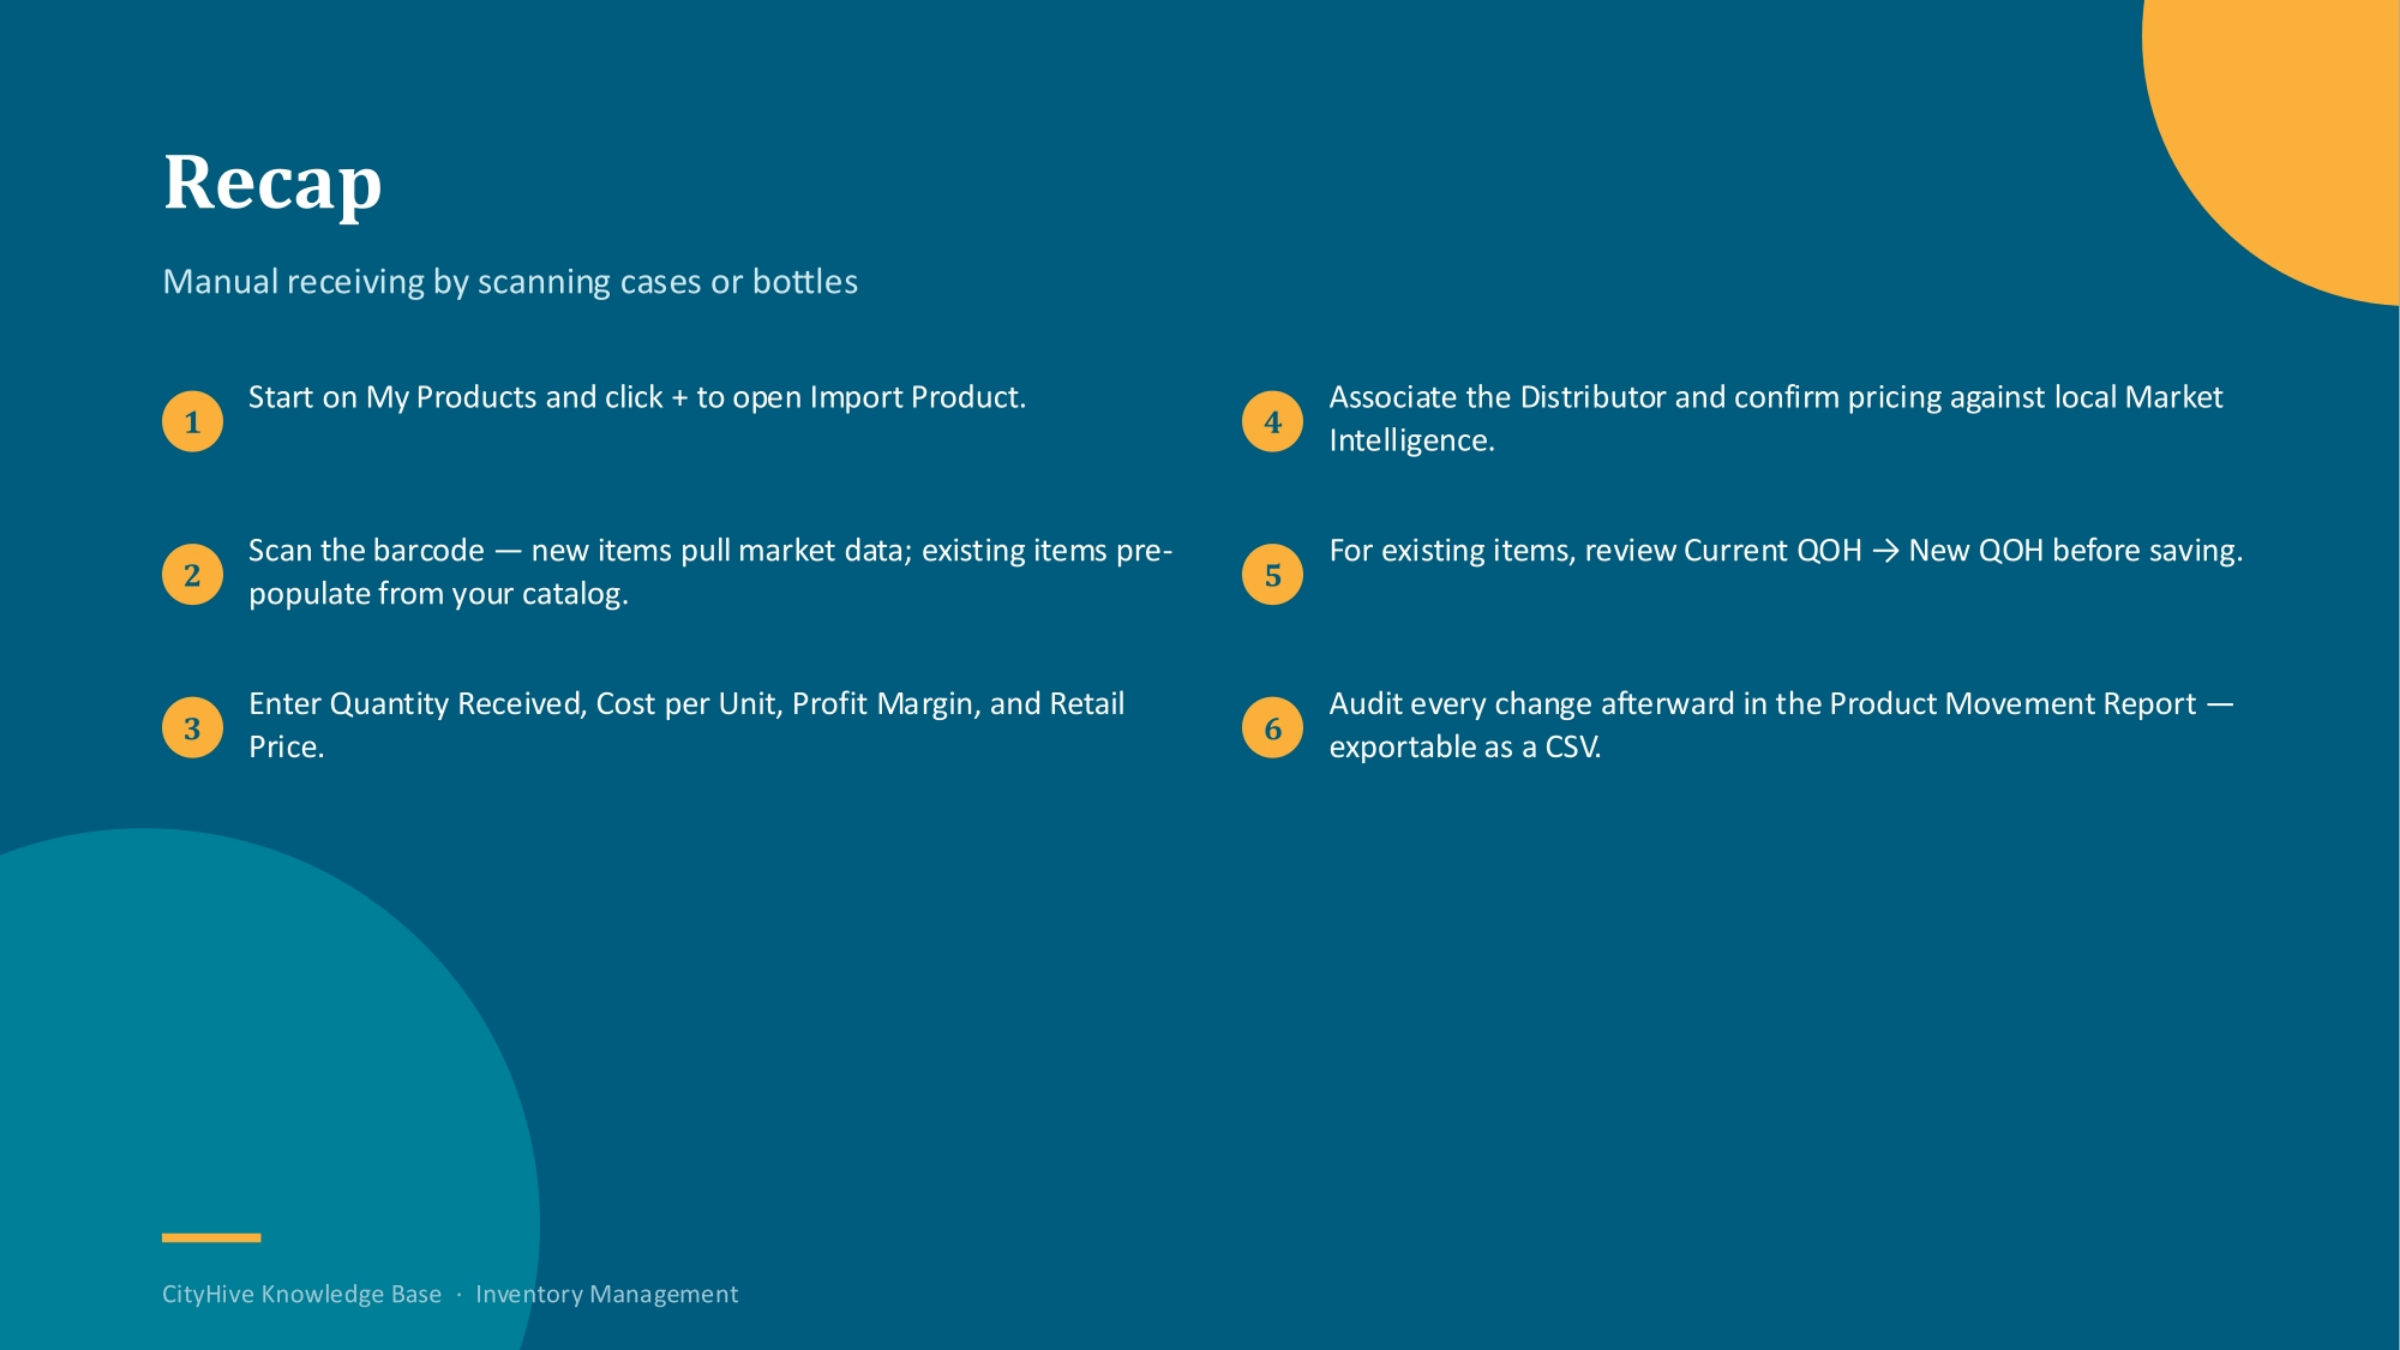
To recap, manual receiving involves starting in My Products, scanning items to pull market data, and entering quantities, cost, margin, and retail price. For existing items, update the quantity on hand. Finally, audit all changes using the Product Movement Report.