![City Hive Logo-2.png]](https://support.cityhive.net/hs-fs/hubfs/City%20Hive%20Logo-2.png?width=62&height=60&name=City%20Hive%20Logo-2.png)
Manually Editing Customer Store Credit in CityHive (POS)
This training provides essential guidance on managing customer store credit within the CityHive POS system. We will cover how to view, add, and remove store credit balances efficiently from both the Customers page and the register.
1. Overview of Customer Credit Balance
Customer Credit Balance, also known as Store Credit, represents a running balance linked to a customer's account. This overview will guide you through two primary methods for managing this credit: either directly from the Customers section or via the register during checkout. By the end of this session, you'll be able to navigate to a customer's profile, locate their credit balance card, add or remove credit, and understand how to enter an optional reason for any adjustments.
2. Opening the Customers Section
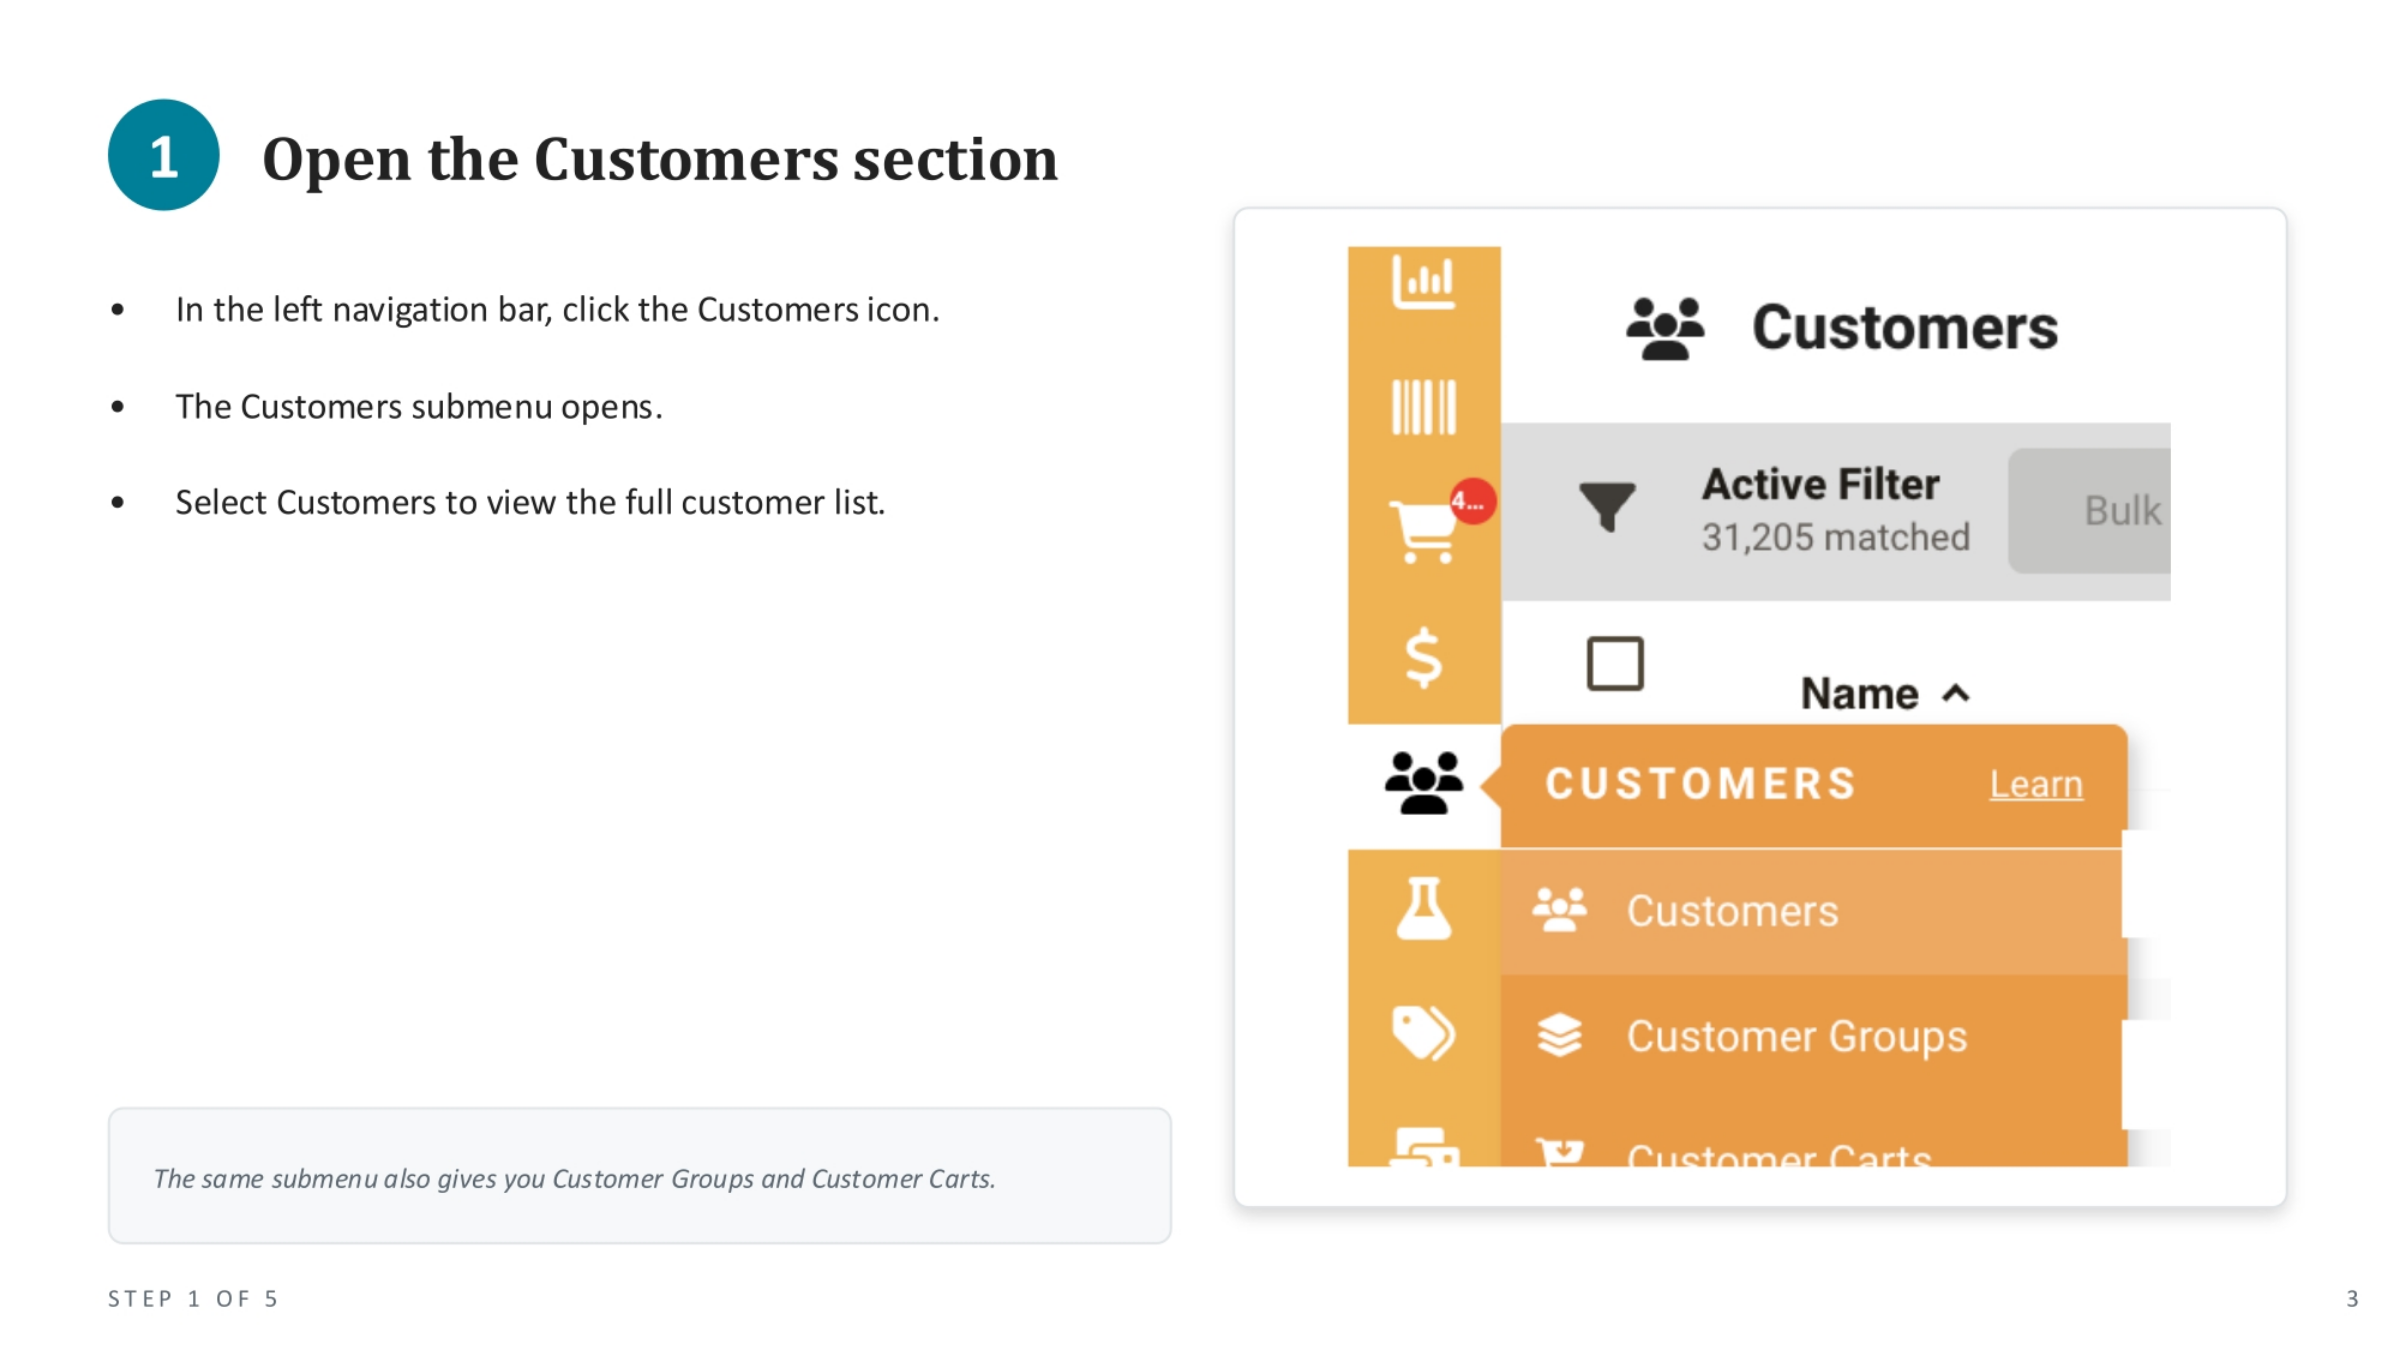
To begin, you'll need to access the Customers section. In the left navigation bar of your CityHive POS system, simply click on the Customers icon. This action will open a submenu, providing options like Customer Groups and Customer Carts. From this submenu, select 'Customers' to view the complete list of all customer accounts. This is your starting point for managing individual customer profiles and their associated store credit.
3. Finding the Customer Account
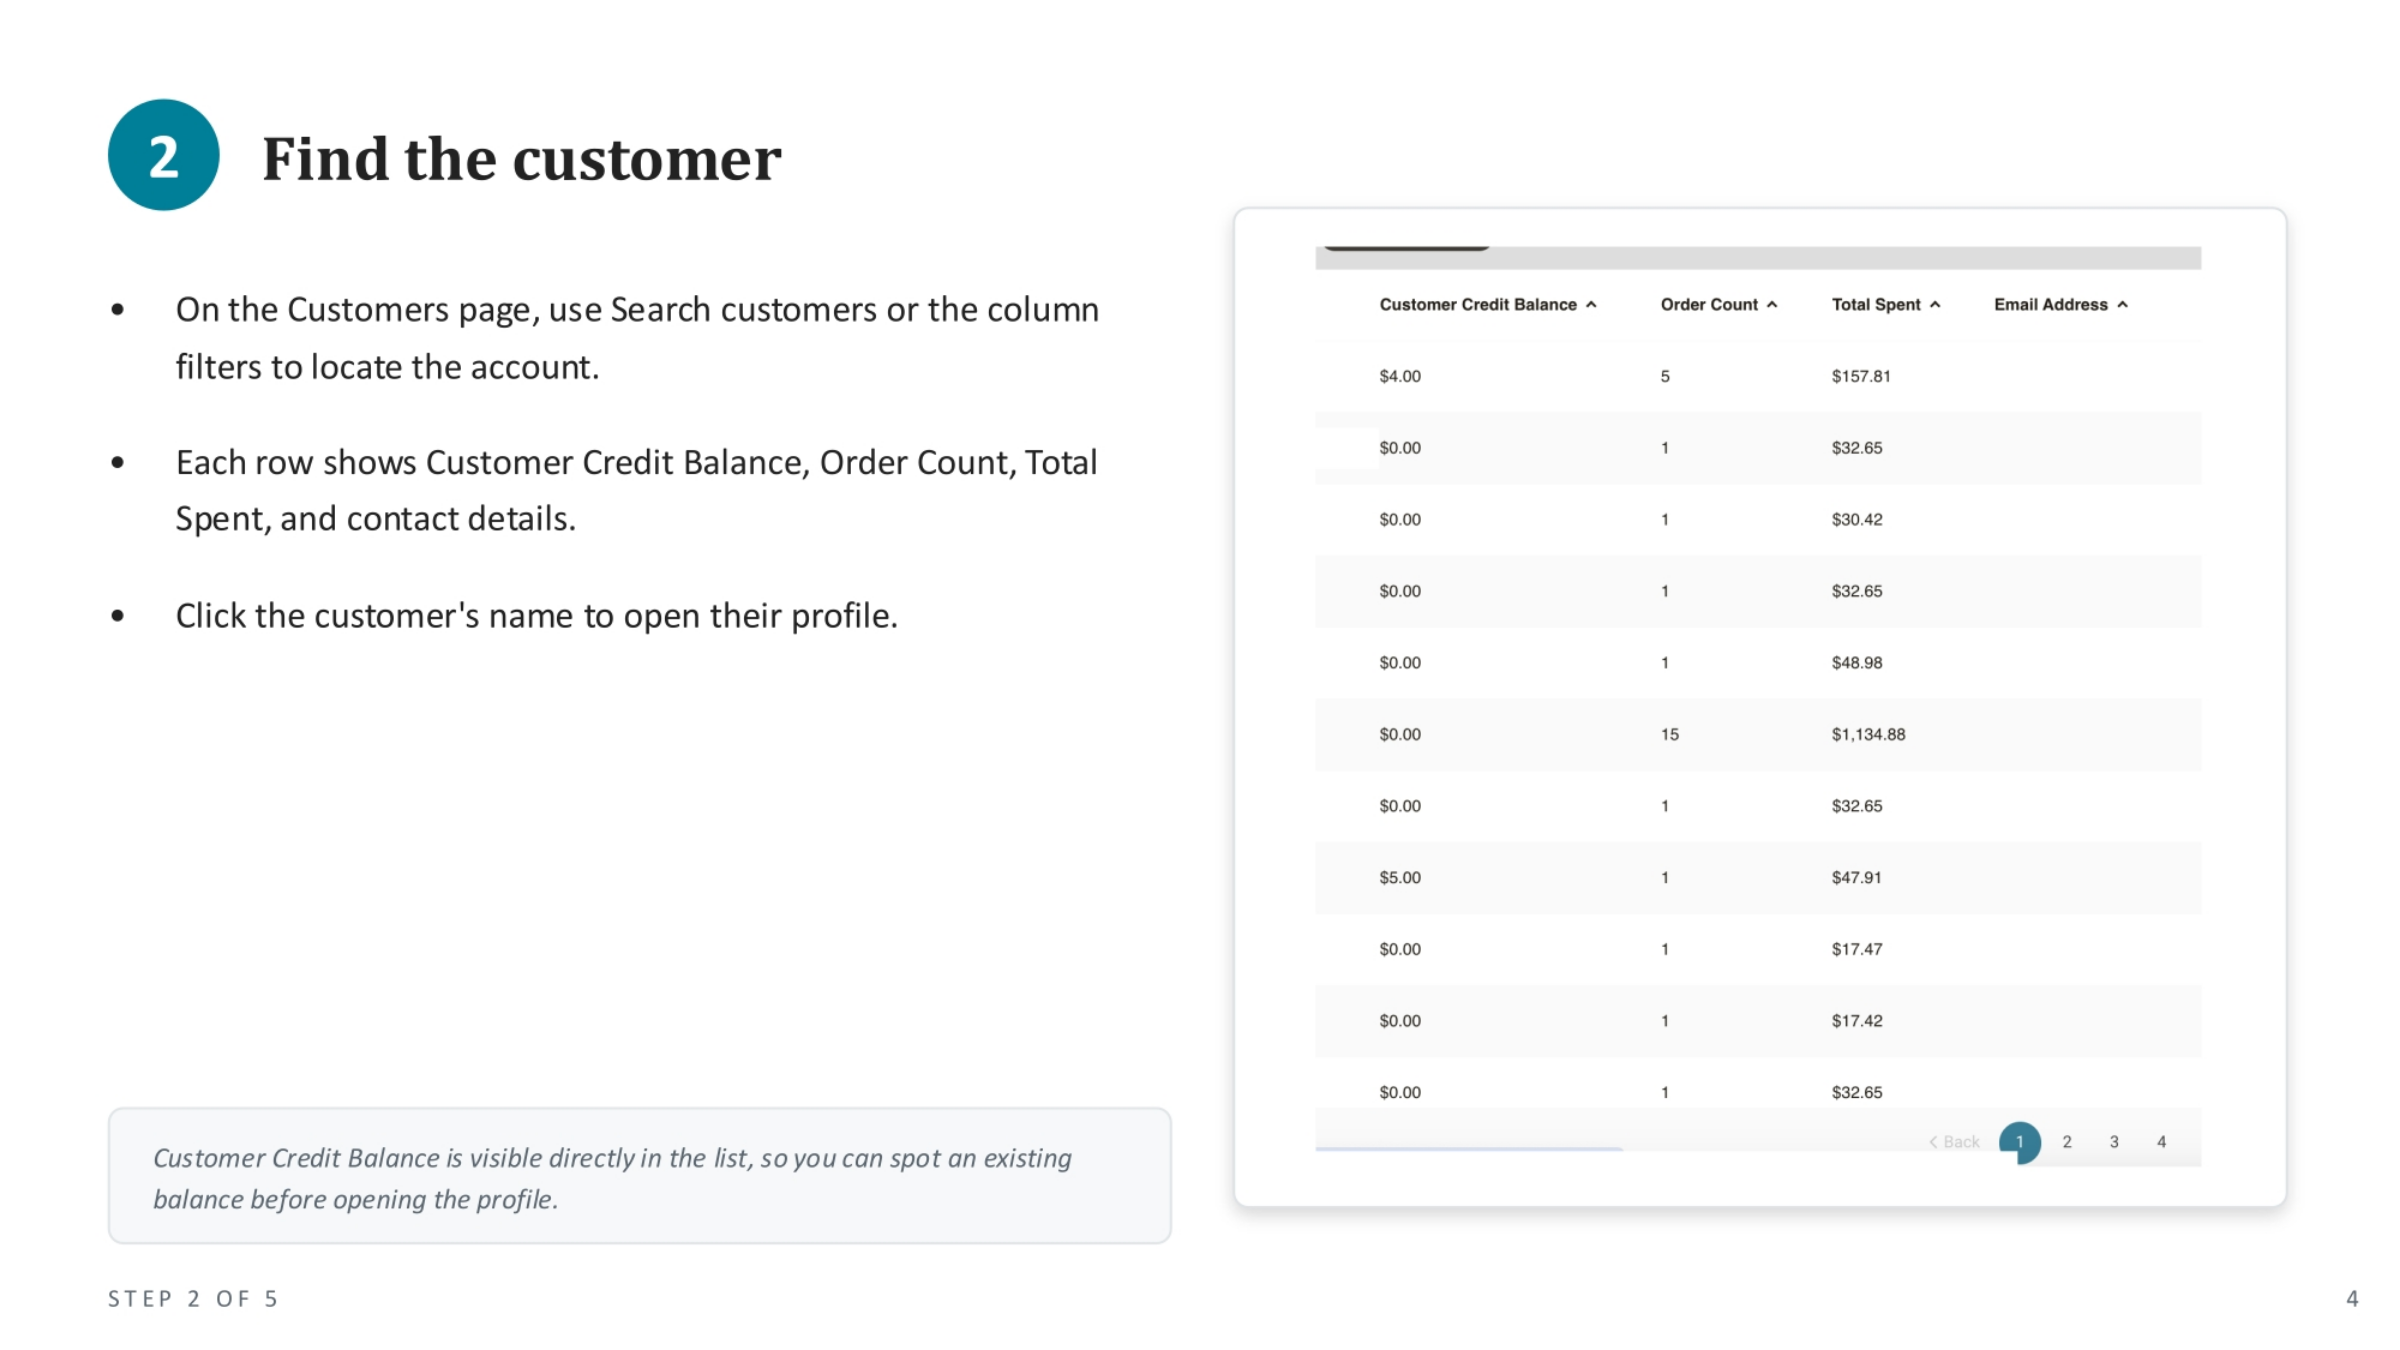
Once you're on the Customers page, you can easily locate a specific account. Utilize the search bar or apply column filters to narrow down the list and find the customer you need. Each row in the list provides a quick overview, displaying the customer's current credit balance, order count, total spent, and contact details. To access their full profile and proceed with editing their store credit, simply click on the customer's name.
4. Opening the Credit Balance Editor
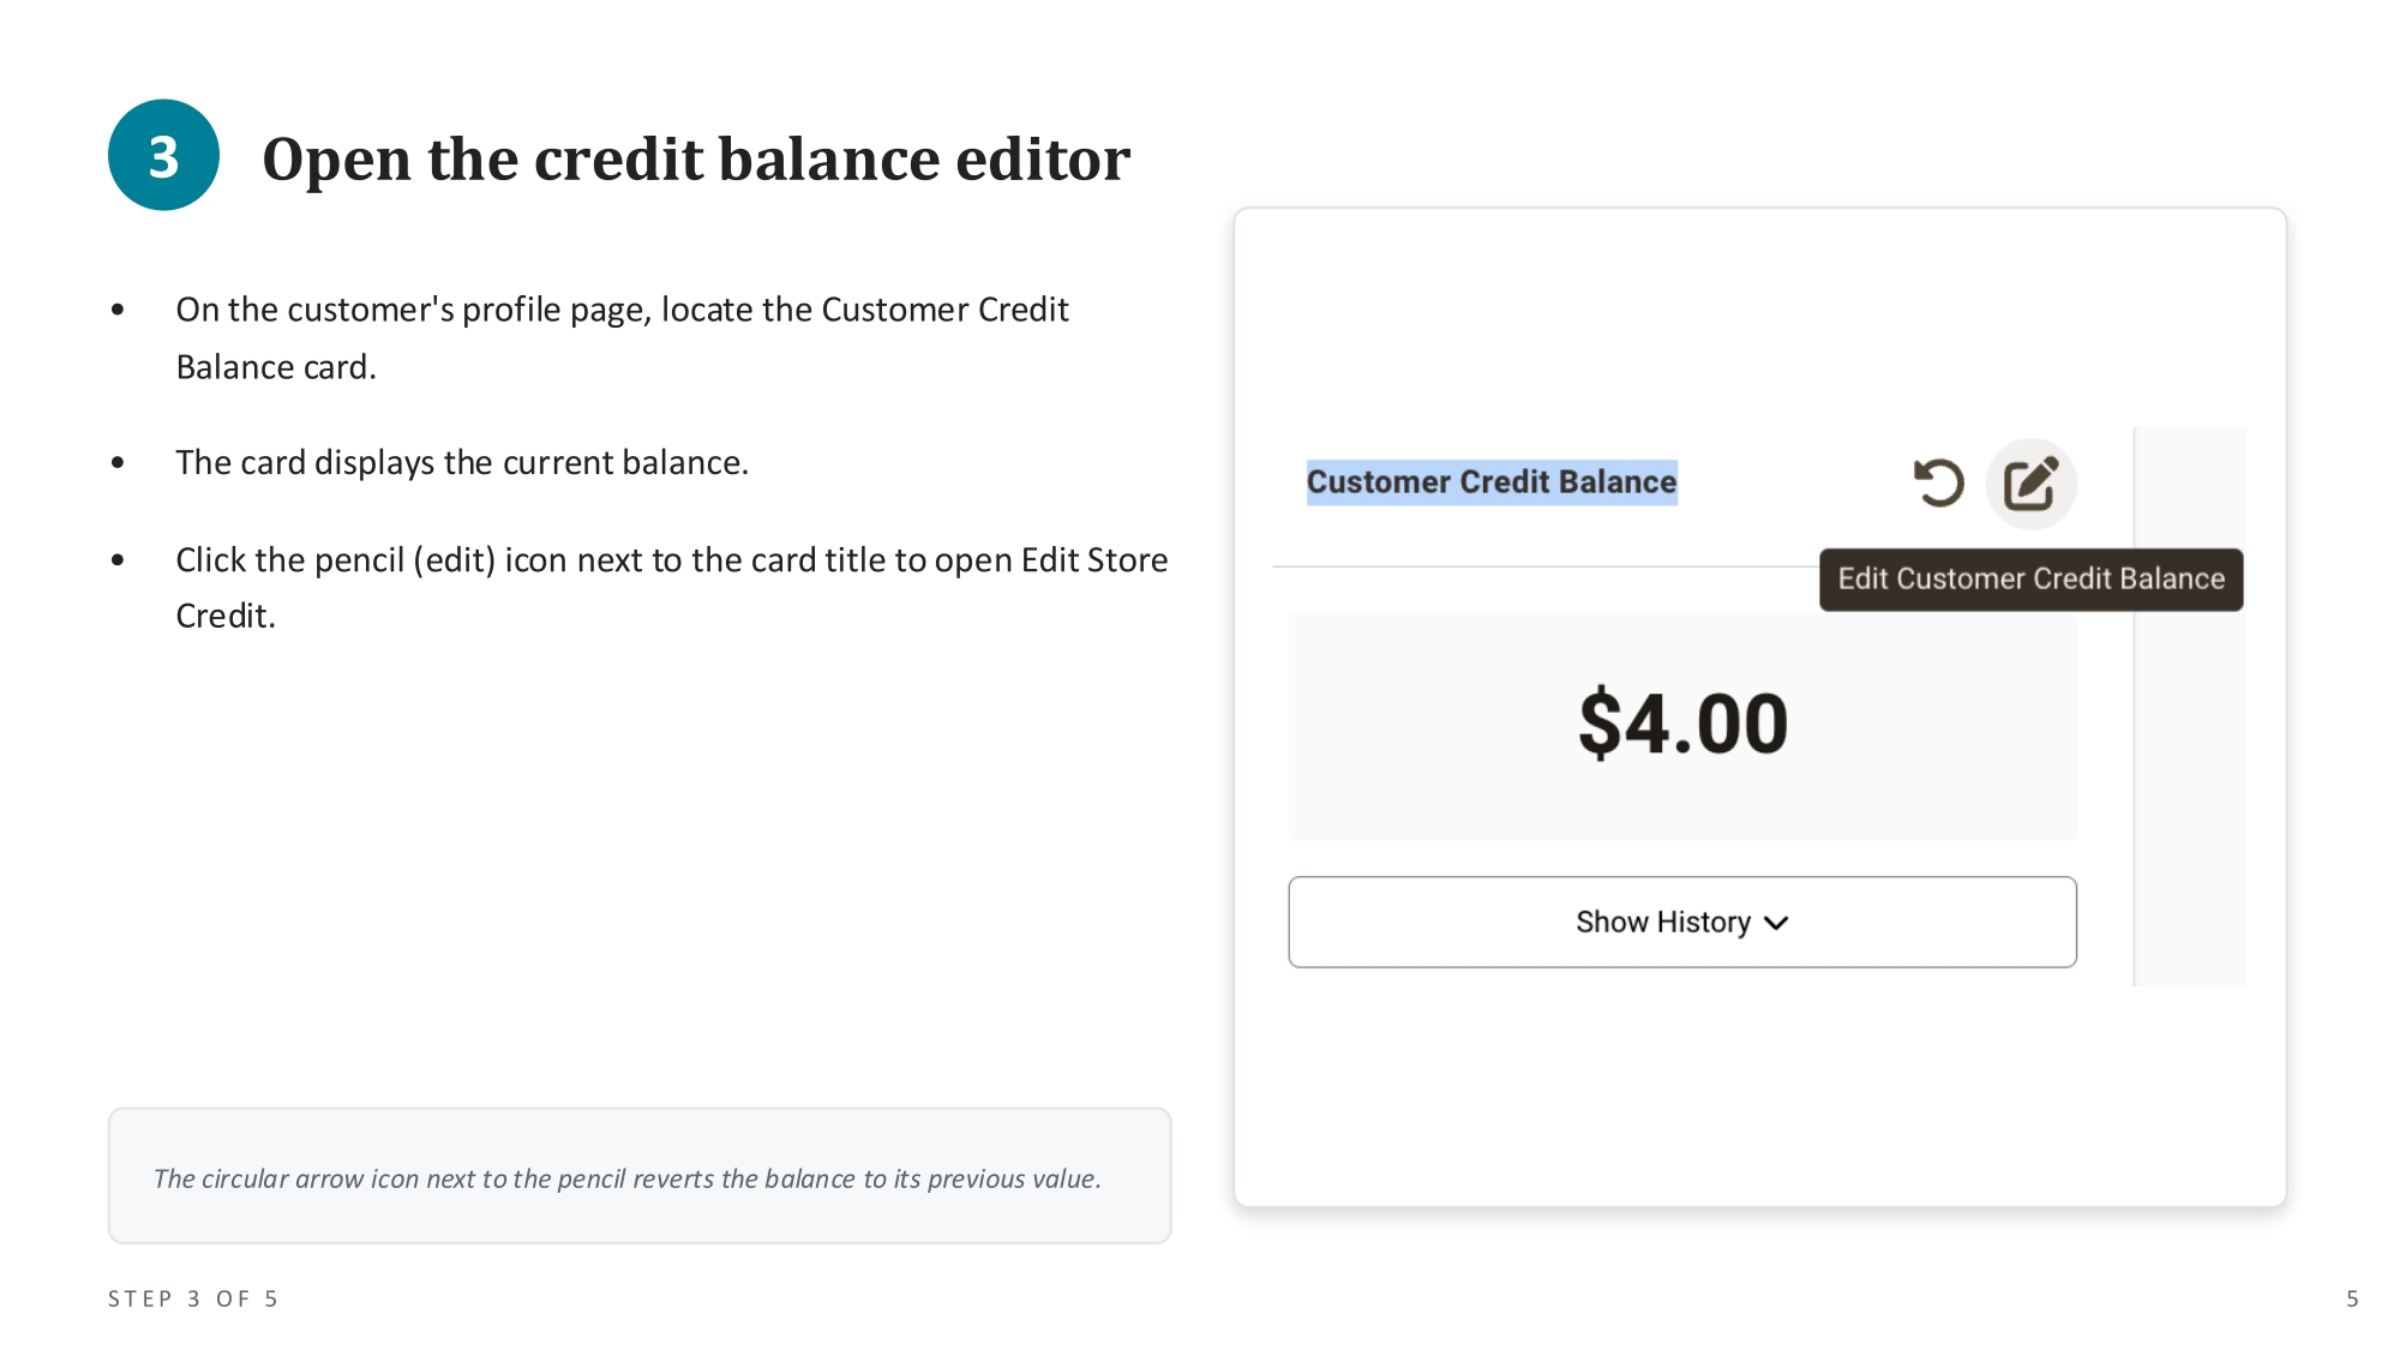
Within the customer's profile page, locate the Customer Credit Balance card. This card prominently displays the customer's current store credit balance. To make any adjustments, click the pencil icon, which serves as the edit button, positioned next to the card title. This action will open the 'Edit Store Credit' window, allowing you to modify the balance. Note that the circular arrow icon next to the pencil allows you to revert the balance to its previous value if needed.
5. Adding or Removing Store Credit
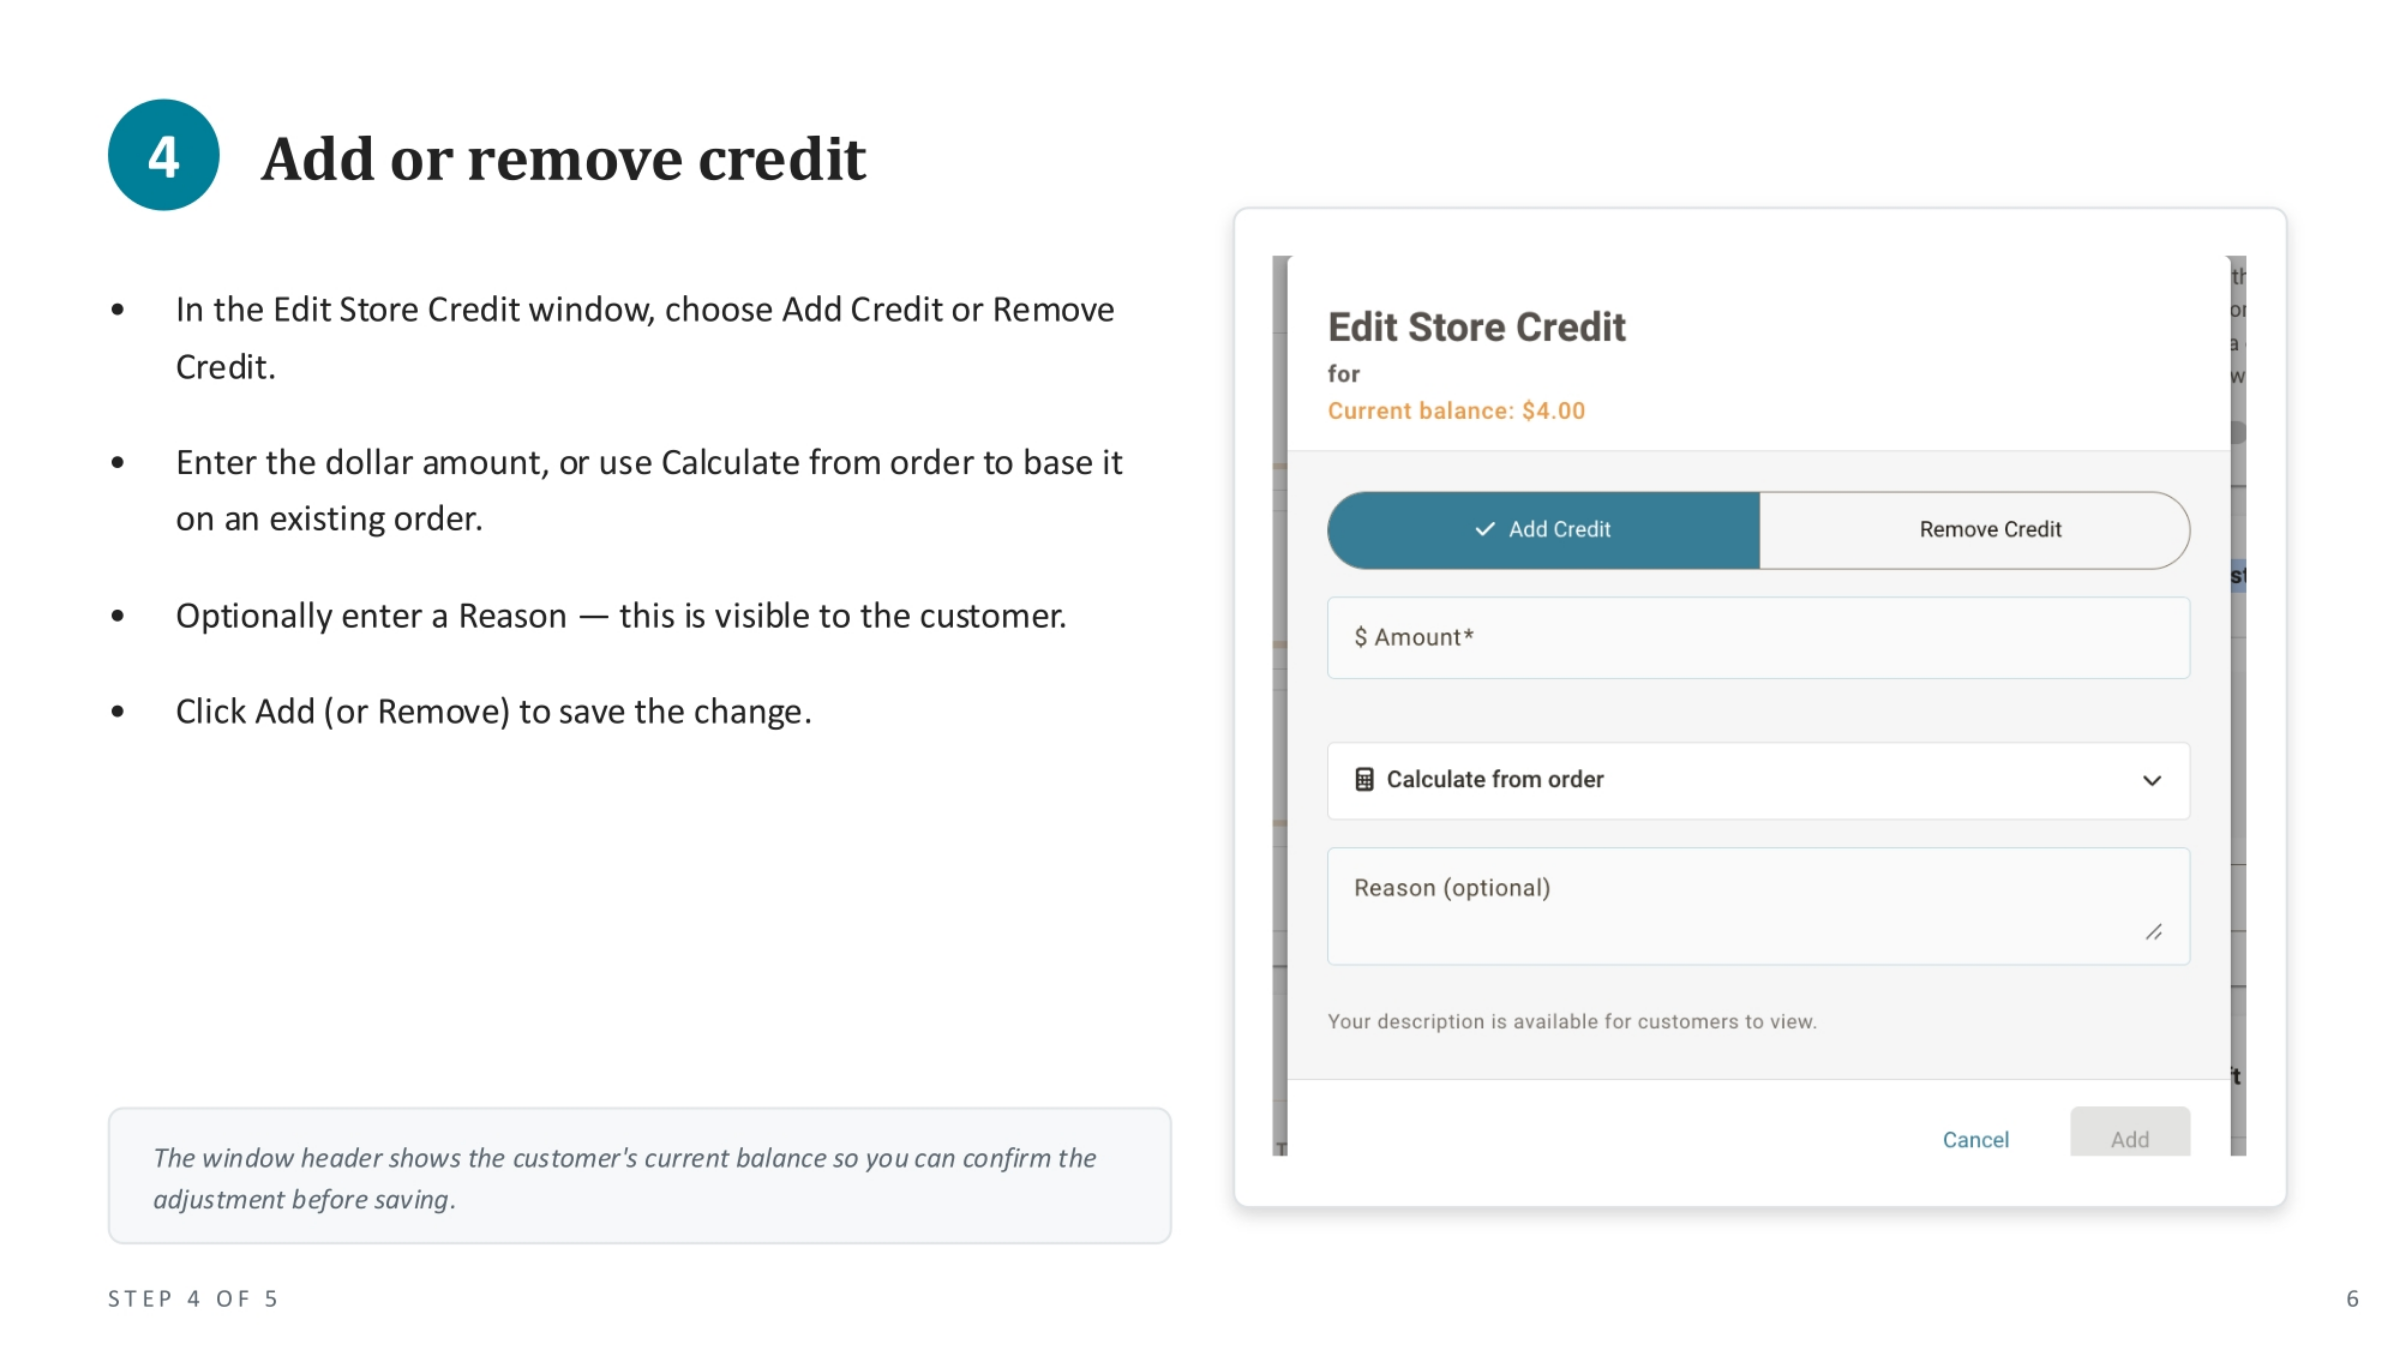
In the 'Edit Store Credit' window, you have the option to either add or remove credit from the customer's account. First, choose the appropriate action: 'Add Credit' or 'Remove Credit'. Then, enter the specific dollar amount you wish to adjust. You can also use the 'Calculate from order' feature to base the adjustment on an existing order. For transparency, you can optionally enter a reason for the adjustment, which will be visible to the customer. Finally, click 'Add' or 'Remove' to save your changes.
6. Alternate Path: From the Register
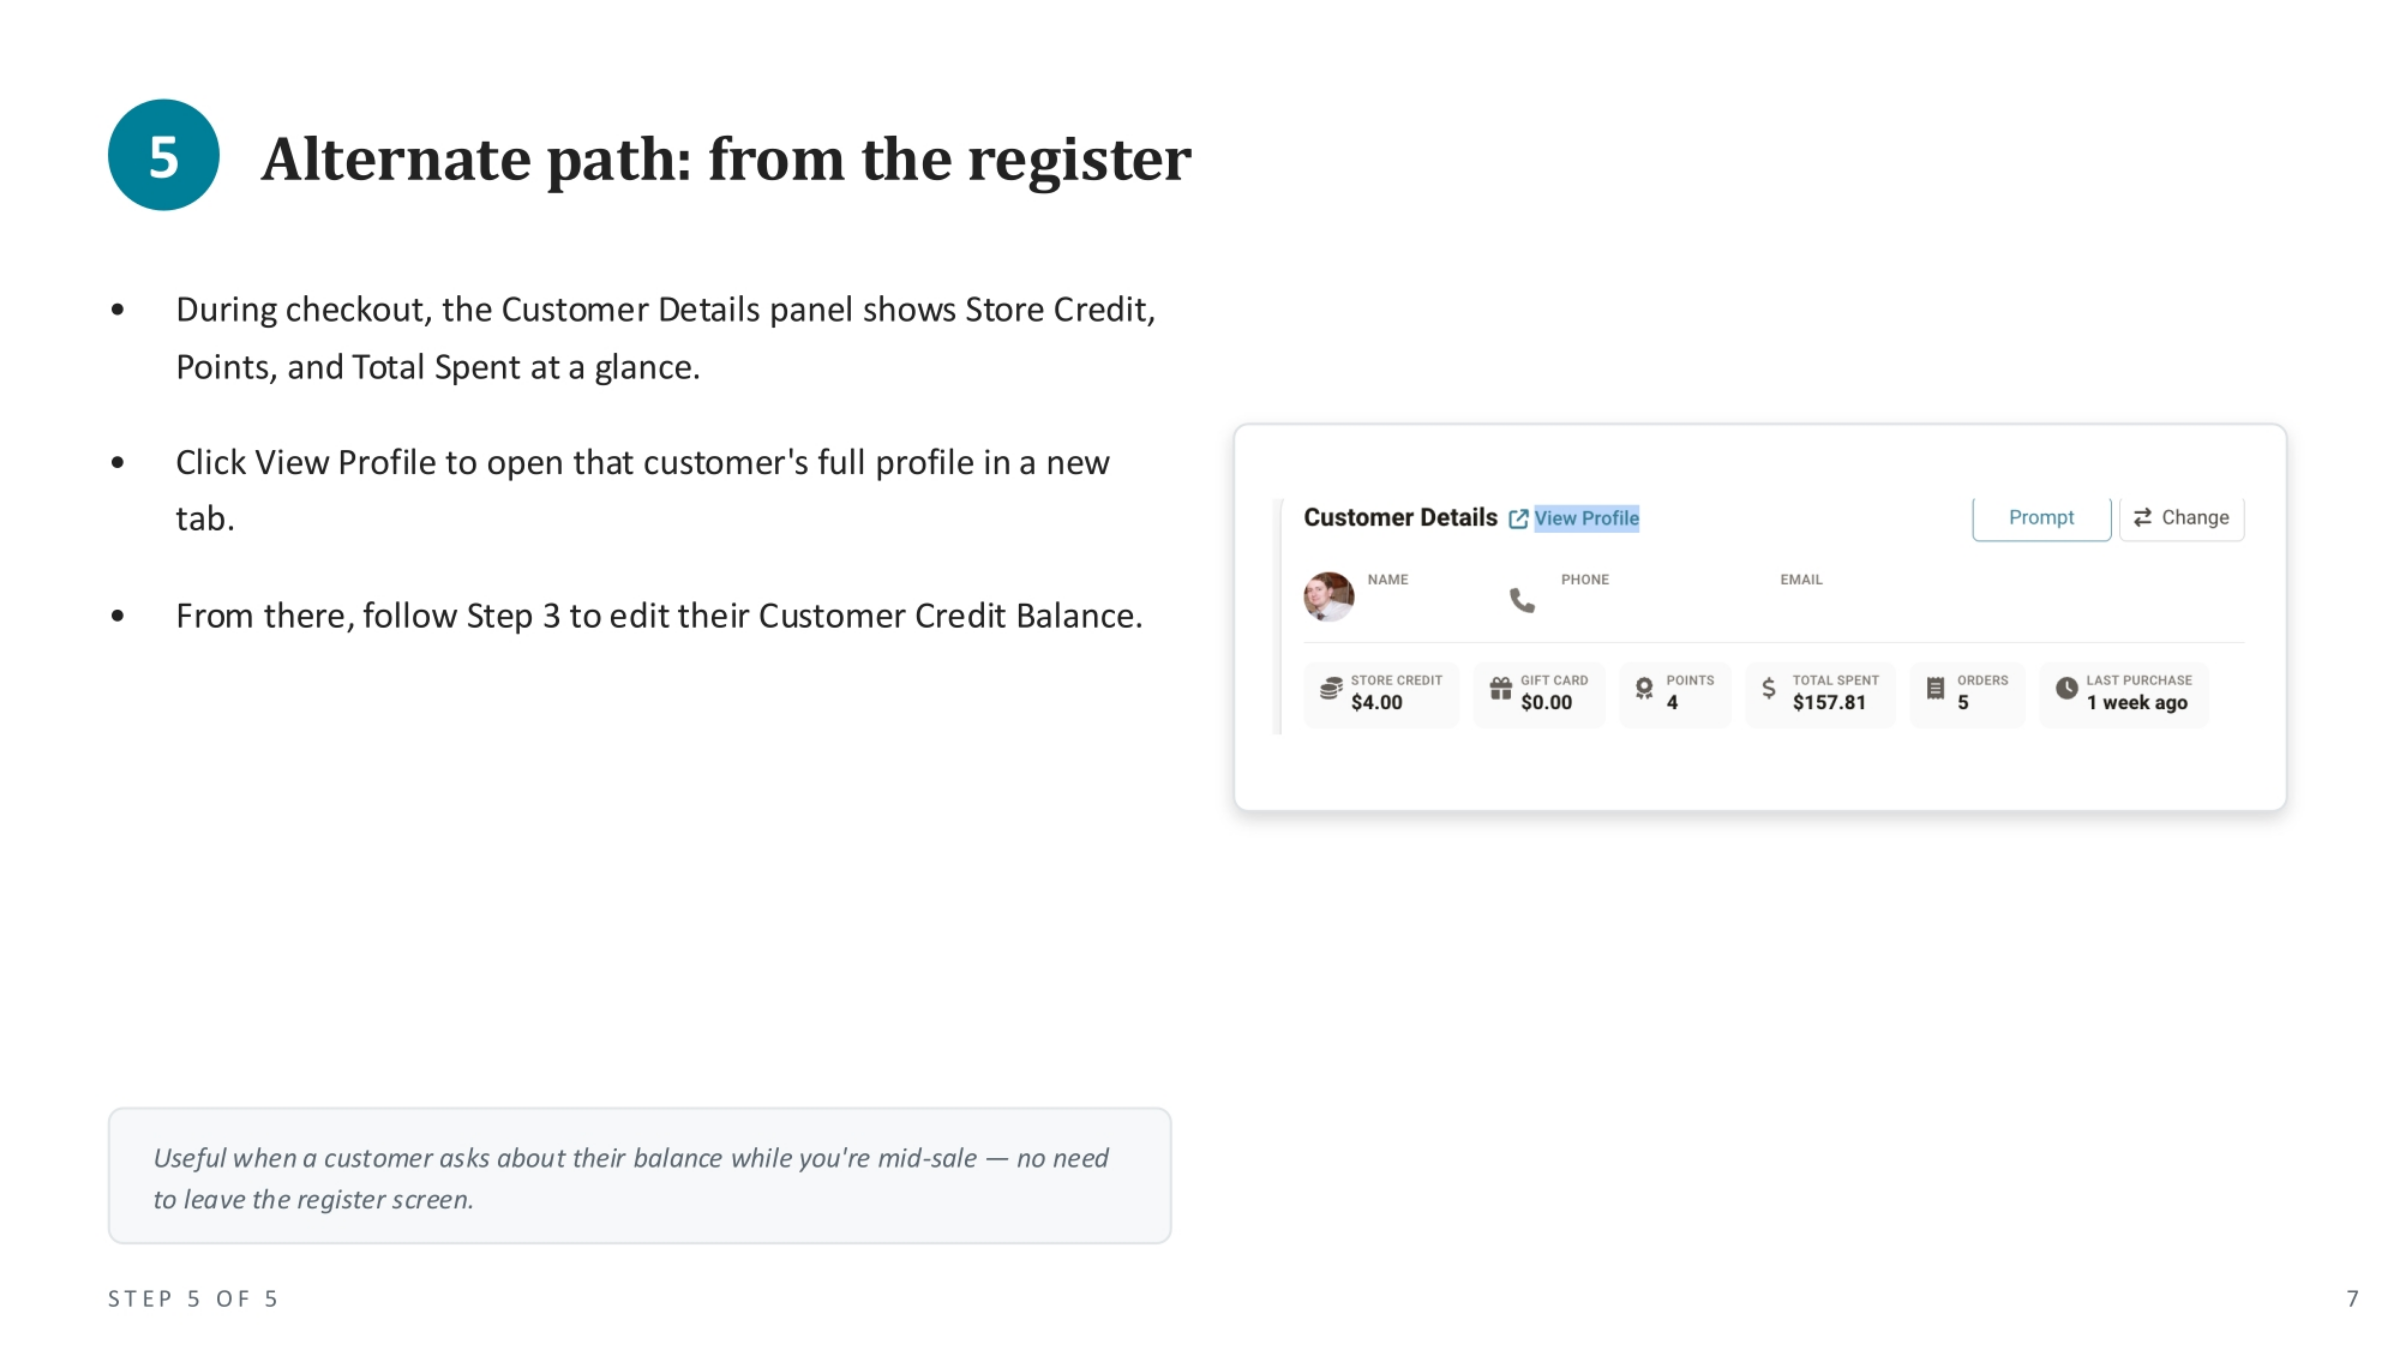
For added convenience, you can also manage customer store credit directly from the register during checkout. While processing a sale, the Customer Details panel provides a quick glance at their Store Credit, Points, and Total Spent. To access the full customer profile and edit their credit balance, simply click 'View Profile'. This will open their complete profile in a new tab, allowing you to follow the same steps as outlined previously, starting from step three, to adjust their Customer Credit Balance without leaving the register screen.
7. Recap and Support
To recap, we've covered how to manage customer store credit, from opening the Customers section to adding or removing credit. For any further assistance or to revisit these steps, please visit the CityHive Knowledge Base at support.cityhive.net.