![City Hive Logo-2.png]](https://support.cityhive.net/hs-fs/hubfs/City%20Hive%20Logo-2.png?width=62&height=60&name=City%20Hive%20Logo-2.png)
-
Begin on the Marketing section of the dashboard
-
Click on Email Configuration on the top menu

-
Enter your From Name

-
Click on Change Domain

-
Enter the email address you would like to use in the Reply To Email Address for the first line

For the second, enter the email domain which is everything after the "@" sign

-
Click on Register Domain

-
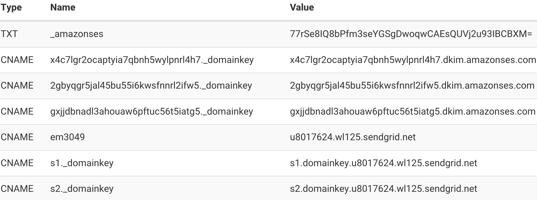
For the next step, log into your domain platform where your website is hosted
-
Once logged in, make sure Type, Name and Value records have been input correctly exactly as they appear then save
-
Click on Check Verification

-
Ensure that all entries under the Verified section indicate True

-
Click Set Domain

-
Scroll up to the top and click Save Configuration to save all changes
