Whether you want to create a group of products for your customers to shop from or you need a way to organize your inventory, a product group is a great way to do both.
What is a product group?
Where are product groups?
Navigate to your Merchant Dashboard's inventory section, then click on the "Advanced Filter" section on the top left hand corner and look for "Groups" in the list. Here you'll find the groups that are created for your store by City Hive and any existing product groups.
How to create a product group
- Select then add/create (Static)
- Once in your Merchant Dashboard's inventory section, look for the empty checkbox next to each product in your inventory list.

- To select a product to add to a product group, click on the checkbox next to the product. Do so for all of the products you want to add to the group.
- Once all of the products have been selected, click on the "Add Product Group" button in the filter menu above the inventory list.

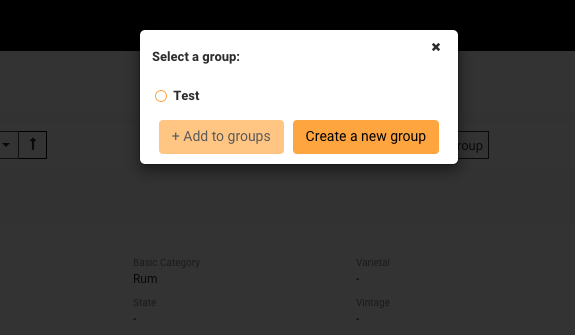
- A window will open with the option to add the selected products to an existing product group that you've already created or to create a new group. If you are adding to an existing group, select the group from the and click "Add to groups". If you wish to create a new group, click "Create a new group", this will open a new product group window.
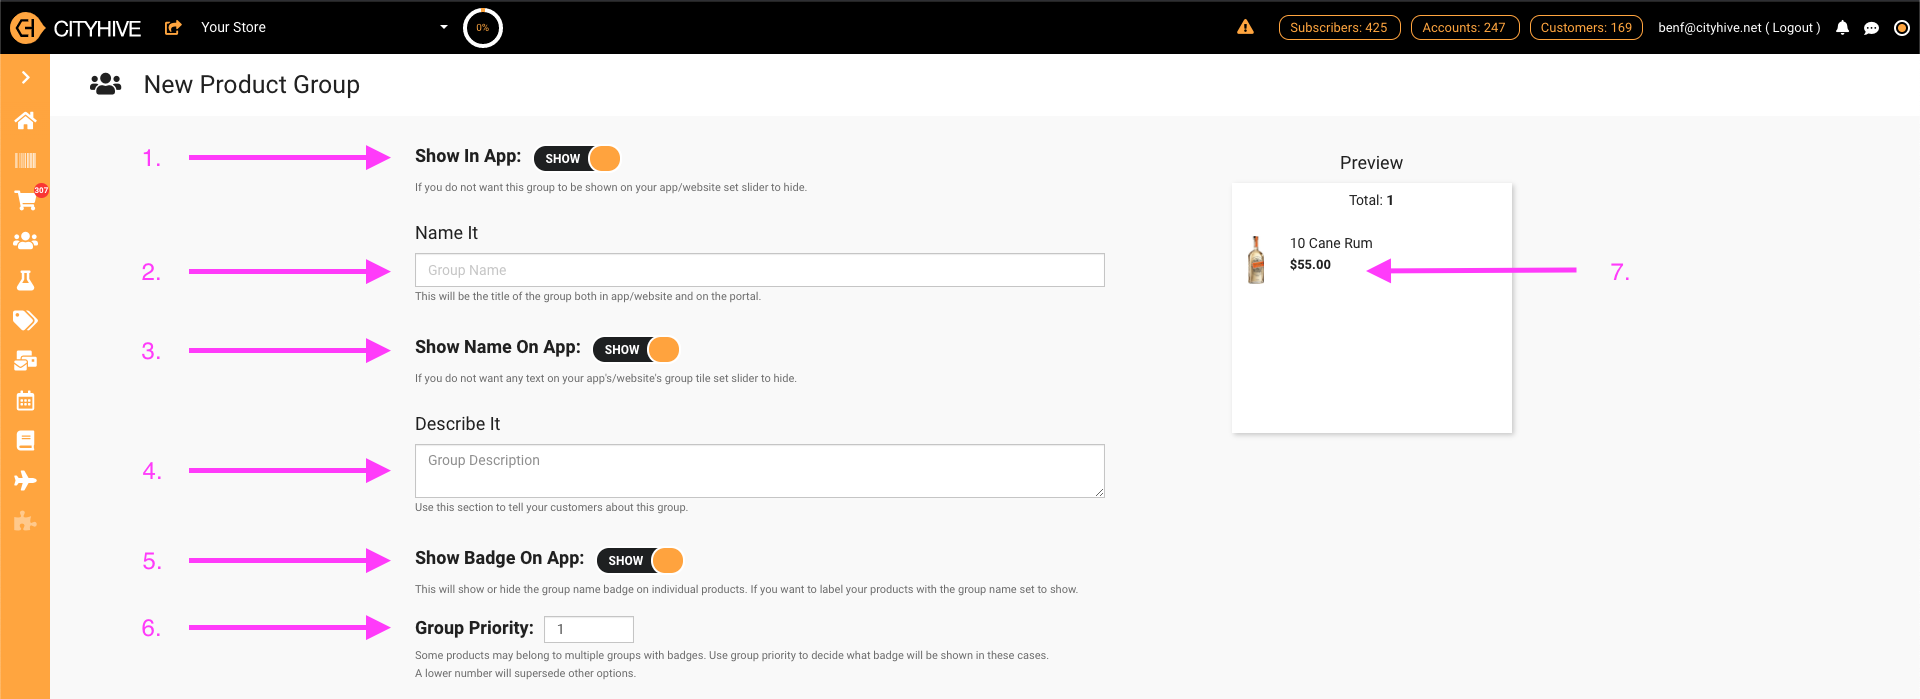
- Fill out the details of the product group
- Show in App - This slider controls if the group will appear on your app/website
- Name It - This is the name that will show up in the list of groups. It will also be the name on the product group image and badge (see #3 and #5)
- Show Name On App - This slider controls if the name of the product group will show up on the product group image on your app/website
- Describe it - This is for you to explain the purpose of the product group
- Show Badge On App - This slider controls the if the name of the group will show up as a badge on each of the products in the group on your app/website (see below for example)
- Group Priority - This controls the order of the appearance of product groups, the lower the number, the closer to the beginning it will show on your app/website
- Preview - This is where you can see the products that are in the product group
- Add images to the group if you want the group to appear on your app/website. If you have the first slider turned on (see #1) these images will appear on your app/website. The images must be either jpg or png files and we recommend that are 1000 x 360 app (the first file uploader) and 1000 x 240 for website (the second file uploader). The size of your images must be below 2MB. If you need help creating images, we suggest sites like canva.com or upwork.com.
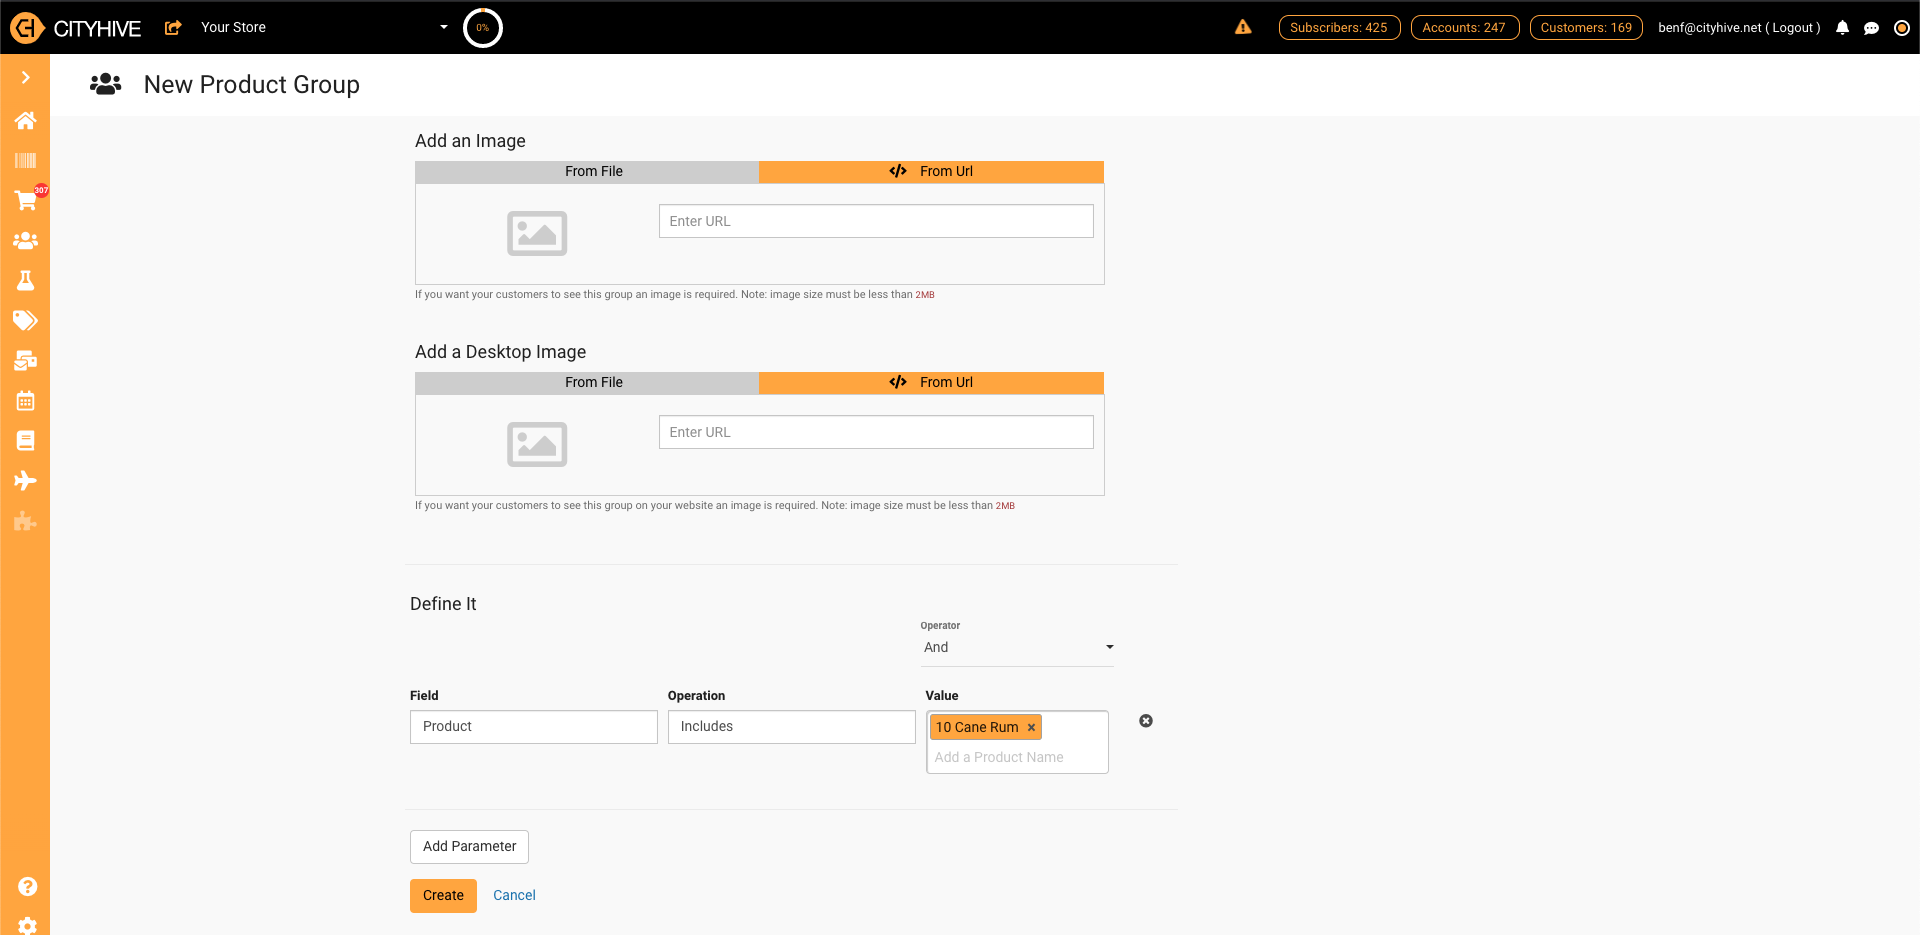
- Finally, you can see the product filter in the Define it section. When creating a product group this way, you can ignore this because you used the checkboxes earlier to select the relevant products. To save your group, click "Create".
- Once in your Merchant Dashboard's inventory section, click on the button on the filter menu "Create Product Group".

- Follow the same steps above to fill out the details of the group and to add images.
- Once the details and product group images have been updated, scroll down to the Define It section and the product filter.Create, then add (dynamic)

- Here you'll find a three column parameter filter that will help you add products to this group. Each parameter will add the products in your inventory that match the settings you control. To begin, click on the Field drop down menu to see the list of attributes you can filter by. If you've used the category and product plugin for a discount, then this will look familiar to you.
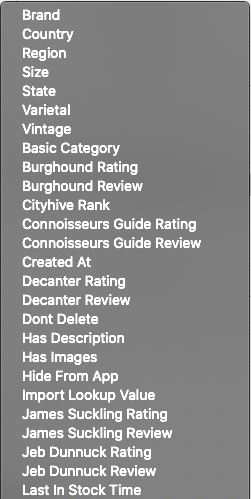
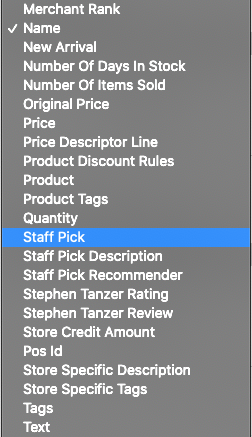

- Choose the first field that you would like to filter, then choose how to limit by choosing the operation and value. Below are some of the most popular choices:
- Size - Equals - *Enter Size*

- Basic Category - Does Not Include - *Choose Basic Category*

- Views - Includes - *Choose View*

- Price - Greater Than Or Equal - *Enter Price*

- Tags - Include - *Enter tags*

- Pos Id - Includes - *Enter SKU*

- New Arrival - Equals - *Turn on/off*

- Has Image - Equals - *Turn on/off*

- Size - Equals - *Enter Size*
- Multiple parameters can be used be used in a product group. The default setting is that each parameter will further filter down the list of products in the group, but you can switch the group using the "OR" operator in the top right hand corner of the Product Filter.
- Once you select the products you wish to have, click create to save the group.
- Once in your Merchant Dashboard's inventory section, look for the empty checkbox next to each product in your inventory list.
 When using the product filter, the product group will dynamically update it's list of products as your store's inventory changes to include more products that meet the parameters of the group or when products no longer meet the parameters they will be removed. For example, if you filter by tags and you remove the tag from one of the products, the product will no longer be in the group.
Edit a product group
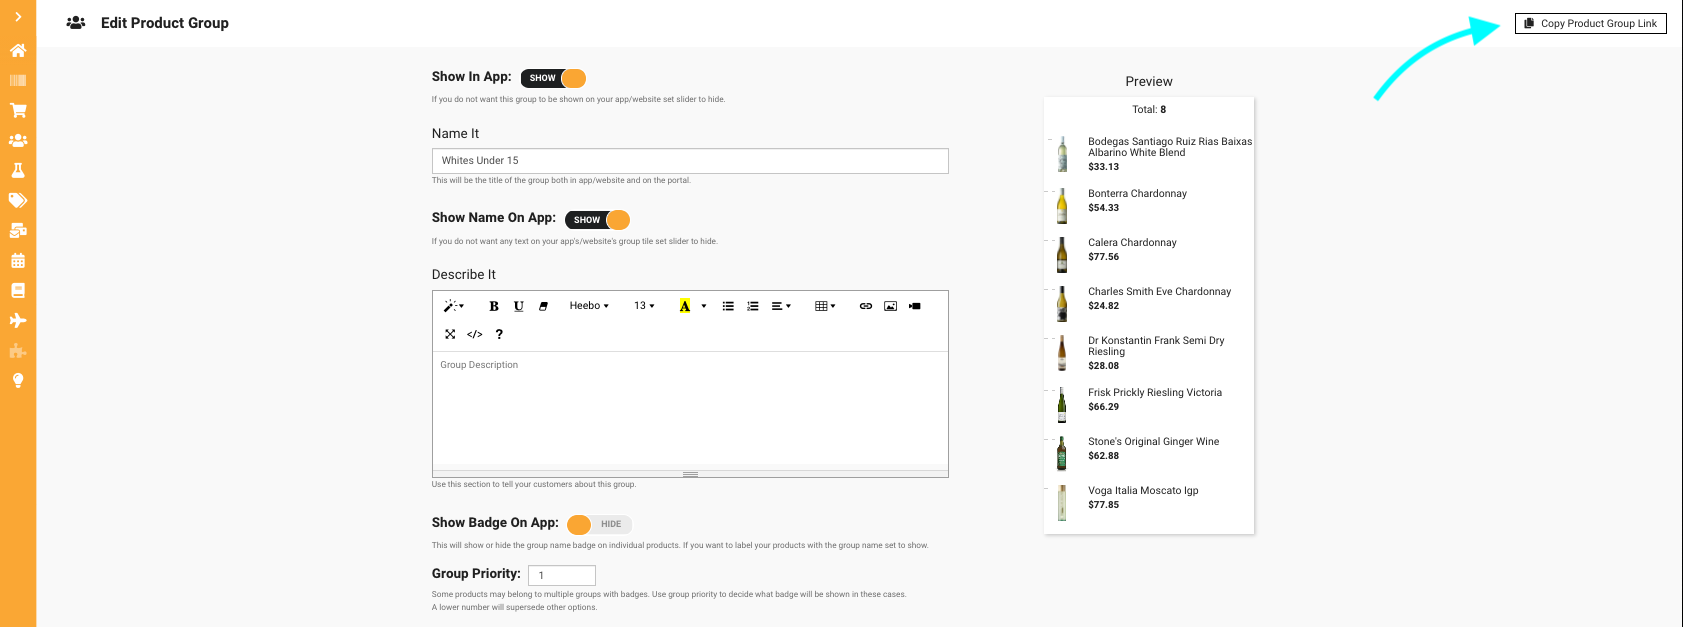
Navigate to the groups list in the advanced filter window of the Merchant Dashboard's inventory (see above for help). Each group has a pencil next to it's name, click on it to open up the edit screen to update the group details, or the products included.
Link to your product group page
Navigate to the groups list in the advanced filter window of the Merchant Dashboard's inventory (see above for help). Each group has a pencil next to its name, click on it to open up the edit screen. In the upper right hand corner, there will be a button that says "Copy Product Group Link".